
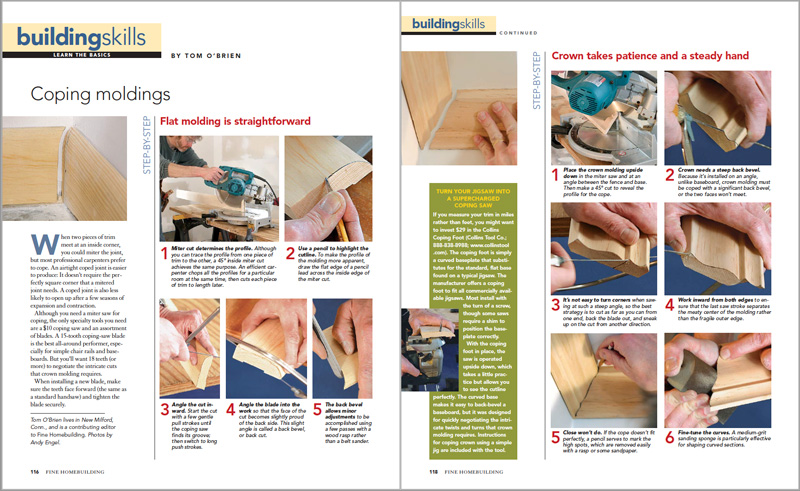
Coping Moldings
With a few common carpentry tools, making an airtight coped joint is easier than you might think–and more durable too.
Synopsis: Mitering trim joints works, but its not the method most pros prefer. Making an airtight coped joint is easier than you might think — and more durable too. Coped joints do not require perfectly square corners as miter joints do, and coped joints are also less likely to open up after a few seasons of expansion and contraction. As the author explains, all you’ll need to start coping is a $12 coping saw with a few blades to go along with your miter saw, or, if you plan on doing a great deal of coping, follow the authors instructions to turn your jigsaw into a supercharged coping saw. The article includes step-by-step instructions for producing perfect coped joints in both flat molding and crown molding, complete with detailed pictures to guide you through each step.
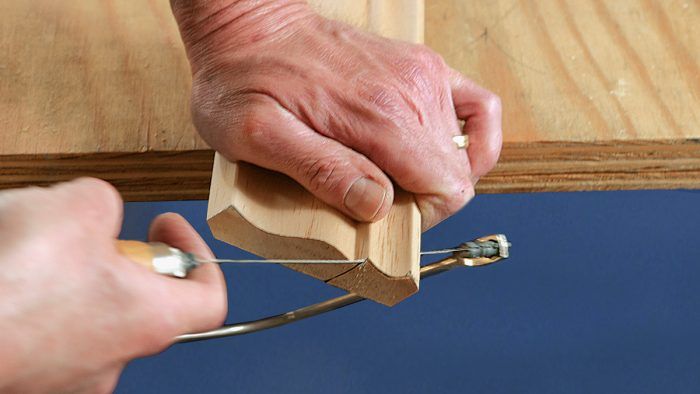
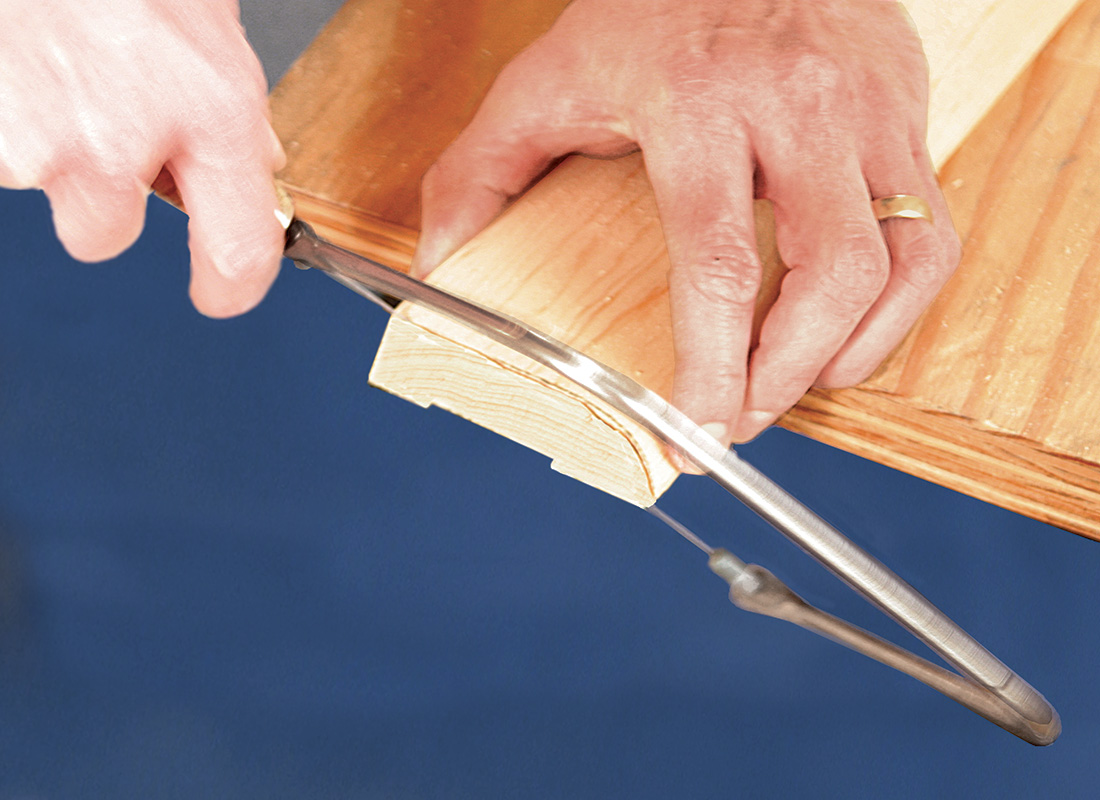
When two pieces of trim meet at an inside corner, you could miter the joint, but most professional carpenters prefer to cope. An airtight coped joint is easier to produce: It doesn’t require the perfectly square corner that a mitered joint needs. A coped joint is also less likely to open up after a few seasons of expansion and contraction.
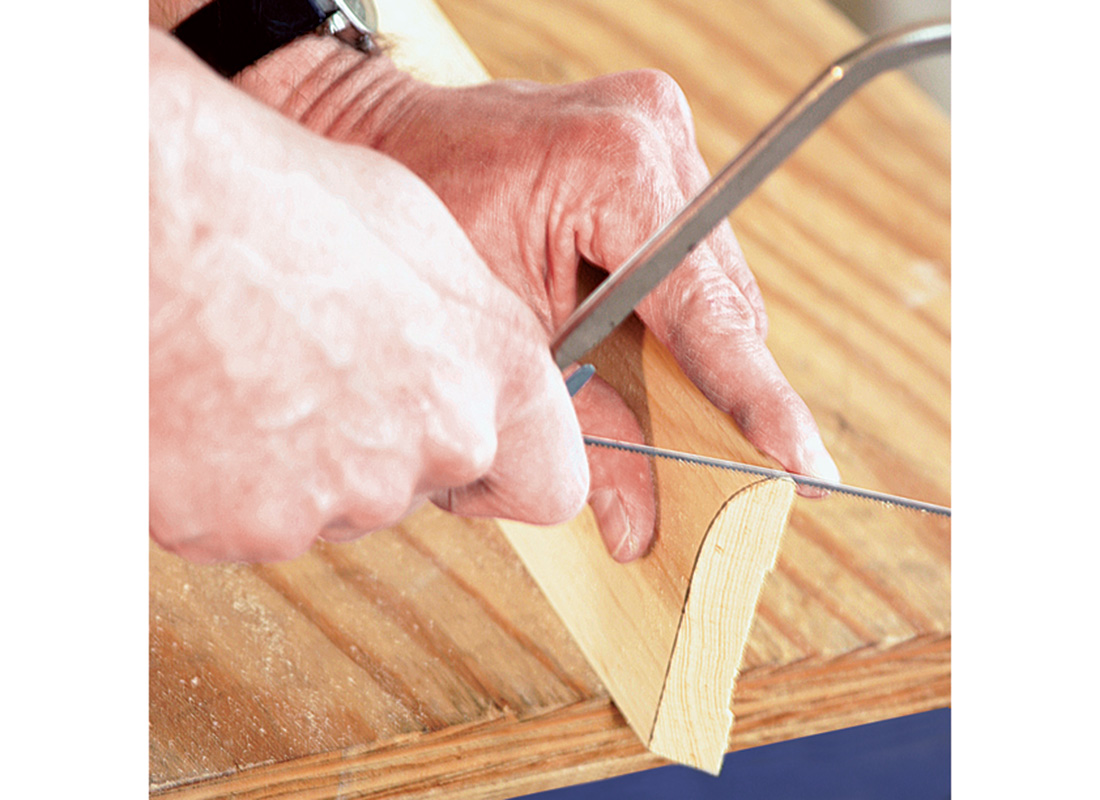
Although you need a miter saw for coping, the only specialty tools you need are a $12 coping saw and an assortment of blades. A 15-tooth coping-saw blade is the best all-around performer, especially for simple chair rails and baseboards. But you’ll want 18 teeth (or more) to negotiate the intricate cuts that crown molding requires.
When installing a new blade, make sure the teeth face forward (the same as a standard handsaw) and tighten the blade securely.
Turn your jigsaw into a supercharged coping saw
If you measure your trim in miles rather than feet, you might want to invest $35 in the Collins Coping Foot. The coping foot is simply a curved baseplate that substitutes for the standard, flat base found on a typical jigsaw. The manufacturer offers a coping foot to fit all commercially available jigsaws. Most install with the turn of a screw, though some saws require a shim to position the baseplate correctly. With the coping foot in place, the saw is operated upside down, which takes a little practice but allows you to see the cutline perfectly. The curved base makes it easy to back-bevel a baseboard, but it was designed for quickly negotiating the intricate twists and turns that crown molding requires. Instructions for coping crown using a simple jig are included with the tool…
For complete step-by-step instructions for producing perfect coped joints, click the View PDF button below to read the entire article.
From Fine Homebuilding #164
