Finishing a Masterpiece
A raw, hand-carved fireplace surround receives a deep ebony finish
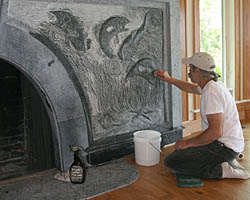
After the majority of the carving and shaping was completed in his Cape Cod, Mass.-based shop, stone carver Tim Dibble brought the 60-some pieces of this massive fierplace surround to the jobsite and began the meticulous process of assembly. Tim fastened the soapstone pieces to the original brick-faced fireplace with epoxy, and wedges held the pieces in place until the epoxy set.
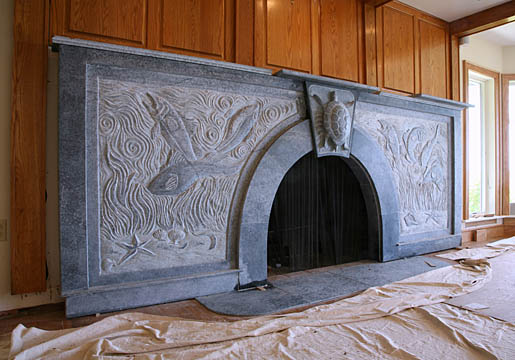
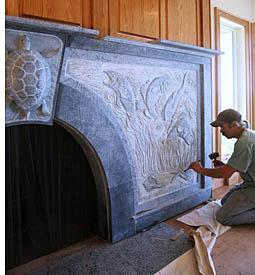
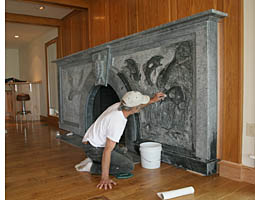
The sea-turtle keystone began as three layers of 1 1/2-in. thick soapstone laminated together. The rest of the relief sculpture was shaped from a single layer of the stone. After installing the major pieces of the fireplace surround, Dibble did some fine tuning in places with hand chisels. The slabs that form the mantle were the last of the big pieces of soapstone to be installed. Tim carved the shaped edges of the mantle and the mantle trim by hand.

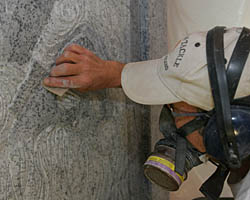
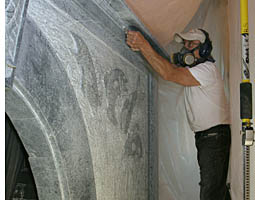
For the final tweaking of the carving, Dibble put up a floor-to-ceiling tarp for dust containment. Diamond embedded fabric in grits up to 400 brought the smooth areas of the carving such as the backs of the fish to a honed finish. To smooth the trim profile, Tim wrapped diamond cloth around a small cylinder.
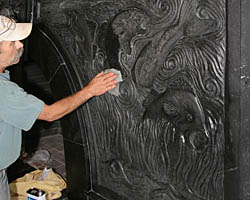
With the smoothing done, Tim vacuumed the entire carving. The next step was a thorough washing with water and stone cleaner. The final pieces installed were the shoe molding sections along the floor. The entire piece was then sealed with mineral oil which leaves soapstone very dark.
Tim then followed with paper towels soaked in laquer thinner. Wiping with thinner draws the oil out of certain sections to accent the detail and bring out grain of the stone. The owners plan to add a gas firelog and glass doors behind the arched opening.

Photos by: Roe A. Osborn


View Comments
Wow! That is a gorgeous creation meticulously executed! Congratulations!