Perfecting Coffered Ceilings
Learn how to build and fasten faux beams with U-shaped ceiling supports instead of the traditional elaborate grid of framing
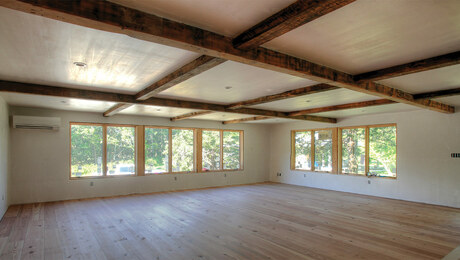
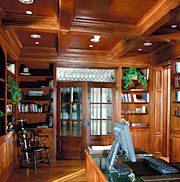 This coffered ceiling may look complicated, but with simple lightweight supports and a little planning, it was done in just three days.
One myth about coffered ceilings is that the network of beams that create them has to be attached to a continuous solid frame bolted to the joists. Instead of spending days building an elaborate grid of framing, I attach the beams (faux beams, actually) to U-shaped supports, glued and nailed strategically and intermittently to the ceiling plane, as shown in the drawing.
I assemble the supports in three configurations: straight sections at midspan in larger coffers; cross-shaped at the intersection of two beams; and T-shaped at the intersection of the ceiling and the walls and where one beam ends at another.
I make the supports from inexpensive finger-jointed stock because it’s easy to work with, and it nails and glues well. Avoid the temptation to use medium-density fiberboard (MDF) or plywood because these materials are heavy and tend to split when edge-nailed. I allow up to 24 in. between supports. If the distance between them is greater than that, I install a straight section as midspan support. The key is that support for the beams does not have to be continuous, which makes it lighter and easier to keep in a straight line than solid lumber.
A look inside the ceiling
Lightweight U-shaped supports keep the beams on the ceiling. They come in three shapes: straight sections (1), X-sections (2), and T-sections (3). The supports are connected by the trim, which is preassembled for each coffer on the ground and then raised into position. The crown molding nailed into the beam sides and into ceiling joists turns the trim into a strong and stable unified system.
Glue the supports to the ceiling
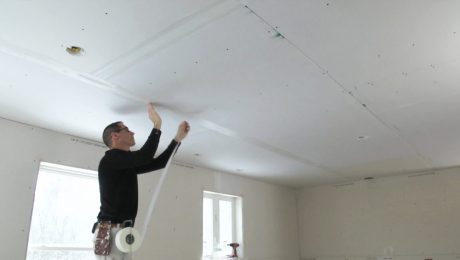
After carefully snapping layout lines, I install the supports directly to the ceiling drywall with liberal amounts of heavy-duty construction adhesive. (For stain-grade ceilings, I glue finished plywood to the ceiling sections before the crown molding is installed.) I fasten the supports into joists with 8d finish nails wherever possible, but if framing isn’t available, I simply cross-nail the supports to the drywall to hold them in place until the adhesive cures, as shown in the drawing.
The adhesive holds the supports in place until the crown molding is installed. I always make sure to wait a day for the adhesive to cure completely before installing the trim details.
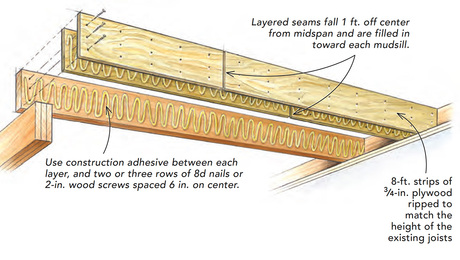
Defying gravity with nails and glue
U-shaped supports are glued to the ceiling and nailed to the ceiling joists or cross-nailed to ceiling material.
Assemble molding before it goes on the ceiling
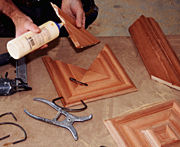
 Assemble the trim on the bench, not in the air. Each layer of trim for each coffer is glued and back-nailed together on the ground. The assembled unit then goes in as one piece and helps to tie the ceiling together.
The hollow supports not only keep the beams straight but also keep the coffers fairly square, which makes it easy to preassemble all the layers of coffer trim on the ground. Working comfortably and safely on my workbench, I assemble each complete trim section, gluing the corners and then holding them in place with spring clamps while I drive a few brads from the back. Preassembly saves time, and when the crown sections are nailed to the joists and to the sides of the beams, the ceiling becomes a strong, stable unit.
Design details that make a difference
 Arts and Crafts: Use simple trim and let the baseboard sides hang below the beam cap to create a secondary shadowline.
Once you’ve mastered the basic support and assembly techniques, you can have fun with the details. There are many ways to dress up a design without adding a lot of material and labor costs. You can use different moldings to create different ceiling styles. Here are three options:
 Georgian: Use baseboard with a large edge bead first. Then install extra layers of baseboard to increase the depth of the beams.
  Victorian: Fancier moldings including custom pendants can be used to dress up the Victorian version. Additional trim can be added in the field of the coffer.
To make the ceiling really jump out, dress up the intersections with bosses, or pendants. They can be made of baseboard, casing, or crown. I cut the pieces with a miter saw and build them on a bench with spring clamps.
 Adding bosses (or pendants) to the beam intersections can provide a striking accent to the ceiling.
 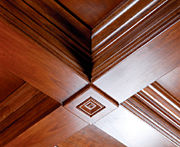 They are made by combining four equal triangles cut out of baseboard or crown molding.
Gary M. Katz is a contributing editor to Fine Homebuilding. Photos: Gary M. Katz; drawings: Bob La Pointe


View Comments
Very nice.
Do the beam bottoms or other elements open and close with seasonal changes in humidity?