
Cutting Plywood to Size
Tips from a professional carpenter can help you acquire this basic building skill.
Synopsis: Cutting 4×8 sheets of plywood down to size is a basic task that most carpenters take for granted, but it can be daunting if you’ve never done it. In this short article, a professional carpenter explains the process and offers some tricks (using the right blade and making a shooting board) for doing it fast and accurately.
Sheets of plywood first appeared on job sites a little more than 50 years ago. They quickly proved their value. These days, a huge variety of panels is manufactured for applications that run the gamut from rough sheathing to fine cabinetmaking.
Every trade has its own secrets for cutting panels down to size. Framers often nail up full sheets (or overlap one sheet onto another), then trim the excess in place. Cabinetmakers rely on heavy-duty tablesaws surrounded by infeed and outfeed tables.
The rest of us just need a professional-grade circular saw, a stable cutting platform, and a good straightedge for precise cuts.
Sheathing is cut freehand
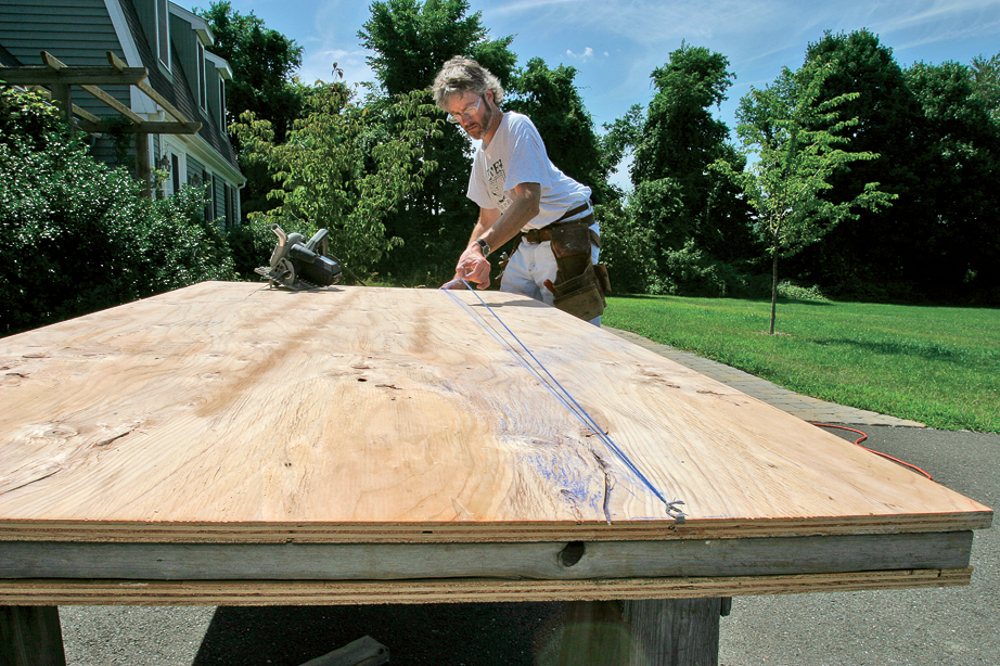
To prevent the blade from becoming pinched in the sawkerf—the primary cause of kickback—place a few 4-ft. lengths of scrap lumber between the panel you’re about to cut and the underlying sheets. Measure for the cut you need to make, and mark the cutline by snapping a chalkline. Secure the panel with a pair of Quik-Grip clamps. Then set the circular saw’s cutting depth.
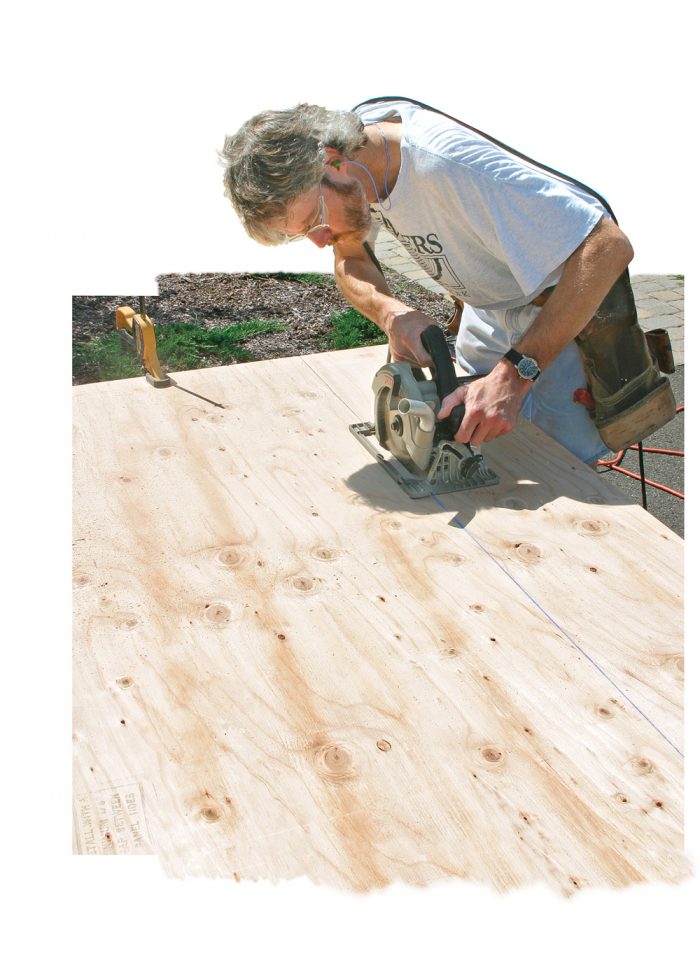
Drape the saw cord over your shoulder to prevent the cord from catching on the edge of the panel, and cut along the line with both of your hands controlling the saw. To prevent kickback, maintain a balanced stance, and don’t force the cut. If you start to stray from the chalkline, don’t try to twist the saw back toward the line. Instead, turn off the circular saw, wait for the blade to stop spinning, and back up to the location where your cut was true. With the blade centered in the kerf, start to cut again. You’ll keep it straight this time.
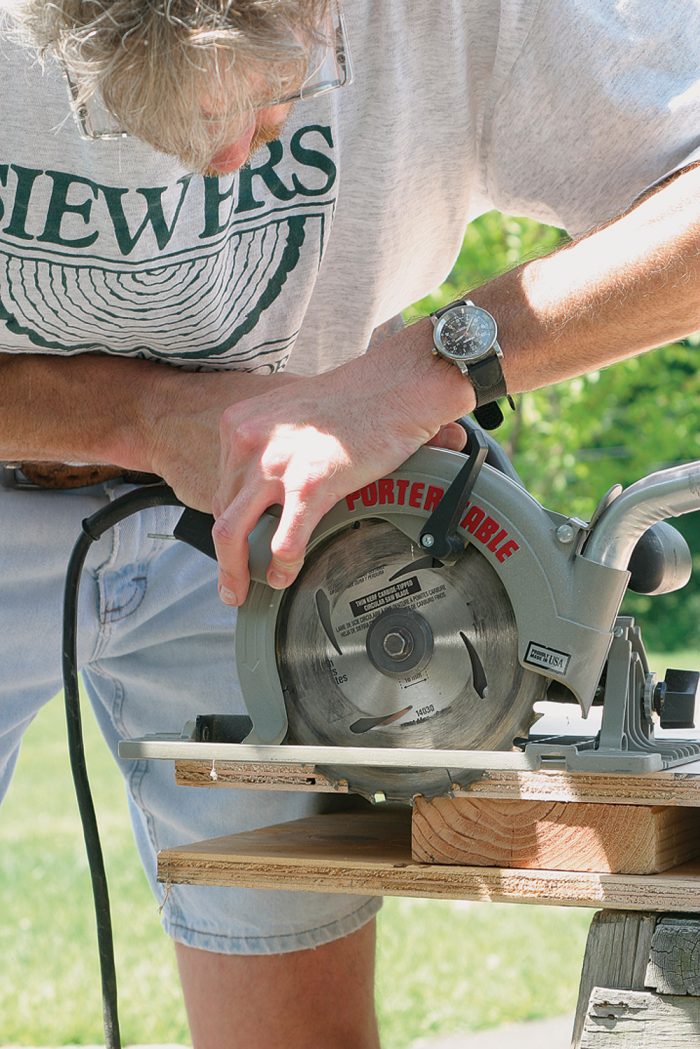
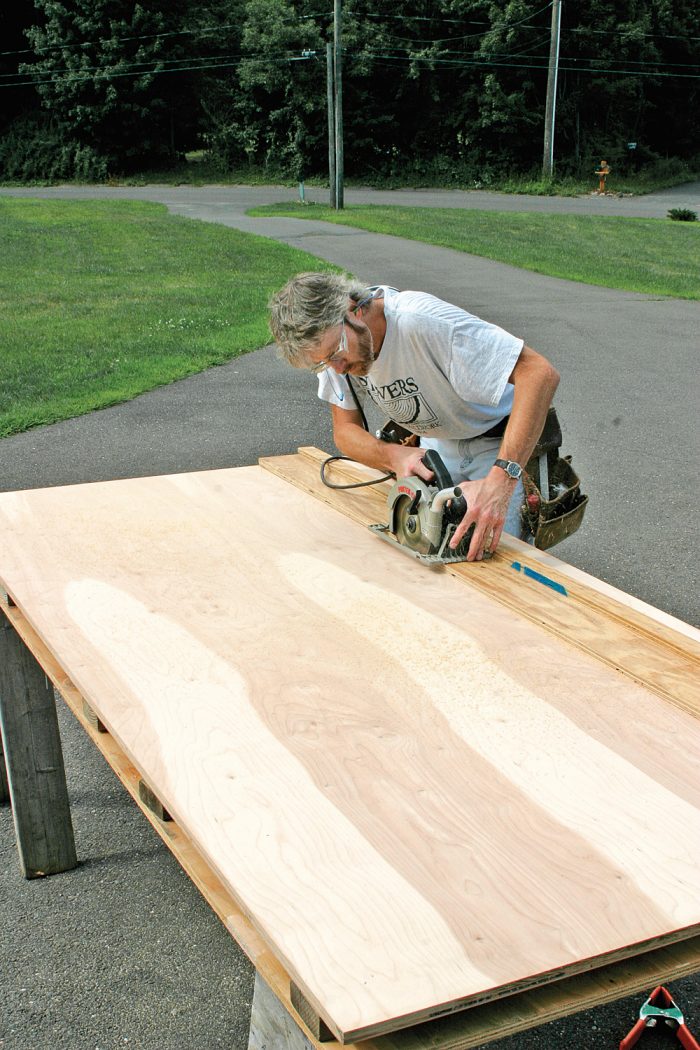
To cut finish panels, you need a guide
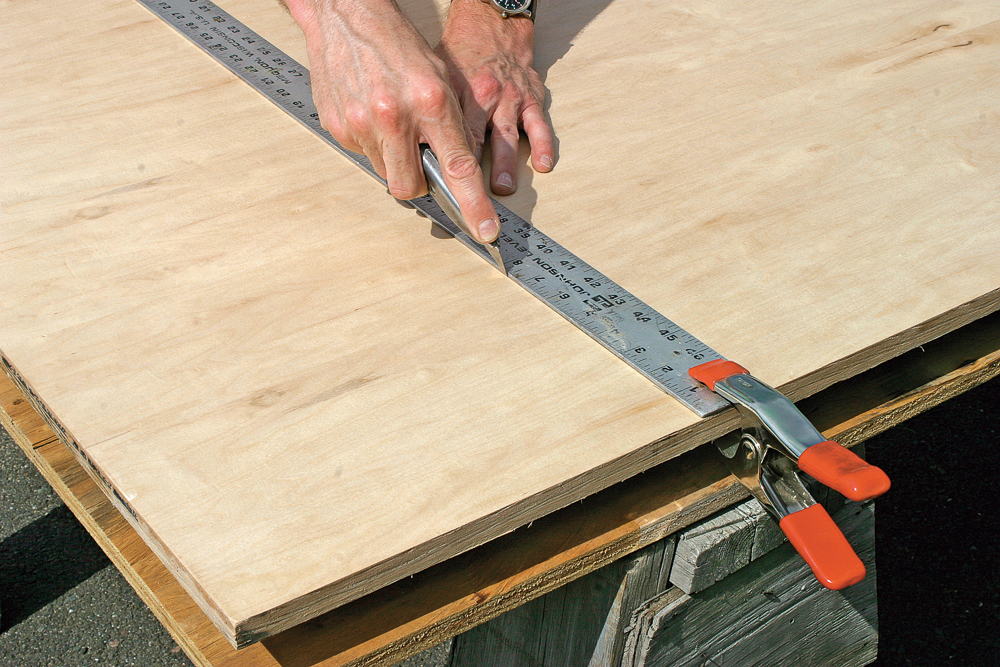
Inexpensive aluminium straightedges are available in lengths of up to 8 ft. To prevent tearout when you’re cutting across the grain, scribe the cutline with a knife or an awl. Then offset the straightedge to allow for the distance between the sawblade and the edge of the baseplate. Secure the straightedge with some heavy-duty spring clamps; then make a guided cut.
Set up, snap, and cut
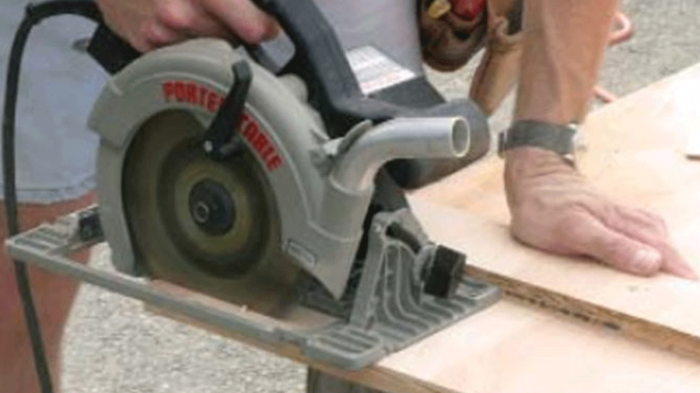
Blade basics
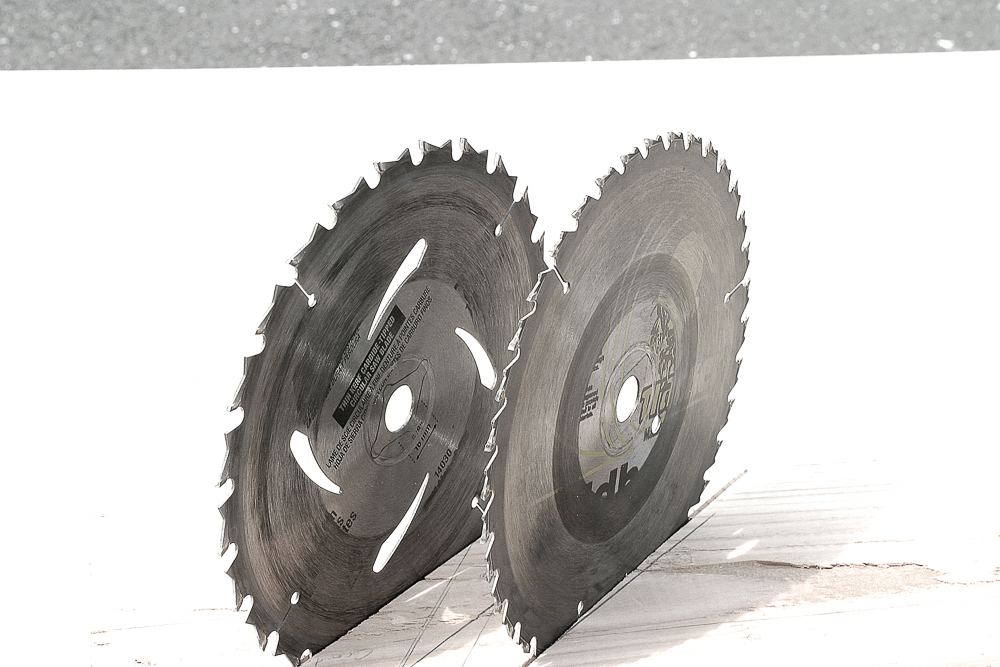 A general-purpose blade with 24 teeth (at left) is what you need for cutting sheathing and framing lumber. For smoother cuts, a 40-tooth finish-cutting blade works best.
Scribe and guide
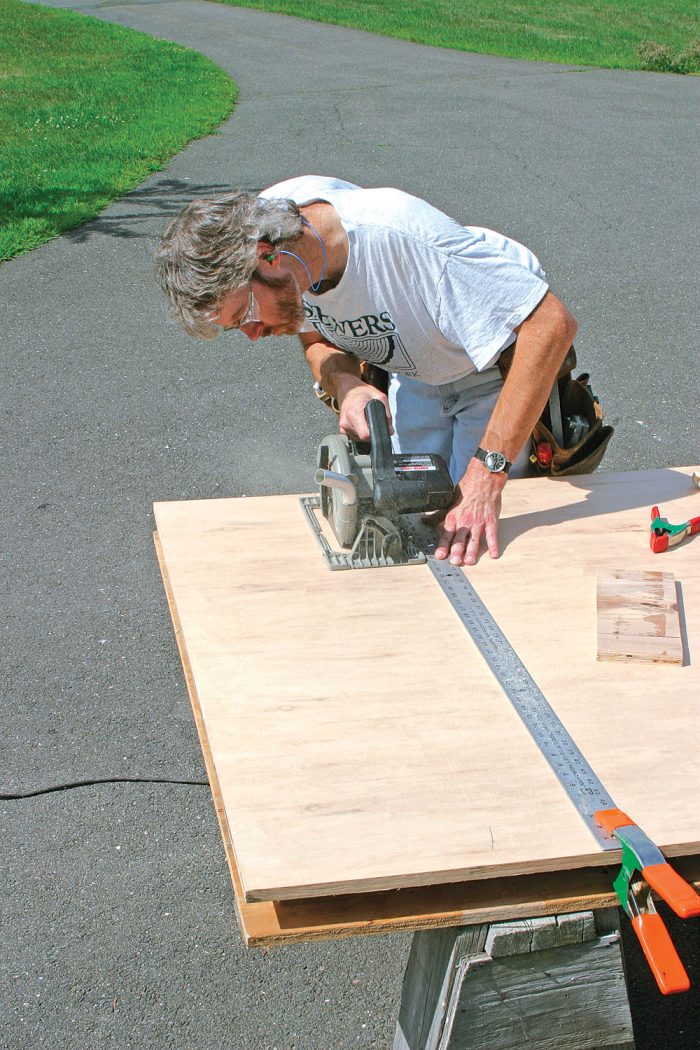
A homemade shooter board makes it easy
 Assembled from two pieces of plywood, a shooter board combines a straightedge with an attached base that can be aligned right on your planned cutline. Simply clamp the shooter board to the panel, and you’re ready to rip. The base of the shooter board will reduce tearout, but it’s still a good practice to cut finish panels with the good side facing down.
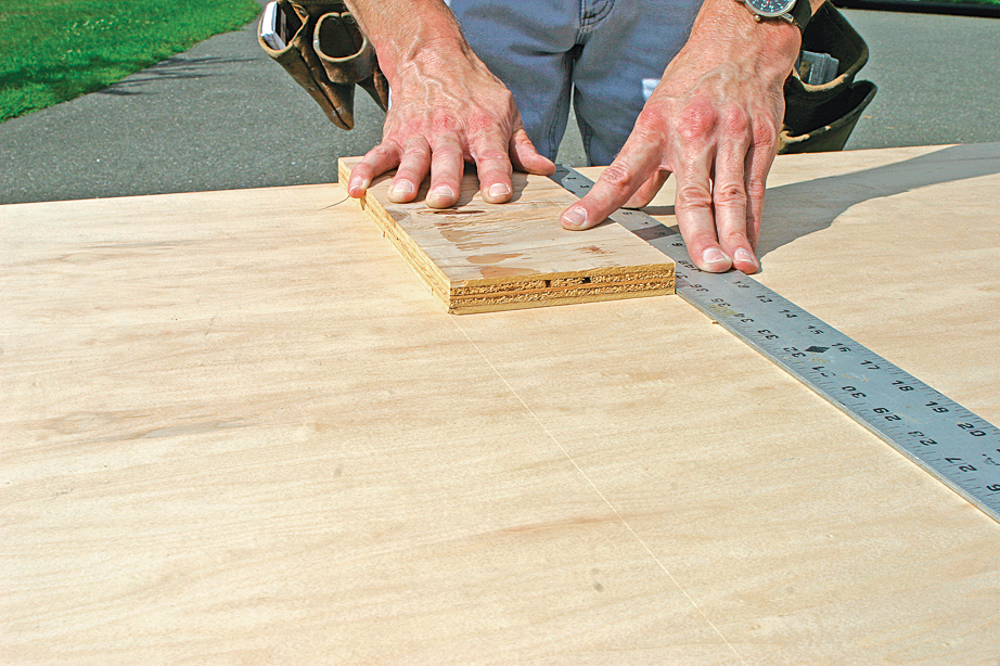
To make a shooter board, you need a 4-ft. or 8-ft. length of 3⁄4-in. plywood (about 1 ft. wide) with a straight, smooth “factory” edge that
can guide the baseplate of the saw. Start by ripping a 2-in.- to 3-in.-wide strip that includes the factory edge. Screw this guide piece to the base of the shooter board. Make sure that when the factory edge guides the baseplate of the saw, you’ll cut the base to its finished size
Photos by Chris Green.
Related stories:
For more photos and details on how to cut plywood, click the View PDF button below.
From Fine Homebuilding #166

View Comments
While straight edges may be available up to 8' long, that's not a very useful length for cutting 8' plywood. It's nice to have a few inches of overhang on each end to make starting and ending your cuts more accurate. Having cut up acres of plywood in my life, may I make a suggestion?
A few years ago I was at the metal supplier - that's where welders and such trades buy their material. While there I stumbled across a piece of 1/4" x 2" aluminum bar stock and a light bulb went off in my head. They come in 10' or 20' lengths and you have to buy the whole piece at a store like this, but they will cut it up for you. (I think they charged a dollar or two a cut.) So I had them cut a 20' one into 9, 5 and 3' lengths, plus "the drop" which I cut up as needed later. As I recall, I later had a 10' length cut to 6' and 4'.
This gave me a very affordable assortment of very accurate and very durable straightedges. I can always find a size for guiding a saw or router on any piece of plywood I am cutting. They are thick enough to run your tool against and tools slide more smoothly against these bars than they do against wooden guides.
They work great for marking things, for monitoring your progress as you plumb/flatten a shower wall, etc. You can put a few strips of blue tape on one side to prevent them from marring a finished surface or to keep them from sliding around when you guide on them. If the tape gets messed up it is a trivial matter to replace it.
I've used these as guides when cutting granite on-site with a wet saw. No worries about the guide becoming warped or anything. And if you are careful, you can cut accurately enough to make cabinet carcasses and drawers with them.
Each one has a hole drilled near the end and all but the 9 footer hang on a couple of nails in a very small bit of wall space in my garage.
Great suggestions - thanks for taking the time to share them!