
Replacing a Garbage Disposal
Here's what to do when troubleshooting reveals a quick garbage-disposal fix or repair is not an option.
As a plumber, I get a lot of calls about garbage disposal problems. I’ve seen an amazing variety of items take a disposal out of commission—everything from knickknacks to twist ties, bottle caps, and beef bones. But a disposal also can stop working for other reasons. The motor can overheat and seize, or an internal part can simply wear out or break.
When I arrive on the job, I have a strategy that tells me in a matter of minutes if the existing disposal can be fixed. If the troubleshooting tips don’t work, there is a good chance your disposal is beyond repair. New disposals are relatively inexpensive and easy to install, so even if the old disposal is shot, it’s not the end of the world.
Because a disposal can mash fingers just as easily as it mashes food waste, I never work on this appliance without making sure the power is off. You might simply be able to unplug the disposal from a receptacle inside the cabinet. Otherwise, you’ll need to flip a switch or a circuit breaker.
Troubleshoot first
 Krysta S. Doerfler
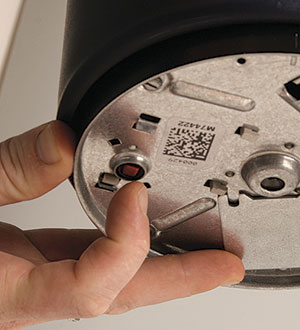
Reset the motor. When the disposal’s motor is overloaded, an internal circuit breaker can trip and shut down the unit. Pressing the red reset button on the underside of the disposal restores power, and the motor might be able to free itself.
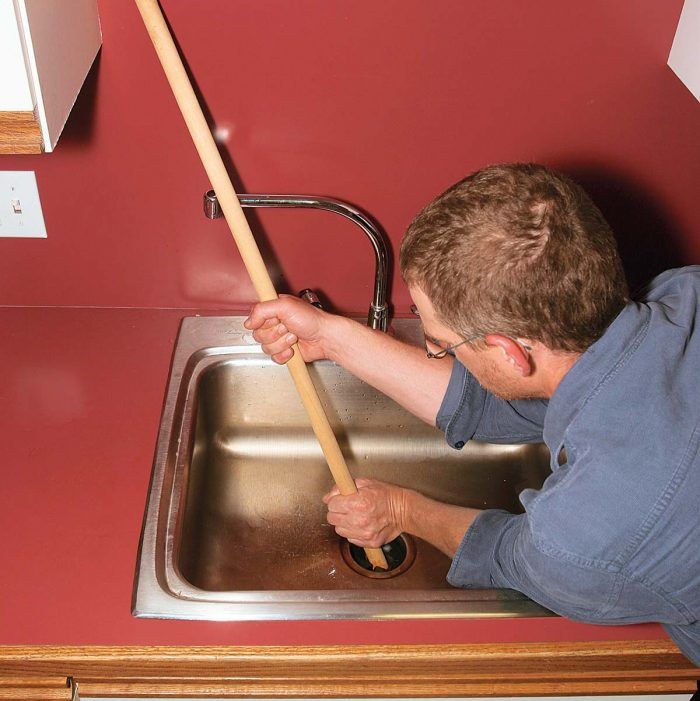
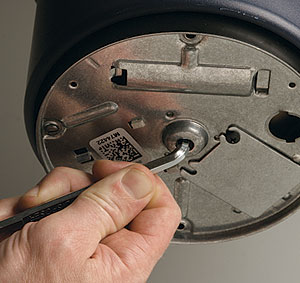
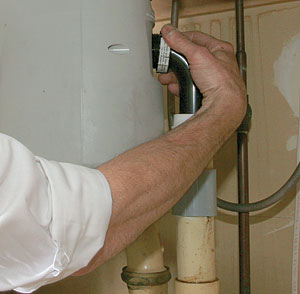
Spin the grinding chamber to clear the jam. With the power off, wedge a broom handle against the side of the grinding chamber, and use your hand as a pivot point. Alternatively, some units might accept a Jam-Buster Allen wrench that could free the jam.
 Krysta S. Doerfler
 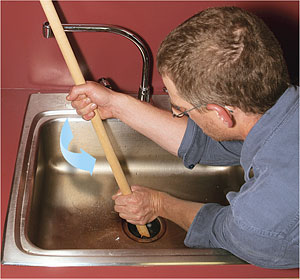 Charles Bickford
Remove the old disposal
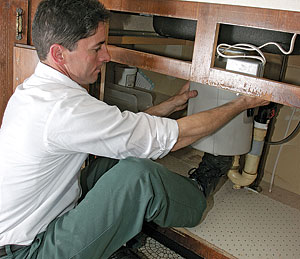
Disconnect the drain line. The drain outlet is near the middle of the disposal. On this unit, I could loosen the drain and disconnect the disposal by hand. Near the top, disconnect the dishwasher inlet as well.
Remove the disposal with a twist. I like to sit on the floor and support the disposal with my foot. You don’t have to be as flexible as you might think to do this. With both hands, rotate the disposal counterclockwise until the mounting assembly disconnects.

Remove the mounting assembly. With a screwdriver, loosen the mounting screws and pry off the snap ring on the lower part of the assembly. Once that’s removed, gently break the putty bond of the sink strainer, and remove the assembly from above
A quieter grind
 InSinkErator
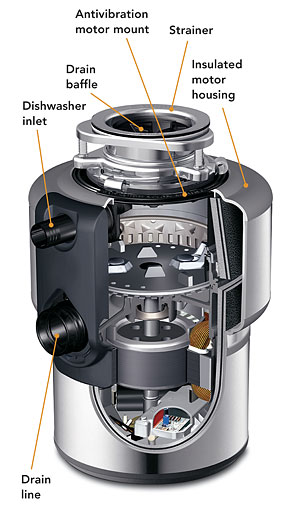
Garbage disposals can pulverize the scraps of food from a fourcourse meal, but they also can grind after-dinner conversation to a halt. The folks at InSinkErator (www.insinkerator.com) have tuned their ears to this problem and are trying to improve the around-thesink ambience. Their 3⁄4-hp Premier model has more-than-adequate power, but also incorporates sound-dampening features like a specially designed drain baffle, an insulated motor housing, and an antivibration motor mount. Available at home centers for just less than $200, it won’t chew up the home-repair fund.
Install the new disposal
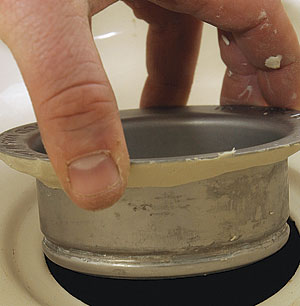
Install the strainer and mounting assembly. Remove old putty from the lip of the drain. Apply new putty to the strainer, and press it in place. From below, slip on the paper gasket, the backup flange, and the mounting ring, in that order. Without pushing up on the assembly, install the snap ring and tighten the screws against the backup flange.
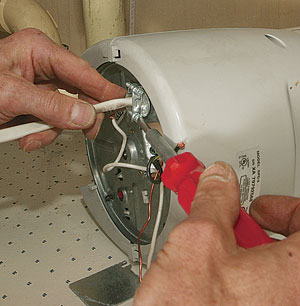
Wire the disposal for power. Whether direct-wiring the power source or installing an outlet plug, the operation is the same. On the bottom of the disposal, firmly secure the ground wire. Then connect like-color wires: white to white, black to black. Push the wires back into the housing and attach the cover plate.
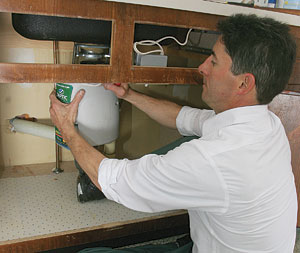
Hang the disposal on the mounting assembly. I use my foot to support the disposal the same way I did when I took it off. Align the mounting tabs with the mounting ring, and twist the mounting ring clockwise until it clicks into place. After the drain line is reconnected, fill the sink with water, and look at all the joints for possible leaks.
Photos: John Ross, except where noted

View Comments
opk
Garbage collection service efficiently removes unused data, enhancing system performance and optimizing storage resources, ensuring seamless operations for streamlined productivity and improved user experience and see more info related Garbage collation link here: https://greenplanethauling.com/