
Sculpting a Radiused Crown Molding in Plaster
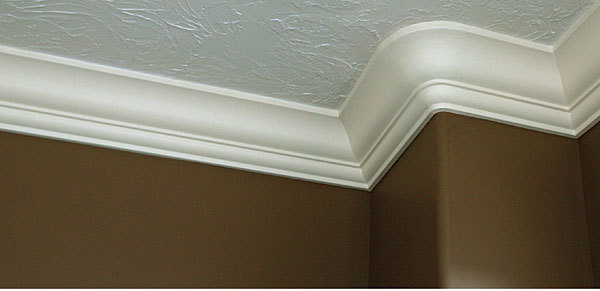
Bullnosed corners on drywall can complicate crown-molding installations. A radiused outside corner is an elegant solution.
Sharp wall corners are as common as dirt, so some homeowners prefer the softer visual appearance of bullnose corners on interior walls. While the change is refreshing, trim carpenters often dread working in homes with bullnose corner bead because it complicates the trim, especially crown molding.
I’ve found that it’s expedient to make curved interior-trim details in plaster rather than in wood (see “Making Plaster Molding,” FHB #93). Recently, I installed crown molding around several bullnose drywall corners and opted to use this technique.
I ran the 61.2-in.-wide crown around the room first. Where the crown hit the bullnose corner bead, I made a 90° cut that left the corner empty. After coating everything with a bonding primer (PrepRite; www.sherwin-williams.com), I built up an armature of wire mesh that was backed by 3/8-in. dowels glued and fastened to the crown with 23-ga. brad nails.
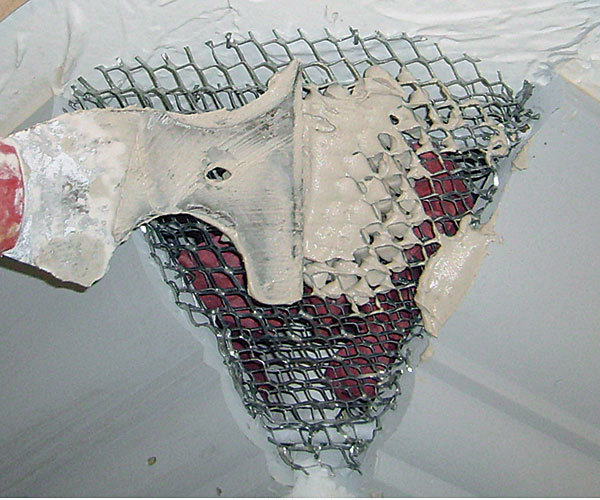
For the plaster work, I used Durabond 120 setting compound (www.usg.com) for the first two coats and USG’s Lite Topping Joint Compound for the last two coats. I could have used traditional plaster, but I didn’t have any experience working with it and was familiar with the setting compounds. Plus, the setting compound allowed me time to use a single batch to complete one coat for all six corners I had to make. I shaped the plaster with an 8-in. drywall knife that I cut to match the profile of the crown. When I pulled the knife too far from the wall as I made my original pass, however, I left some high spots in the profile that had to be sanded down before subsequent coats were applied. The ceiling template helped to minimize this problem, to some degree. However, if I use this technique again, I’ll make a second knife ground to a slightly smaller, more recessed profile for the scratch coat; then I’ll follow with a finish version of the knife for the final coats. The scratch-coat knife could be left rough, and any scratches the knife made would provide more tooth for the next coat of drywall compound.
After the painter primed and painted the crown molding, we discovered that the wood took the finish differently from the plaster, which had more sheen. In hindsight, the wood should have been given an extra coat of primer. The general contractor fixed it by spraying the bullnose areas with a clear matte finish, which did a good job of deglossing the corners.
The joint between wood crown and plaster corners has the potential to crack. The bonding primer, dowel, and wire lath I used help to stabilize this joint. Fortunately, the lengths of crown that meet at each of the six corners are all less than 4 ft. Additionally, the moisture content of the wood before I started was less than 9%, and I confirmed that the setting and topping compounds did not elevate the moisture level of the wood. Another way to minimize movement at corners is to fasten the crown thoroughly closer to the outside corners and to use minimal fasteners at the other end. The ends of the crown opposite the bullnose corners were coped, which allows those less noticeable joints to move rather than to crack at the plaster joint.
Plaster corners obviously are limited to painted crown. It’s worth mentioning that for stain-grade trim, bullnose-crown corners can be turned on a lathe to match the profile.
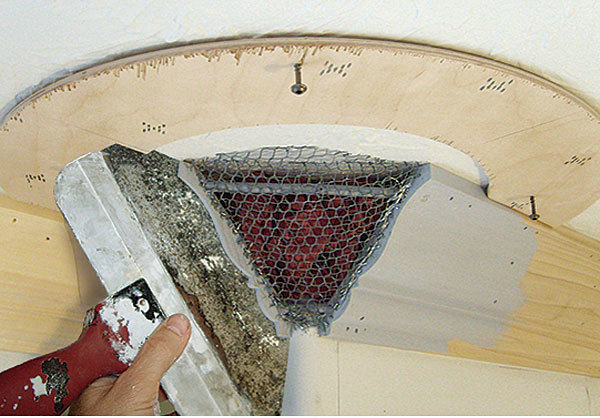
Build the armature
After cutting the crown square where it intersected the bullnose corner, I glued and brad-nailed two 3/8-in. dowels into holes drilled into the molding.
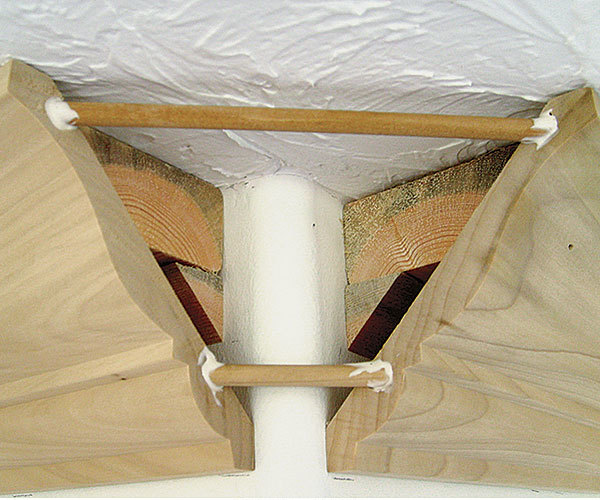
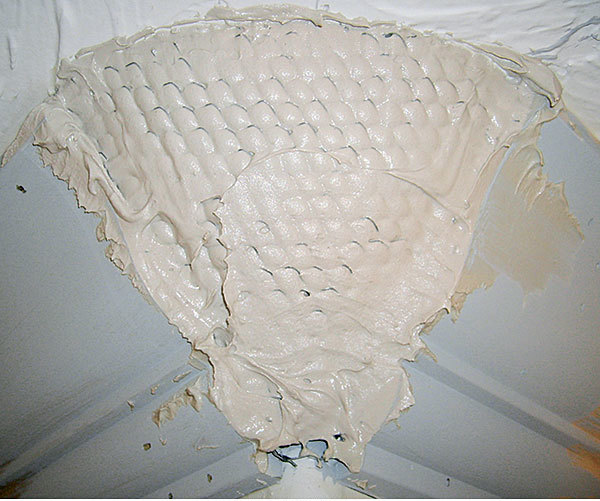
When the glue was dry, I painted the surrounding areas with a bonding primer. After loosely filling the space behind the dowels with crumpled-up rosin paper, I cut two layers of expanded metal lath; the first layer was stapled to the dowels straight across the corner. I bent the second layer of lath into a cone shape, stapled it to the crown on both sides.
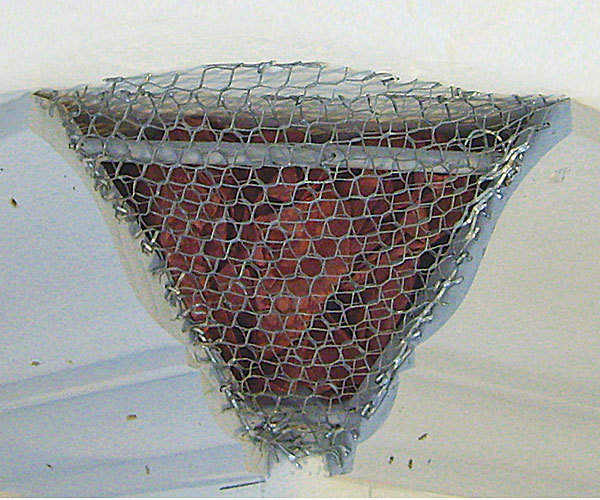
I packed in the first few coats of mud with a putty knife.
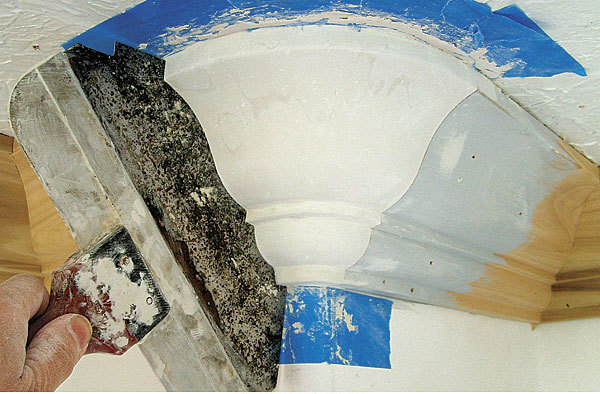
Build up the layers
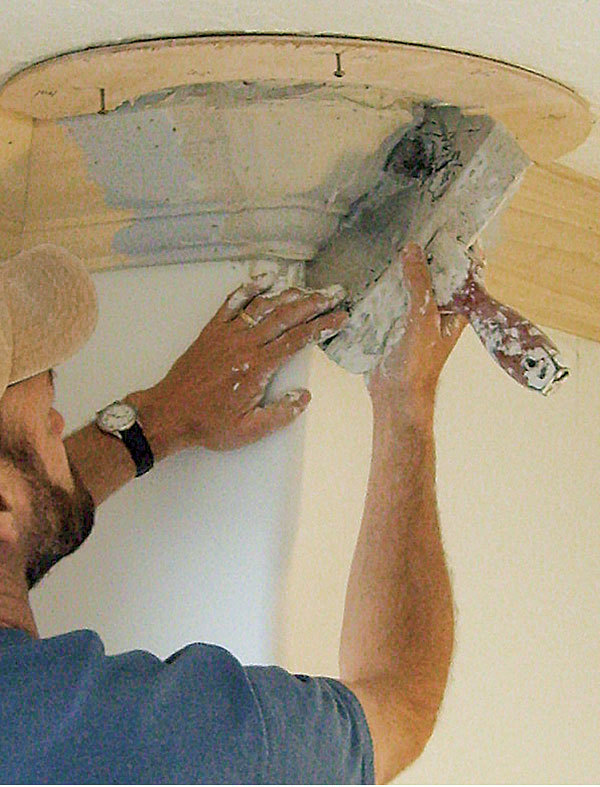
A plywood template screwed to the ceiling made an easy-to-use guide for my profile knife.
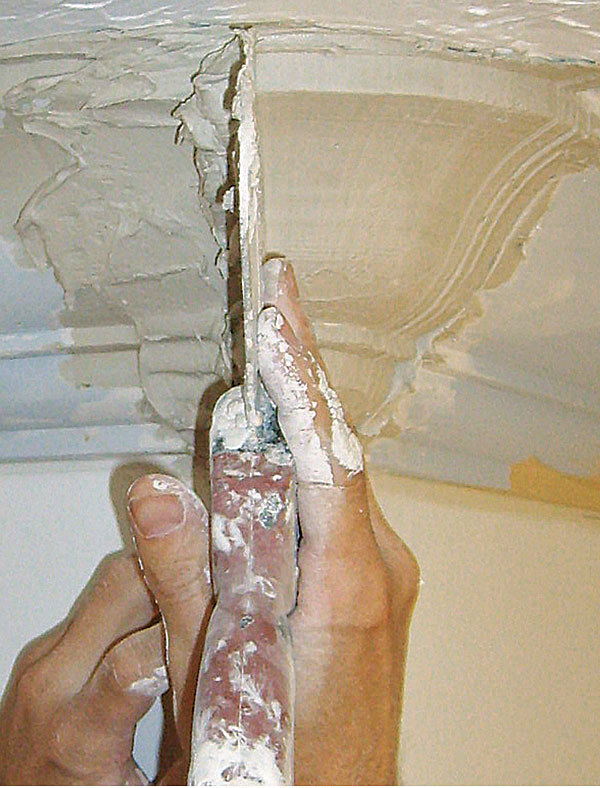
I used a slow-drying setting compound for the scratch coats and leveled out subsequent coats with the profile knife.
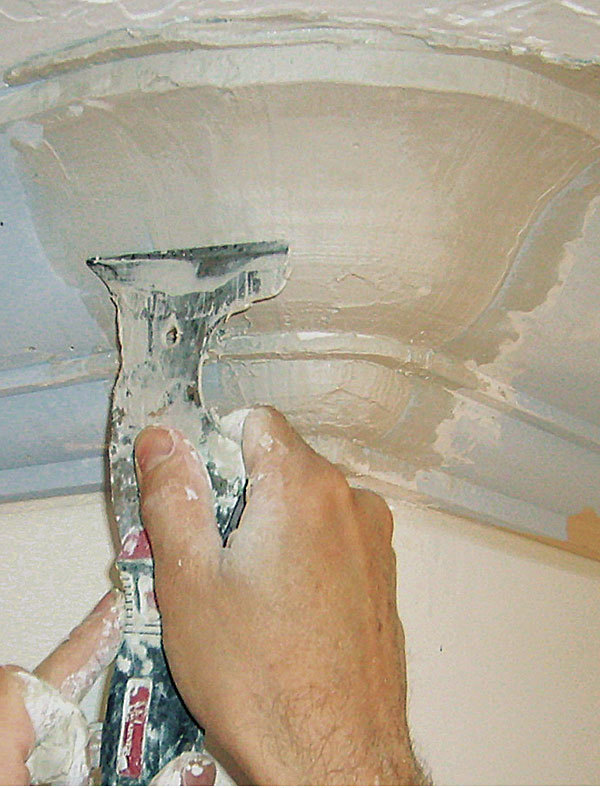
Then I went back to the putty knife to fill small divots. I also sanded and vacuumed between coats, which maintained a smooth profile.
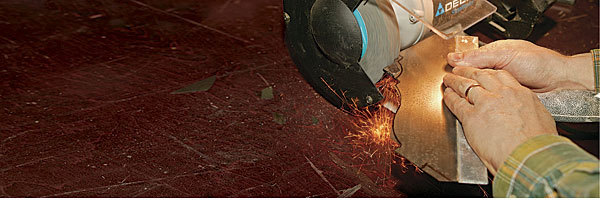
Trick of the trade: Make a custom profile knife
I modified an 8-in. taping knife to shape the plaster. After tracing the crown’s profile onto the blade, I rough-cut the shape on a portable bandsaw, then fine-tuned the edge with a benchtop grinder fitted with an abrasive wheel. I also cut angles to represent the wall and ceiling planes. When I held the knife against the corner, I could mark and reproduce the knife’s radius onto a piece of plywood, which I then cut out and screwed to the ceiling to serve as a guide.
 Charles Bickford
A lighter coat for a smooth finish
I applied lightweight joint compound for the last two coats because it shrinks less than regular compound and therefore would be less likely to crack under the paint.
Photos by: Brian Campbell, except where noted

View Comments
Don’t get me wrong. This is very good work but I don’t like it. It just doesn’t match. I want my inside and outside corners to match. Thoughts?
I agree. That's one of the problems with bull-nosed corners. Might have been better to make the corner using a third centre piece (with crisp transitions like one might use for baseboard) rather than simply the two and a rounded corner.
Rounded corners are a modern style and crown molding is a traditional look, so it's sort of a mix of styles.--for good or bad.