
Tiling over a Tiled Shower Pan
A pro tilesetter gives tips for a solid installation without removing existing tiles.
Q:
I’d like to change the tile in my shower pan. Is there a way to do so without removing the existing tile? Neither the tile nor the drain leaks.
Rob Brenner, Hannibal, KS
A:
Tom Meehan, owner of Cape Cod Tileworks, replies: Absolutely. In fact, I recently completed a similar job. It’s a straightforward process that requires isolating the old tile with a waterproofing membrane, removing the old drain cover, and setting a new grate over the existing drain.
I isolate the old tile with Schluter-Kerdi membrane (www.schluter.com) set in a thin bed of latex-modified thinset. To get a good bond between the old tile and the thinset, I score the old tile and drain assembly with an angle grinder. Then I cover the entire pan with latex-modified thinset, making sure the membrane overlaps the existing drain flange. Once the thinset is down, I install the Schluter-Kerdi membrane and let it cure for about 24 hours.
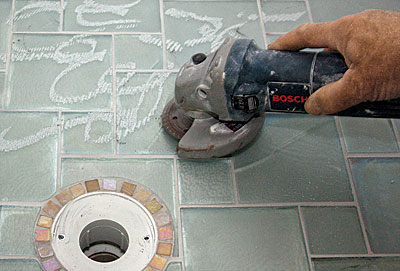
1. Rough up the tile
Use an angle grinder equipped with a diamond blade to score the old tile. This creates a better bonding substrate for the latex-modified thinset.
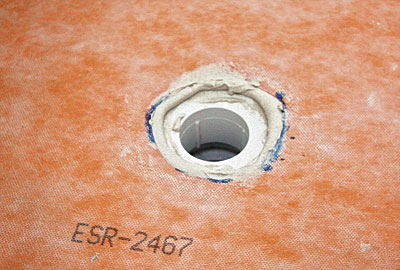
2. Lay the waterproofing membrane
After spreading a thin layer of thinset over the old tile, install Schluter-Kerdi membrane. Trowel the membrane flat, and remove all excess thinset around the drain flange. Let the membrane set for 24 hours.
The key to this process is making sure that the new drain grate doesn’t sit above the new tile, so I install the tile and the drain grate at the same time. I use the top section of Schluter’s Kerdi-Drain two-part assembly. The assembly is designed to work with Schluter’s bonding flange, but I simply set it in thinset above the existing drain’s flange. Other drain grates might work, but this is the only one I’ve found that’s shallow enough to work in this application.
Using a grinder, I grind down the small knobs that protrude from the existing drain flange, and I lay a generous amount of thinset around the drain and around the grate. Then I set the grate over the drain, pushing down firmly with both hands to ensure a tight seal all around.
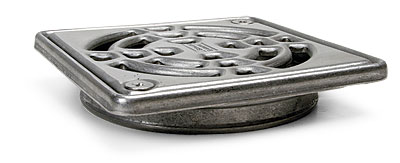
3. Lock the grate in place with thinset and tile
After applying thinset around the drain, press the grate in place until it sits flat. Next, I test-fit the new tile around the grate, adding or removing thinset until the tile is even with or slightly above the new grate. I proceed by tiling around the drain toward the walls. The key here is to ensure that everything pitches toward the drain. Once the thinset cures, I complete the job with grout followed by two coats of Miracle Sealants 511 Impregnator sealer.

View Comments
I have a simular situation, but there appears to be a leak at my clients. I was wondering if this would be a good approach after testing the drain, and all pluming for leaks prior to re-tiling the floor.
The Schluter-Kerdi membrane instructions repeatedly state that unmodified thin set should be used to insure proper bonding. Could you please resolve this discrepancy?
BrickmanConsulting. You are correct. The author fails to mention the VERY long cure time that might be required. I've learned that one can't believe everything one reads on Fine Homebuilding.
"Modified thin-set mortars must dry for the polymers to coalesce and form a hard film in order to gain strength. When sandwiched between two impervious materials such as KERDI and ceramic tile, including porcelain tile, drying takes place very slowly through the open joints in the tile covering. [According to the Tile Council of North America’s Handbook for Ceramic Tile Installation, this drying period can fluctuate from 14 days to over 60 days,....."
https://www.schluter.com/schluter-us/en_US/faq/shower-system-kerdi-thin-set-mortar-type-ceramic-stone-tile
I am interested in doing pretty much this exact same thing i am just a little confused on the drain part. can the kerdi drain system simply set into the old drain system? just that piece without the flange that the grate piece screws into? thanks for the help