Here is an inexpensive solution for transporting and storing air hose on the job or in the shop. All the materials, with the exception of the air hose and couplings, were scrap from my last job.
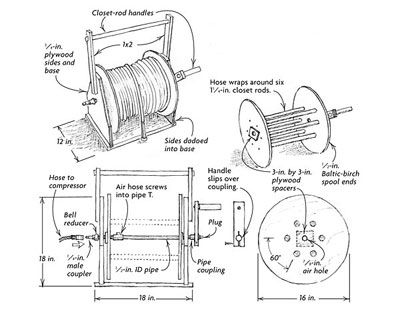
The rig consists of two primary pieces: a frame and a spool. The frame base and sides are constructed of three pieces of 3/4-in. lumber-core plywood. The 16-in. dia. spool sides are made of 1/2-in. Baltic-birch plywood left over from making cabinet drawers. Plywood spacers on the outside of each spool prevent the sides of the spool from binding against the frame.
The spool is held together with six pieces of 1-1/4-in. wooden closet rod screwed in from the sides. The length of the pieces can be whatever width you want to make the spool. Mine are 14 in. long. The top handle and crank handle are also closet rod. Incidentally, the crank portion of the handle is attached to the handle’s arm with a screw. I put a washer between the crank and the handle to cut down on friction as the handle is turned, and the screw passes through a hole in the arm that’s large enough to let the screw spin freely.
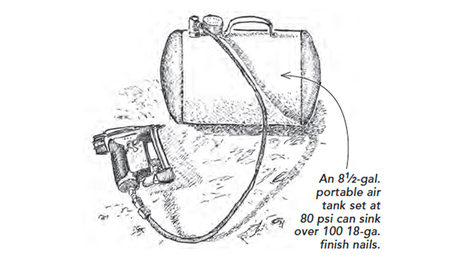
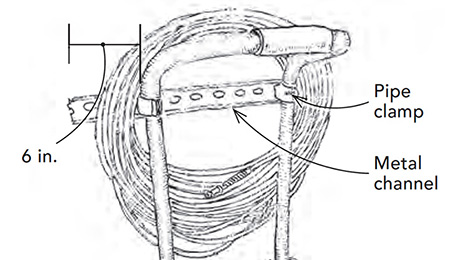
The spool’s axle is also the manifold that delivers air to the hose. As shown in the drawing, two pieces of 1/2-in. ID black pipe are threaded into a T-fitting next to the interior face of one of the spool sides. A plugged coupling caps the pipe on one end, capturing the spool. It is to this coupling that the crank handle attaches. On the other end, the pipe ends in a bell reducer with a 1/4-in. male hose coupling threaded into it. This coupling is the one to which I attach the spool to the compressor with a 6-ft. whip hose. As hose is unwound or wound, the male coupler on the reel axle simply turns inside the female coupler of the whip hose. This way, the whip hose does not twist or tangle with the turning of the reel.
This reel will hold 150 ft. of 1/4-in. air hose. I generally leave my compressor on my truck and just reel out as much hose as needed. At the end of the day, it takes only a couple of minutes to reel the hose up without any kinks or knots to undo. So far, 150 ft. has given me enough hose to trim out a house with lots of hose left over.
Frank Maglin, Abilene, TX