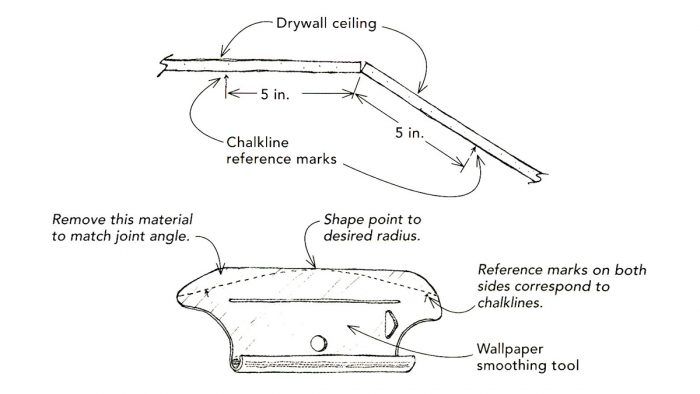
My new living room sports a cathedral ceiling with a flat center section and a sloped section on each side. This design left me with two long joints to tape with an odd angle between the flat and sloped surfaces. The drawing shows how I achieved smooth, slightly curved joints in keeping with the rest of our house.
First, I snapped chalklines parallel to the joints exactly 5 in. from their centers on both sides. The chalklines served as guides for a custom taping knife that I made from a plastic wallpaper smoother. I cut the smoother to match the ceiling angle. Then I made reference marks on the smoother corresponding to the chalklines, and I shaped the tip into a gentle radius.
It took two coats of joint compound to fill the corners: a bedding coat with tape and setting-type joint compound, followed by a thin coat of premixed joint compound. For the third coat, I was able to apply a thin coat across the joints with a wide knife because the curve was already formed along the entire joint. The result: straight, smooth, and uniform curved joints without much fuss.
Watch Chuck Miller demonstrate how to make a custom drywall taping knife.
James LaGrotta, Boonton Township, NJ
Edited and Illustrated by Charles Miller
From Fine Homebuilding #204