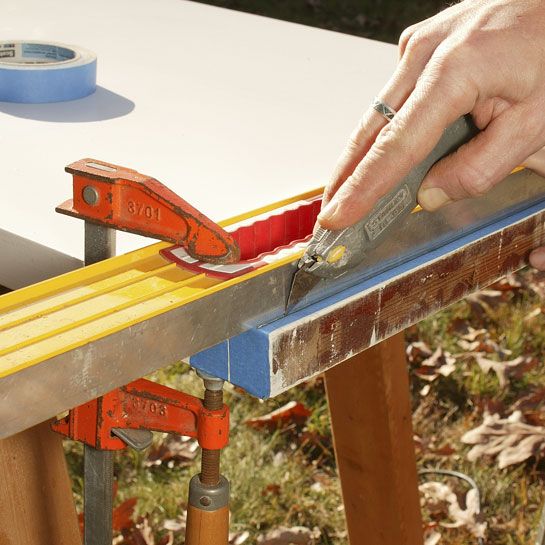
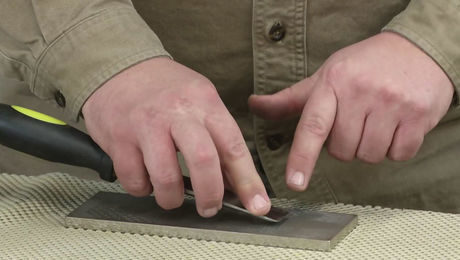
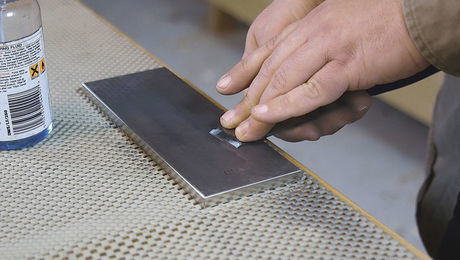
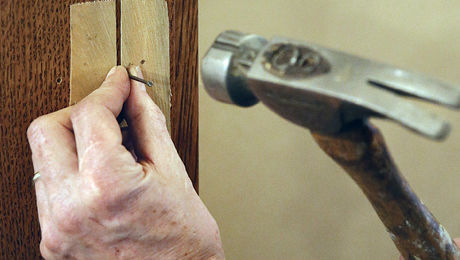
2011-01-17In our first episode of the new Building Skills video series, long-time contributor Mike Guertin tells us the most important thing when measuring and cutting a door is protecting the surface. He shows how to use masking tape and a utility knife to prevent tearout, and how to position and clamp a straightedge to get an accurate cut everytime.
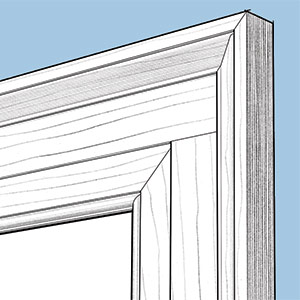
More about doors:
Video: Framing a Rough Opening![]()

Watch the video below for tips on cutting doors.


View Comments
Helpful, BUT . . . I do so wish that the video had included a shot of him PUTTING ON HIS SAFETY GLASSES, which I'm sure he did!
has mike ever seen or heard of a cut board? i find it remarkable that many of you contributors spend more time writing about subjects than thoroughly learning about them. a cut board is door hanging 101. a technique i was taught 35 years ago! it virtually eliminates most of the steps in your video. if you are interested, or even bother reading this, contact me and i will provide you with another example of my observation in your current issue!
has mike ever seen or heard of a cut board? i find it remarkable that many of you contributors spend more time writing about subjects than thoroughly learning about them. a cut board is door hanging 101. a technique i was taught 35 years ago! it virtually eliminates most of the steps in your video. if you are interested, or even bother reading this, contact me and i will provide you with another example of my observation in your current issue!
Some of the protective steps are valid but this not the way to trim a door. If you do the following you will find it less time consuming(after the jig is built) and will enable you to trim a door more accurately and the remove tiny ammounts(try 0-1/16" tapered cut with the above method) for perfect final reveal.
The Jig:
Materials: A four foot piece of 3/4" MDF at least 3" wider than the dimension on the wide side of your saw base from the outer edge to the blade. A four foot piece of 1-1/8" door stop. Glue, finish nailer, 4 foot level, 1" drywall screws.
Assembly: Measure from one edge of the MDF a distance about 1/4" more than the width of the wide side of the saw base. Using the level to maintain a straight application, glue and finish nail the stop to the MDF along the previous measured distance. Add a few drywall screws. Clean off the glue squeeze out. When cured, cut the MDF running the edge of the wide side of the base against the edge of the stop.
Use: Mark both sides of the door bottom where it is to be cut. Set jig on door right on the marks. Clamp jig in place at each end. There should be enough exposed MDF behind stop. Set clamps so that saw does not bump them when cutting. Place shim or block between clamp and door so finish is not marred. Set saw on jig and cut door running saw base along door stop.
As the saw cuts right along the cut off edge of the MDF, you can remove very little material and the jig itself acts to prevent grain lift up better than tape. The jig is clamped firmly in place whereas the tape itself can lift.
Once you have one of these, it's quicker than the feature, easier and more accurate.
I'm not sure where I picked up the term, but I've always called the jig that Suburbangeorge describes a "shooting board."
I have an 8 footer, a 4 footer, and I make custom boards all the time. I just made one recently to cut a piece of marble with a masonry blade, which cuts a thicker kerf than my wood blades.
They're so fast to set up that I use one for just about every cut, even when cutting a piece of OBS roof sheathing, where a precise line is not too critical. Of course, I'm typically working on my own house and can afford the time.
There are dedicated track saws from Festool, DeWalt and others that provide perhaps more precision for the same task, as well.
I bet Mike has a reason why he doesn't use one or didn't use one here. Maybe he'll chime in.
Also let me know if Suburbangeorge's description of the jig is confusing. If it helps, I'll shoot a quick video of how to make a shooting board for a sidewinder or worm-drive saw.
For production door cutting I use an EZ Guide Rail system from EurekaZone. It works like a 'cut board' noted by jkidevcorp and 'shooting board' Brian mentions but has a chip-free cutting edge.
This post is listed under "Building Skills" and was intended as entry level information.
Instructions for building and using a shooting board jig appeared in Fine Homebuilding many years ago but as far as I know, no one has done a video for the FHB website yet.
I have cut thousands of doors in the last 26 years as a carpenter in Northern Michigan. I cannot believe that Fine Homebuilding is showing such a primitive method of cutting doors. It would take forever to do it the way that is shown. My cutoff jig follows a straightedge and has a 1/4" plywood base that the saw rides on. That way it is impossible to scratch the finish and all I have to do is put the 1/4" plywood on my marks, clamp it and cut. I never have to score the door before cutting because I use sharp 40 tooth finish cutting blades.
Shooter board the only way to go here. You don't even need to mark the door, just align the board with your eye.
I also tend to think that painting the bottom of the door is a nice touch, but over rated. The door he is cutting is not painted on the bottom before he cut it.
If you're charging for your labor and materials are you perhaps wasting your customers money? Even if you use a heat gun to dry the 2 coats of paint how much more time does that take that you are charging for?