previous
  • How To Make a Reciprocating-Saw Blade Guide Block
    How To Make a Reciprocating-Saw Blade Guide Block
  • The Self-Taught MBA: Inspired Reading
    The Self-Taught MBA: Inspired Reading
  • The Inspector Game: Goofs on a Roof
    The Inspector Game: Goofs on a Roof
  • Fine Homebuilding: The Digital Issues
    Fine Homebuilding: The Digital Issues
  • Your Guide to Energy Smart Homes
    Your Guide to Energy Smart Homes
  • 10 Basement-Remodeling Tips and Techniques
    10 Basement-Remodeling Tips and Techniques
  • Top 10 Videos of 2011
    Top 10 Videos of 2011
  • VIDEO: Stop Paint from Bleeding
    VIDEO: Stop Paint from Bleeding
  • How to Avoid Complicated Fractions
    How to Avoid Complicated Fractions
  • 7 Small Bathroom Layouts
    7 Small Bathroom Layouts
  • Replacing a Roof : Installing a Ridge Vent
    Replacing a Roof : Installing a Ridge Vent
  • Seven Steps to Choosing the Perfect Circular Saw
    Seven Steps to Choosing the Perfect Circular Saw
  • Patrick's Barn: A Perfect Place for a Party
    Patrick's Barn: A Perfect Place for a Party
  • Wanted: Plumber for a Bathroom Remodel
    Wanted: Plumber for a Bathroom Remodel
  • How to Figure Out Concrete Volume with Sketchup
    How to Figure Out Concrete Volume with Sketchup
next
Theres a Better Way


How To Drill Pilot Holes Without a Bit

comments (2) July 21st, 2010 in Blogs        
cmiller Chuck Miller, special-issues editor
14 users recommend

Video Length: 2:00
Produced by: John Ross


Predrilling without the drill

Gregg Roos, from San Francisco, California writes:

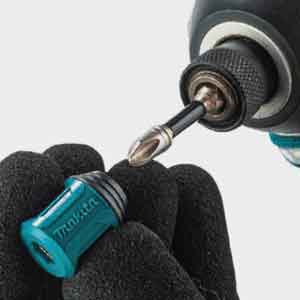
Impact drivers are so good at driving screws that the practice of pre-drilling a pilot hole seems to be on the wane. But if I can’t afford a snapped screw, or it’s critical that the screw pull tightly together two pieces, a pilot hole is important. Rather than get out another drill, I use this shortcut.


First, I drive the screw through the top piece, stopping at or near the back side. This forms a "pre-pre-drill" hole that guides and speeds step number two.


Next, I spin the screw back out, leaving about an 1/8 in. of the screw in the wood. This isn’t critical--just a little bit still in the wood to guide the screw for step three.


Now with the impact driver still in reverse, I push the screw downward, working the driver up to full RPMs, forcing the backwards-spinning screw through the workpiece. This process, which is accompanied by a small curl of smoke, only takes about 5 seconds--less time than it took to read this.


Now that I’ve effectively pre-drilled the top workpiece, I simply switch the driver to forward and drive the screw in as usual. The screw threads will now strip out in the top piece, even in hard or dried out wood, and the chance of a snap off are vastly reduced.


Remodeling Tips and Techniques
Pro-level solutions for everyday challenges $8.99 more info...


posted in: Blogs, drills and drivers

Comments (2)

Lawrence Lawrence writes: When stuck for a drill bit a finish nail often works surprisingly well also. It is flexible enough to outlast many proper drill bits and has a sharp tapered edge as well.

L
Posted: 12:00 am on August 5th

MikeM810 MikeM810 writes: Hi Chuck,

Haven't seen you air this tip. When using a tube of caulk and you cut
the tip open to a hole larger then you want, you can still use the tube
by taking a pair of pliers and squeeze the end flat which will give you
a thin bead of caulk and you can still apply a wider bead of caulk by turning
the tip sideways on your work.

Thanks for all your tips.

Mike Moody
Posted: 11:58 am on July 26th

You must be logged in to post comments. Click here to login.