I had a fair number of doors that needed hanging, and I wanted to take advantage of my router and my 3/4-in-dia. straight bit to make quick work of the hinge mortises. I had tried freehanding the mortises with mixed results. So I decided to make the hinge-mortising template shown in the drawings.
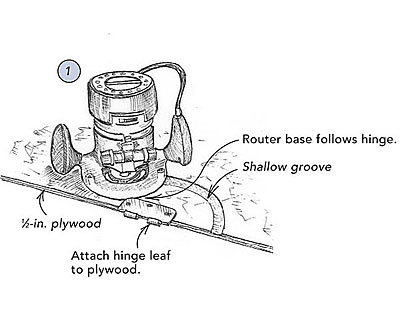 | 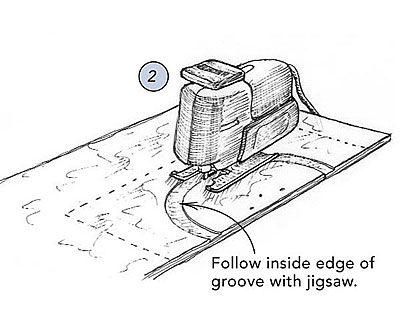 |
I started with a piece of 1/2-in. plywood, to which I attached the leaf of a radiused butt hinge aligned to the edge of the plywood as it will be placed on the door or jamb (drawing 1). Using the hinge as a guide for the router’s base, I routed a shallow groove in the plywood. The inside edge of this shallow groove became the cutline that I followed with my jigsaw as I made a circular cut in the template (drawing 2). Next, I cut the template along the dotted lines to make it more convenient to maneuver.
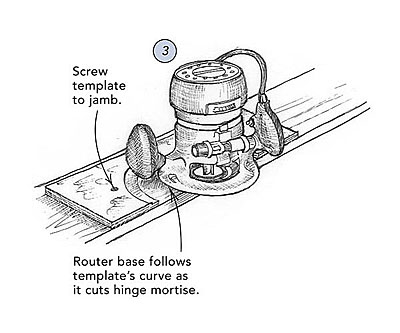 | 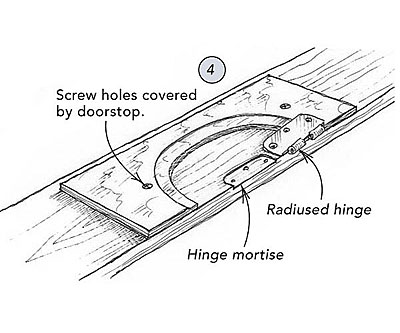 |
To cut a hinge mortise, I screwed the template to a jamb and followed the curved edge of the plywood with the router’s base (drawing 3). I used the same 3/4-in. straight bit, set at a depth equal to the thickness of a hinge leaf, to make the cuts. By the way, I placed the screws that hold the template to the jamb in positions that allow their holes to be covered by the doorstops.
—Ray Freud, Cherry Hill, N.J.
Edited and illustrated by Charles Miller
From Fine Homebuilding #164


View Comments
A great tip ! One I can see for other applications. There are two noteworthy qualities about this trick: no measuring and speed to produce an accurate jig. Thanks !