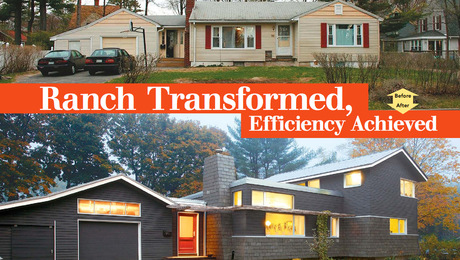
I tend toward obsessive when it comes to efficiency, so for me the layout of our kitchen was labored over during many a restless night.
Back in 1952 when our house was constructed, I’m sure the design worked quite well. It was sized for one cook, close to the back door, and conveniently separated the rest of the family from the smells and sounds of dinner preparation.
But it wasn’t working for our family. Meal preparation is a family affair, and we needed a space where we could monitor the kids while they were in the living room or doing their homework at the dining room table. And we wanted to be able to converse with guests while preparing a meal.
After a year of disciplined saving we were able afford to remodel. All that stood in between us and our dreams of an open floor plan were an old, unused chimney and the basement stairwell. The chimney came down all too easily, with a simple claw hammer and a day’s worth of dusty effort. The basement staircase was relocated under the stairway to the second floor. Our only remaining structural constraint was a column to transfer the second floor load to the basement carrier beam.
Other than the column, we had an open 12×14 space for our new design. After consulting an architect, I dragged in large cardboard boxes to simulate different layouts and drafted designs on the computer. I’m happy to report that our layout works beautifully, and I’m sleeping much better.
-
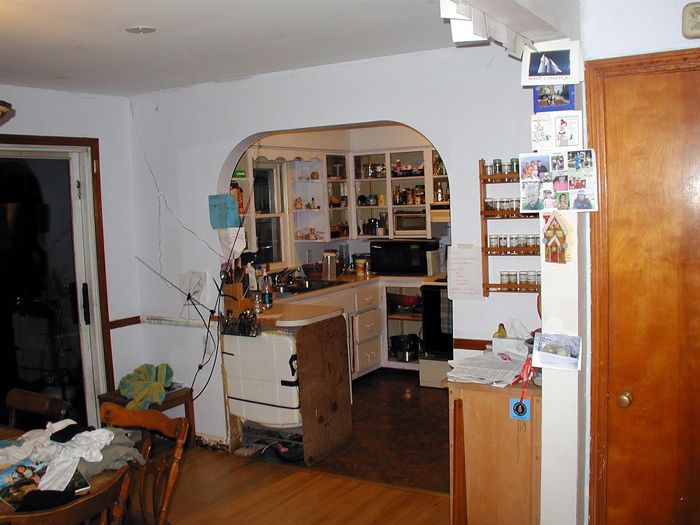
The kitchen in our modest post-war cape had never been remodeled. The rickety drawers were fastened with nails in 1952, and held together primarily with 18 coats of paint. The side door is through the kitchen and around the corner to the right, just out of view. Traffic flow was constricted down to a 36-inch passageway underneath the arch. The first order of business was to relocate the basement stairway, which is behind the door at the far right-hand side of the photo
-
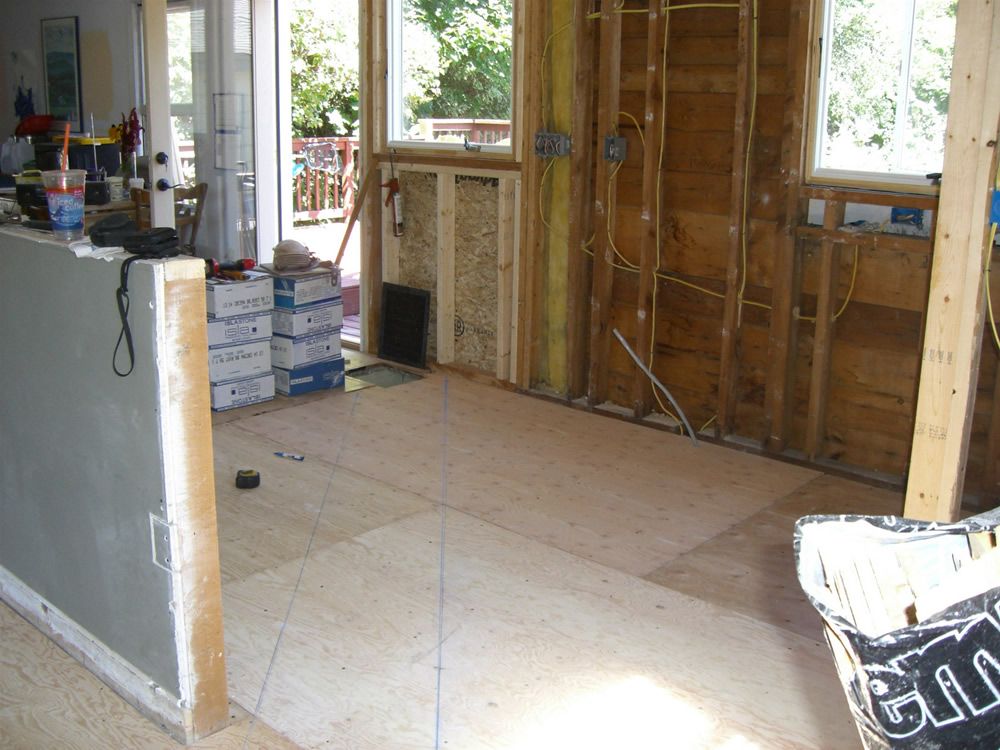
There were so many layers of flooring that the side door barely cleared the doormat. After 3 sweaty hours of quality time with a crowbar and dressed in a hazmat suit for the asbestos, I had liberated 6 layers of vinyl, and two layers of underlayment. We laid a new sub floor of ½ inch plywood covered by 12x12 porcelain tile. The finicky 1970’s aluminum slider that opened to the back deck was replaced with a Thermatru fiberglass door and an Andersen casement window. With only 2x4 walls, we wanted to get maximum R-value. I applied closed-cell foam using a do-it-yourself kit, which gave us r26.
-
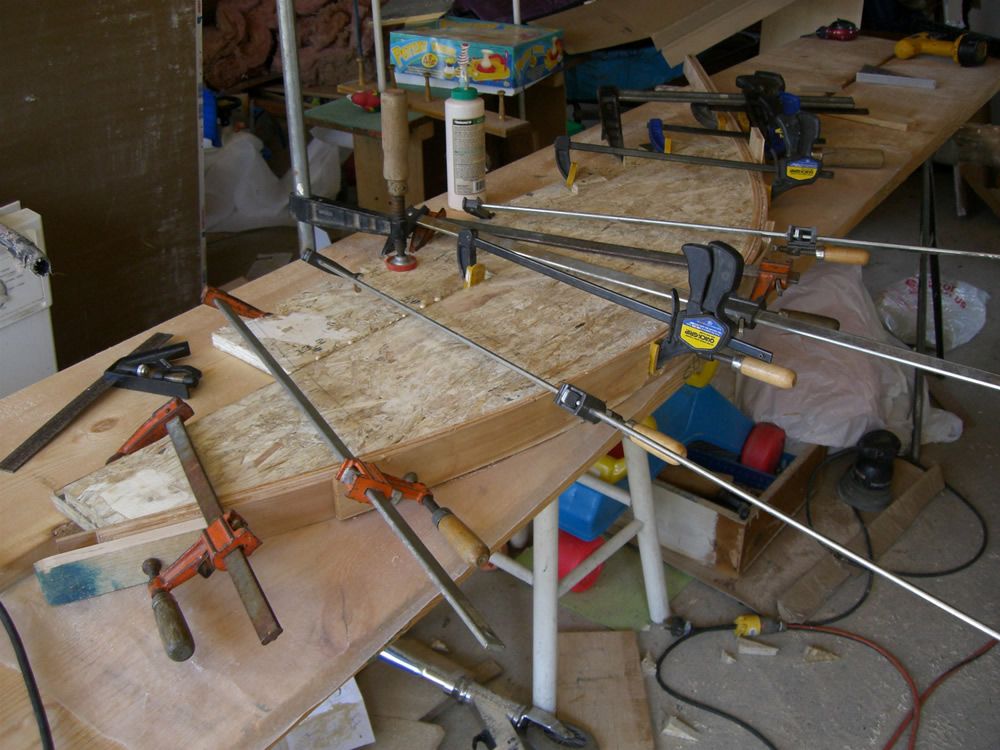
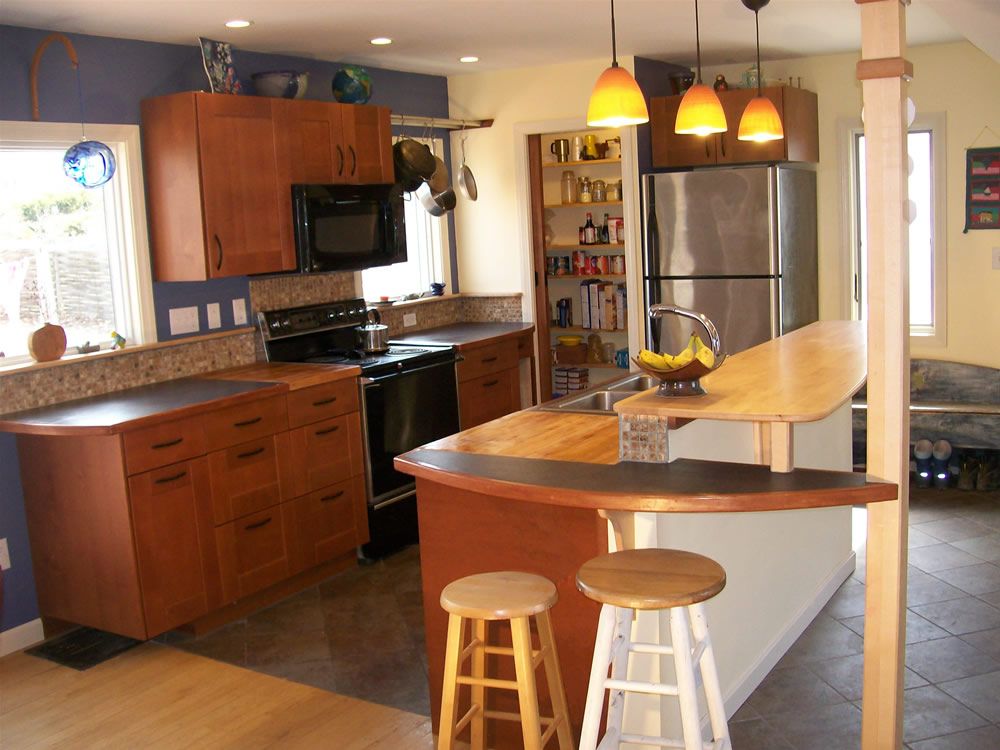
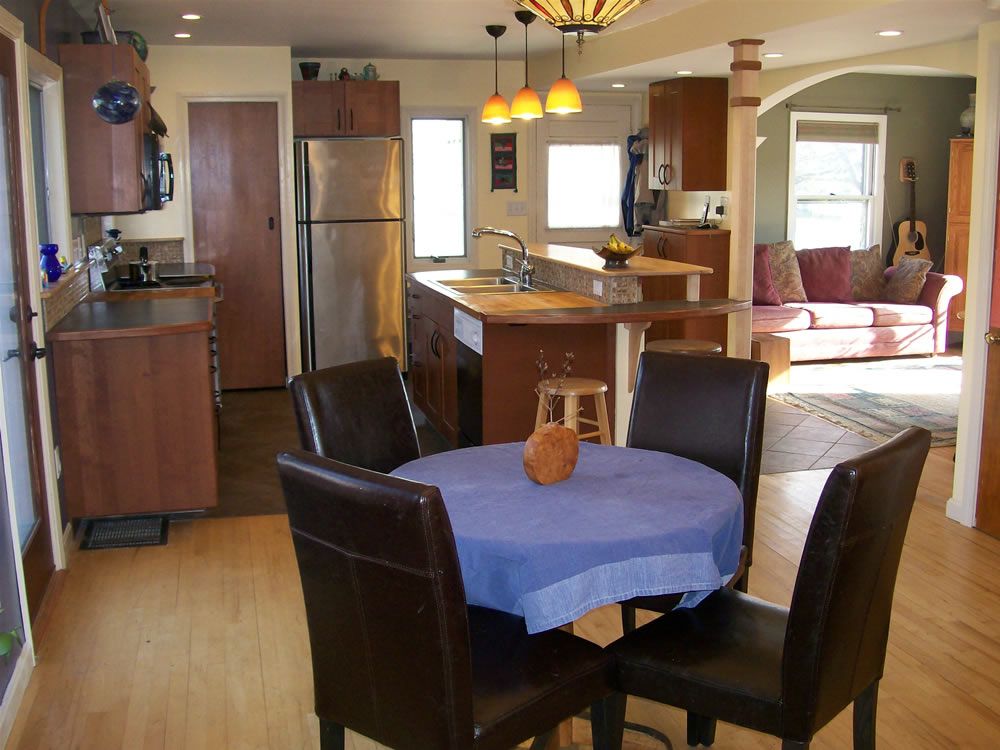
I’ve bruised my hips on sharp counter edges too many times, and I liked the potential of curves for improving traffic flow. We also wanted a countertop material that was sustainably produced and would fit our budget. Our solution was Forbo Marmoleum edged with 1” thick laminated red birch from local mill. Linoleum, we were surprised to learn, is a natural material made from linseed oil with jute backing. It is recommended for countertops for its antiseptic and hardwearing qualities. A supplier gave us an ample remnant for free, and even loaned us a bucket of mastic. But linoleum is thicker and more resilient than a typical laminate countertop. I experimented with gluing the linoleum on top of the wood edging and then trimming it with a router, but the jute backing hung out like a 5 o’clock shadow. The better solution was to butt the edging flush up against the linoleum, showing the full thickness of the birch. We started with a substrate of two layers of ¾ inch Advantech, a non-absorbent OSB that holds screws much better than particleboard. After ripping 1/8” strips on the table saw and running them through the thickness planer, we used the substrate as a template for the glue-up. When the glue was dry, we could remove the edging without it losing its shape. I affixed and trimmed the linoleum, and then glued and screwed the edges. The countersunk screw holes were filled with bungs and chiseled flush. After applying a custom stain to match our stock cabinetry, we were ready to install. Although they were quite labor intensive to build, after two years the countertops have held up quite well with no noticeable scratches.
-
We’ve never liked corner cabinets. Too much wasted space, and the canned goods always get lost in the back. Our solution was a corner pantry, but to make it fit we needed some creative solutions. First, the countertop needed to taper to 19 inches deep in order to allow a 24-inch doorway. But with 19 inches to work with, how could we fully recess a pocket door? Our solution was to recess into the exterior stud bay. We padded the exterior sheathing from the inside with ½ inch rigid foam, providing a cushioned doorstop that keeps out the cold.
-
Since we spend most of our kitchen time in front of the sink, we preferred to be facing into the house rather than looking at the squirrels in the backyard. We were lucky to find a stainless steel double sink with a Grohe faucet at a reclaimed building materials center for $35. Venting an island sink required a frank discussion between our plumber and the inspector. They agreed on a scooter vent high under the sink cabinet, assisted by another vent from the basement to the roof along the drainpipe’s horizontal run. Between the sink and the dining room table, we installed a 24x24 butcher block cast off from a friend's kitchen upgrade. On the exterior wall sits the stove vented to the outdoors, with a second built-in cutting board that lets the chef chop vegetables right next to the soup pot. To the right of the stove, a 3-foot counter with a view to the backyard is within easy reach of ingredients in both the pantry and the refrigerator.


View Comments
Amazing transformation - artfully done!
Very nice! I especially like the curved countertop!