Squaring and Leveling Mudsills
If you assume the foundation is accurate, you may end up custom cutting each rafter and fussing with every miter in your trim.

Synopsis: Making sure that mudsills are installed properly is the crucial first steps in framing a house. Done correctly, the process will minimize problems and maximize efficiency for the entire construction job. This article explains what to do.
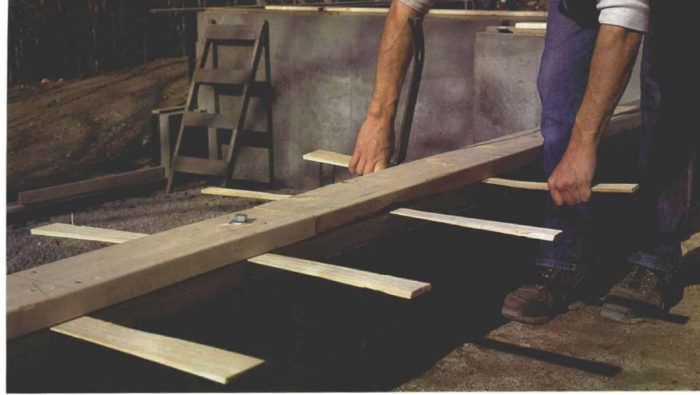
On one of our first framing jobs, the lead carpenter installed the mudsills by just lining them up with the outside edge of the foundation. It wasn’t until the first-floor deck was framed and sheathed that we realized the foundation was 3 in. wider at one end, which made the whole platform miserably out of square. We battled problems from this little oversight all the way through the roof, and soon after we began looking for a new lead carpenter.
In the 15 or so years since that project, we’ve become a little fanatical about squaring and levelling our mudsills regardless of the scale or price range of the house. The reward for being finicky is a first-floor platform that is square, level and built to the exact dimensions called for on the plans. This extra care that is taken at the beginning saves us time and headaches throughout the project.
Crew members must communicate at all times to get accurate measurements
Measuring foundations is almost always a two-person job and may even involve three people, if more than one measuring tape is being used at one time. Constant communication between all crew members involved in a measurement is of utmost importance to the success of squaring and levelling.
We have an unwritten rule that the person on the beginning, or dummy, end of the measuring tape always calls out the measurement he is holding to the line as well as the color of that line — “5 5/8, blue line,” for instance. The person on the business end of the measuring tape always acknowledges his partner’s call before recording the measurement.
To maintain the highest level of consistency and accuracy, we also insist that crew members never switch ends of the tape or switch jobs with anyone else on the crew during the entire process. On past projects we wasted hours trying to figure out why dimensions didn’t jibe only to discover that a crew member merely held the tape in the wrong spot and that his partner failed to check him.
Check the foundation right away
We always square the foundation and snap lines for our mudsills right after the forms have been stripped (and before the foundation contractor is paid), even if we know that we won’t begin framing for a while. Although totally unworkable foundations are rare, we have seen some foundation pours that were out of level as much as 3 in. in 40 ft. and some foundations that varied up to 12 in. from the specifications on the plan. Our crew can work comfortably with foundation tolerances that are within 3/4 in. of square and 1/2 in. of level, and overall dimensions that are within 1/2 in. of the foundation plan.
For more photos and details, click the View PDF button below:
Fine Homebuilding Recommended Products
Fine Homebuilding receives a commission for items purchased through links on this site, including Amazon Associates and other affiliate advertising programs.

Leather Tool Rig

Protective Eyewear

Short Blade Chisel


View Comments
I’m my area Rochester Ny the foundations are primarily block but there some cases where we have to work with poured walls, and there are horrible I agree with Mike you must level and square . There’s no excuse for how BAD these poured walls are, if the footings are level and the forms are all the same height the walls should be level ( no different then standing up exterior walls).
The masons should be back charged a substantial amount of money every time. Last poured wall we did we spent 4 hours leveling and square with no compensation!!! With CMU the walls are straight and level