Q:
I have an old closet in an ancient house that I’d like to line with 1/4-in. cedar oriented strand board (OSB). None of the walls is straight, and the floor sags. To make matters worse, the back wall of the closet is a 4-ft. kneewall, so the sidewalls are trapezoids. Is there an easy way to cut and fit the pieces?
Spence Megan, Somerville, MA
A:
Former managing editor Roe A. Osborn replies: While doing boatwork, I learned a simple system for making templates for areas that had no straight sides or square corners.
First, depending on the age and conditions of the closet walls, I suggest furring out the walls and ceiling with 1×3 strips. The strips help to fair the walls as well as provide a solid place to hang shelf cleats. I’d install the strips 12 in. o. c., screwing through the old plaster and into the lath.
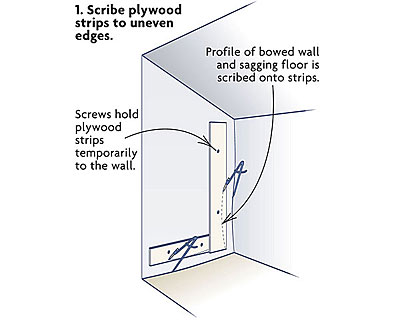
Next, rip some 5-in. wide strips out of 1/4-in. plywood. It’s best to start with the ceiling and work down, installing one section at a time, but let’s discuss one of the trapezoidal sides (see drawing). Measure the length of each side to within 2 in. (precise measurements are not necessary for this process), and cut four strips to those lengths. Set the first strip on the floor, and with a compass, scribe and cut the profile of the sag.
Then repeat the process for the top and the sides. For a wall that bows in, screw the strip to the wall or furring to hold it in place while you scribe. Let the strip touch the worst of the bow with the width of the scribe roughly the same on each side.
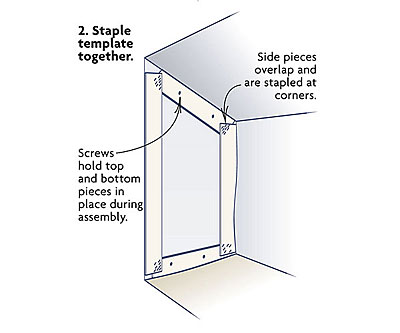
When all four pieces are scribed and cut, screw the top and bottom strips back onto the wall. Hold the sides in place, overlapping the top and bottom, and staple them together with a staple gun at each corner. If the area is roughly square and if there is any chance of confusion, label one side.
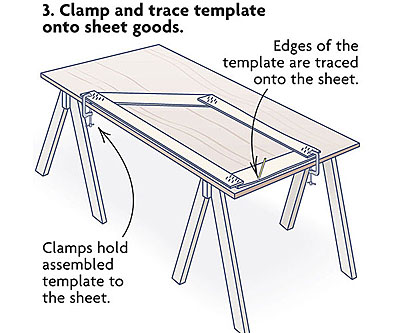
Now remove the template and lay it on the OSB with a straight side (if any) along a factory edge. Always clamp the template to the sheet to keep it from wandering while transferring the lines. Because the sides overlap the top and bottom strips, they won’t lie flat against the sheet, so take extra care to keep the point of the pencil straight down as you trace the side edges.
The piece can now be cut with all its scribes and angles, and it should pop right into place. After each piece is installed, take the template apart, remove the staples and then reuse the strips to make the template for the next area.