From Rough Frame to Finished Stairs
A foolproof method for installing skirtboards, treads, and risers.
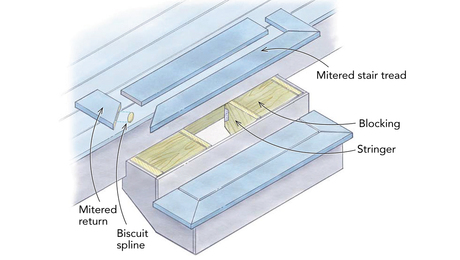
Synopsis: A Florida trim carpenter details how to convert a roughly framed stair into a safe, squeak-free, good-looking piece of furniture. The stair featured here has a closed stringer on one side (it’s against a wall) and an open, or mitered, stringer on the other. Cutting the mitered stringer, installing the risers, and getting the treads to fit tightly are the main topics covered.
Finishing a set of stairs can seem like a daunting task, and frankly, it’s never as straightforward as it ought to be. Platforms, walls, corners, and different framing carpenters all affect how easily the finish details will go together. While each staircase has its own particular challenges, there are some situations common to many staircases. The one featured here illustrates several of them, including open and closed skirtboards, open and closed treads, treads that will be carpeted, and stain-grade treads.
My job as a finish carpenter is to convert a roughly framed stair into a safe, squeak-free, good-looking piece of furniture. While the framing awaiting me at a job site is rarely plumb, level, or square, the stairway that I leave behind is (or at least looks it). To do this as efficiently as possible, I’ve learned where to use wiggle room, when to sweat the small stuff, and when to move on.
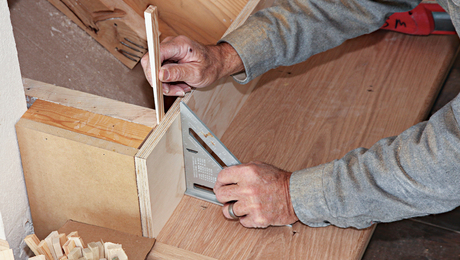
First, draw the closed skirtboard on the wall
Begin by deciding where the closed skirt will sit. About 2 in. above the nosing (tangentially) ensures that the bottom of the 1×12 skirt will be tucked neatly behind the finished risers and treads.
With the scribes set at 2 in., draw arcs – from the nose of the bottom and top treads. Use a temporary tread to position the arcs.
Trace through the arc with a pitch block – When laying out the skirt, plan for how it will intersect with the baseboard.
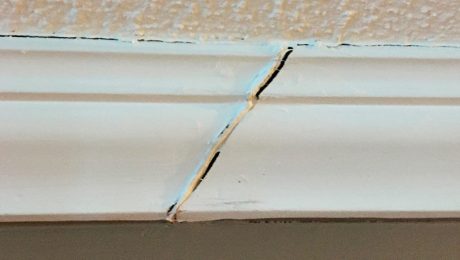
Measure the length – Because most stairs are more than 16 ft., they require a two-piece skirt. Place the scarf joint toward the tread’s nose for easy sanding.
For step by step photos and information on finishing stairs, click the View PDF button below.