A New Header for an Old Wall
Forget the jacks and temporary framing; install the two-piece header one half at a time.

Synopsis: Homeowners are often looking to open up an interior or exterior wall for more space, better flow of traffic, or simply to gain a bit more natural light. This article demonstrates a clever way of framing this new opening by installing one-half of the load-bearing two-piece header at a time, eliminating all the fuss and potential structural damage that goes along with traditional shoring jacks and temporary supports.
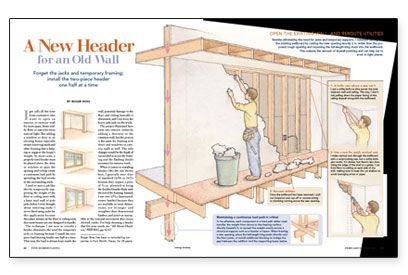
I get calls all the time from customers who want to open an interior or exterior wall for more space, better traffic flow, or just a bit more natural light. But adding a window or door to an existing house typically means removing studs and other framing that is helping to support the house’s weight. In most cases, a properly sized header must be placed above the door or window to span the opening and to help create a continuous load path by spreading the load evenly to the surrounding studs.
I used to start a job like this by temporarily supporting the weight of the floor or ceiling joists with a basic stud wall or pole jacks before I even thought about removing studs. I never liked using jacks for this application because they place stresses on the floor or ceiling joists that most houses are not designed to handle.
The technique I use now to retrofit a header eliminates the need for temporary jacks or framing because I install the two-piece load-bearing header one half at a time. This way, the load is always kept inside the wall, potential damage to the floor and ceiling basically is eliminated, and I can leave the heavy pole jacks in the truck.
The project illustrated here joins two interior rooms by adding a doorway to the common wall, but the process is the same for framing new doors and windows in exterior walls as well. The only changes would be the depth of cut needed to access the framing and the flashing details necessary for exterior work.
When it comes to installing headers like the one shown here, I generally steer clear of standard 2x10s or 2x12s because they require a piece of 1⁄2-in. plywood to bring the finished header flush with the rest of the framing. Instead, I use two LVLs (laminated-veneer lumber) because they are available in exact dimensions, are stronger and straighter than dimensional lumber, and aren’t as susceptible to the seasonal movement that causes drywall cracks.
For more illustrations and details, click the View PDF button below:
Fine Homebuilding Recommended Products
Fine Homebuilding receives a commission for items purchased through links on this site, including Amazon Associates and other affiliate advertising programs.

Stabila Classic Level Set

Sledge Hammer

Tajima Chalk Rite Chalk Line


