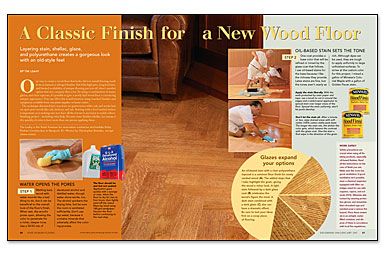
A Classic Finish for a New Wood Floor
Layering stain, shellac, glaze, and polyurethane creates a gorgeous look with an old-style feel.
Synopsis: If you want a old-looking new floor, you can spend a lot of money on salvaged timber—or you can take the advice of veteran floor finisher Tim Leahy and use a combination of products to make a new floor look as if it’s been in place for years. Leahy’s process involves layering stain, shellac, glaze, and polyurethane to create a classic look. Leahy offers advice on wood preparation, color selection, technique, methods of achieving a smooth finish, and finally, protection to keep the floor looking great.
One way to create a wood floor that looks old is to install flooring made from reclaimed or salvaged lumber. But if the high price, long lead time, and limited availability of antique flooring put you off, there’s another option that my company likes a lot. By using a combination of stains, glazes, and clear topcoats, it’s possible to give a newly-laid wood floor a convincing antique appearance. You can effect this transformation using standard finishes and equipment available from any paint supplier or home center.
The technique discussed here was done on quartersawn white oak and works best on open-pore woods like oak, hickory, and ash. Starting with a level, sanded surface is important, as is making sure you have all the resources necessary to tackle a floor finishing project — including extra help. Because some finishes (shellac, for instance) dry quickly, it’s wise to have more than one person applying them.
Water opens the pores
Wetting bare wood with water sounds like a bad thing to do, but it can be beneficial to the overall look of the floor’s finish. When wet, the wood’s pores open, allowing the color to penetrate for a richer, deeper tone. Use a 50/50 mix of denatured alcohol and distilled water, though water alone works, too. The alcohol quickens the drying time, but be sure the room is ventilated sufficiently. Don’t use tap water, because it contains minerals that adversely affect the coloring process.
Oil-based stain sets the tone
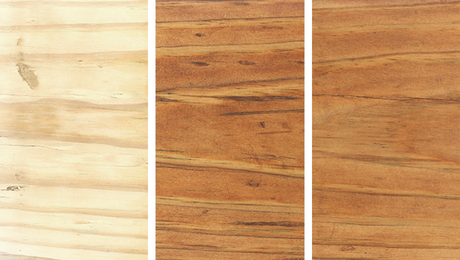
One coat provides a base color that will be refined or toned by the glaze coat that follows. I use oil-based stains for the base because I like the richness they provide. Latex stains are fine, but the tones aren’t nearly as rich. Although dyes can be used, they are tough to apply uniformly to large unfinished surfaces. To arrive at the custom color for this project, I mixed a gallon of Minwax’s Colonial Maple with a gallon of Golden Pecan stain.
Sanding sealer locks in the color
Use dewaxed shellac sanding sealer, which can be topcoated with almost any finish; traditional shellac contains a wax that can keep some topcoats from adhering. The sealer locks in the base color and enhances the grain definition in the wood, but straight from the can, it is too thick for this process. A sealer coat that’s too thick won’t allow the glaze coat to penetrate sufficiently. I use a 1-lb. cut, or thinned mix, of the dewaxed shellac. I thin the shellac with denatured alcohol, following the directions on the can.
A glaze coat pops the wood’s figure
A coat of colored glaze highlights the grain and pore structure of the wood. The effect can be mild, extreme, or anywhere in between. For this step, I mixed a quart of Aged Oak with a quart of Walnut gel stain (quart is the largest size available). Gel stains are easy to use and dry overnight. The color of the gel stain directly affects the overall outcome and look of the finish. A glaze much darker than the base color creates a more dramatic effect than a similar color. The overall process is similar to applying the base coat, except that the gel should be applied only with a brush.
For more photos and details, click the View PDF button below: