Air-Seal Windows and Doors - Fine Homebuilding FHB Logo Facebook LinkedIn Email Pinterest Twitter Instagram Plus Icon Close Icon Navigation Search Icon Arrow Down Icon Video Guide Icon Article Guide Icon Modal Close Icon Guide Search Icon Skip to content
Main Menu
Subscribe

In every issue you'll find...

  • Expert insights on techniques and principles
  • Unbiased tool reviews
  • Step-by-step details to master the job
  • Field-tested advice and know-how
Subscribe Now!
Subscribe
  • How-To
  • Design
  • Tools & Materials
  • Videos
  • Blogs
  • Forum
  • Magazine
  • Members
  • FHB House
  • Podcast
  • Join
  • Log In
Main Menu Subscribe
How-To

Air-Seal Windows and Doors

By Mike Sloggatt Issue 230 - Oct/Nov 2012
Article Image

To the uninitiated, it might appear that once a new door or window is in the rough opening and the exterior is flashed, the installation is done and it’s time to install the trim or move on to something else. Stopping the installation there, however, leaves out a very important step: air-sealing the interior. Air leaks around doors and windows not only significantly increase energy losses and make a house less comfortable, but the resulting cold spots inside the wall also can create condensing surfaces that wet insulation and damage framing and finishes.

Modern spray foam makes air-sealing around windows and doors fast and easy. The secret is to use a low-pressure, low-expansion, closed-cell foam designed for windows and doors, and to apply it with a pro-style foam gun.

Don’t use expanding foams (often marketed as crack-and-gap fillers), which can exert enough pressure to distort frames and hinder door and window operation. Also, before air-sealing, make sure that the door or window works perfectly, because the foam makes later adjustments extremely difficult.

Polyurethane foam sticks tenaciously to just about anything it touches, so keep it away from finished surfaces and home furnishings. Also, wipe away messes on hard surfaces as soon as they occur.

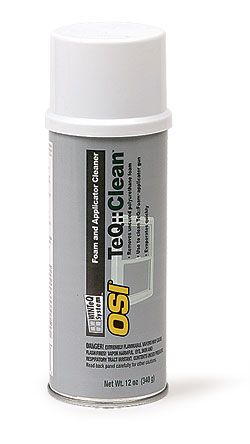
You can clean up uncured foam on soft materials with acetone or aerosol cleaners made by foam manufacturers, but when the foam is sitting on the surface, it’s generally easier and less damaging to let it dry and then to cut, pick, or scrape it off.

Step by Step

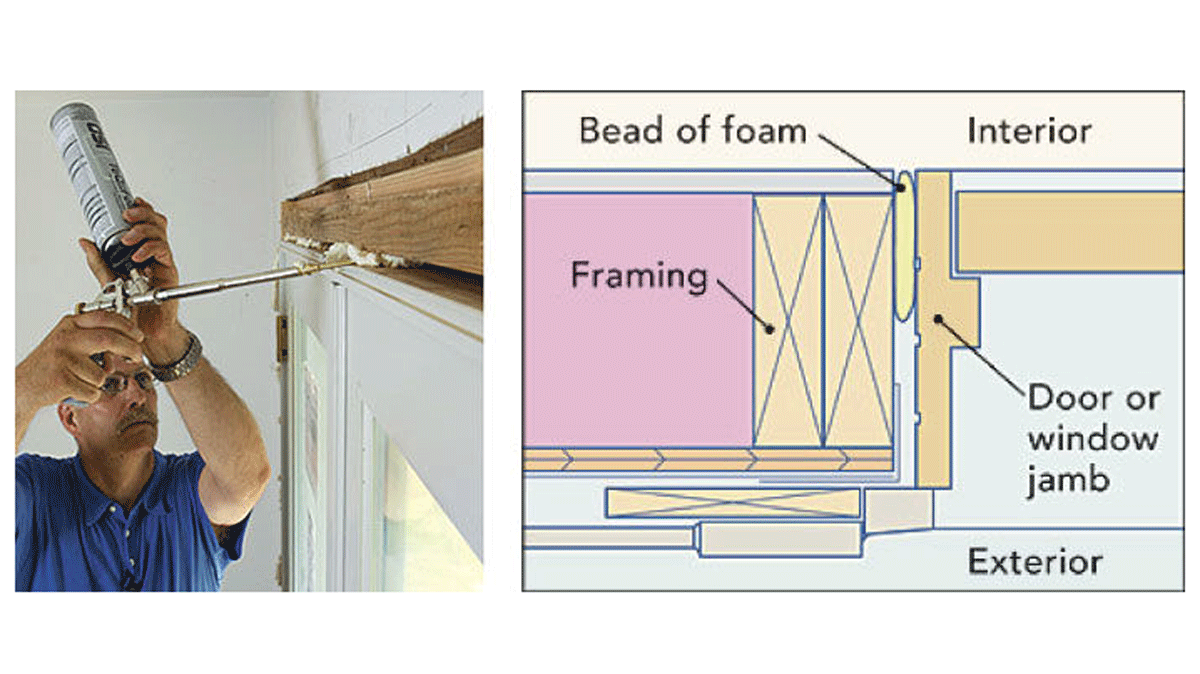
1. Start at the top.

With the foam-gun nozzle inserted between the door or window frame and the rough opening, close the gap with a single bead of foam. Leave the rest of the space between the frame and the rough framing open so that infiltrated water can drain. Start as far away as you can reach, and work toward yourself
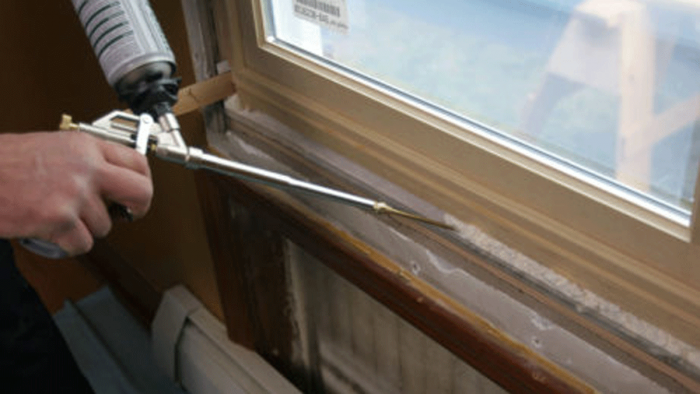
2. Seal the sides.

Once the top is done, seal the sides by working from the top down and using the edge of the jamb to guide the nozzle for a neater job. To make cleanup easier, periodically wipe the gun’s nozzle of accumulated foam with a rag or paper towel before it dries.

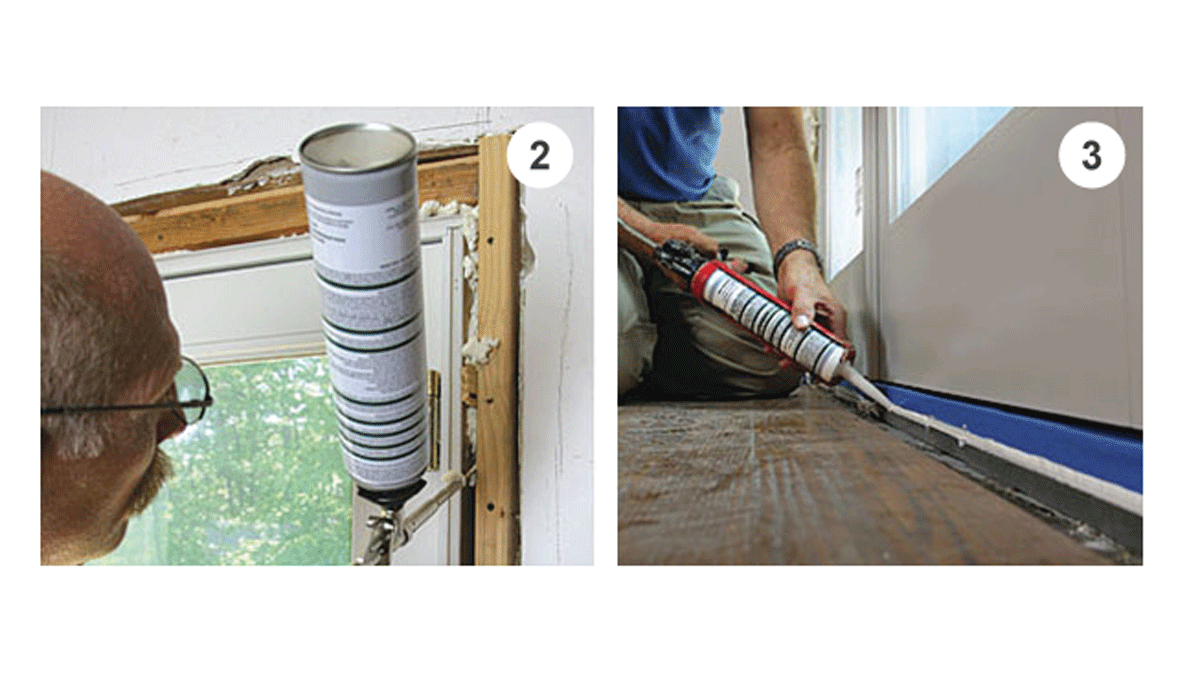
3. Seal manufactured sill pans with caulk.

The tiny gap between window and door frames and manufactured sill pans is better sealed with window-and-door caulk rather than foam (see the sidebar in “Energy Smart Details,” FHB #212). Seal only the top edge of the pan’s back dam so that water can drain from beneath. A strip of painter’s tape ensures a tidy job.

Seal site-built sill pans with foam. For site-built sill pans made from flexible flashing, use a single bead of foam at the rear of the pan to keep out air and water. The single bead allows water to drain while stopping air movement.

4. Trim the foam.

Once the foam has had a chance to set up thoroughly, usually after about an hour, trim the foam flush with the opening using a reciprocating-saw blade or a keyhole saw. The author likes this razor-sharp contractor’s saw from Tajima (www.tajimatool.com).
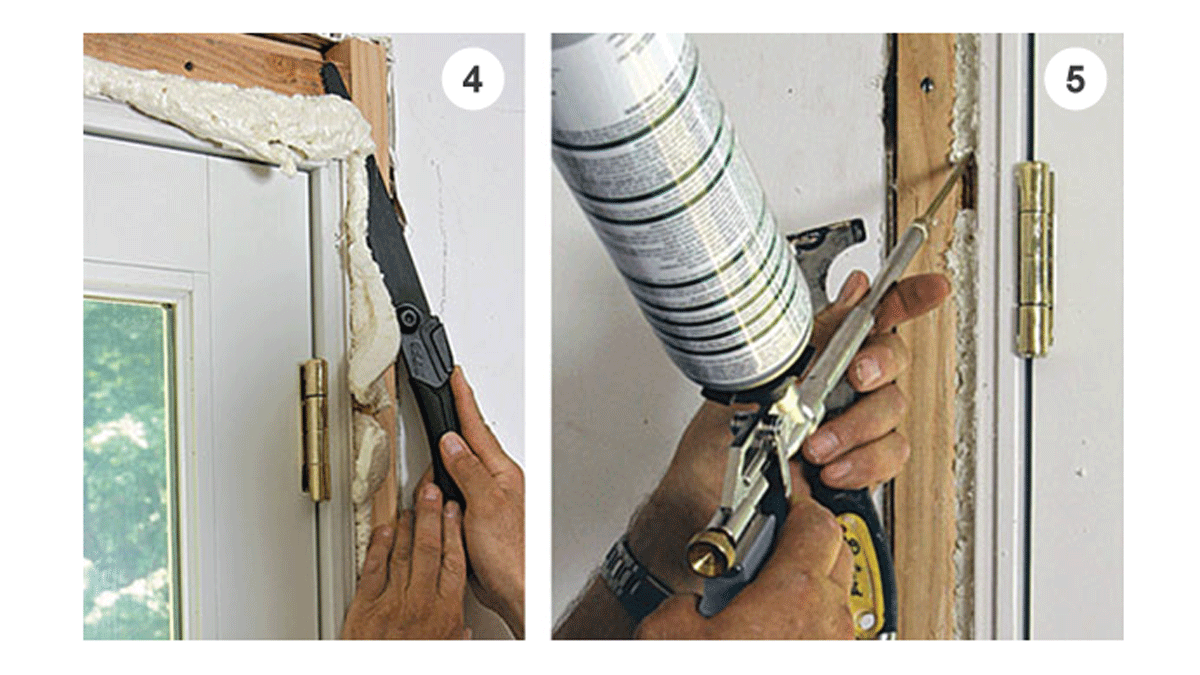
5. Cover the shims.

If you haven’t already trimmed the shims used to level the unit, cut them off so that they’re flush or below the framing. Cover the ends of the shims with foam, and fill any remaining gaps in the foam previously installed.

6. Keep a can of foam on the gun.

Polyurethane foam cures with exposure to humidity, so make sure the gun is airtight by keeping a can of foam on it at all times, even if the can is empty. If you won’t be using the gun for several weeks, replace the can of foam with a can of cleaner. Run the cleaner through the gun until the spray is clear.
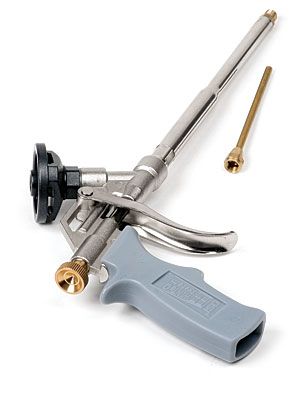
Go with a Pro

A pro-style foam gun is vastly superior to the plastic straw that comes with the cans of foam sold at home centers. The tool features a small nozzle that can fit in tight spots and an adjustable trigger for improved control. The cans of foam it accepts are also a better value than straw-dispensed cans, yielding more foam at a lower cost with almost no waste.

Tips

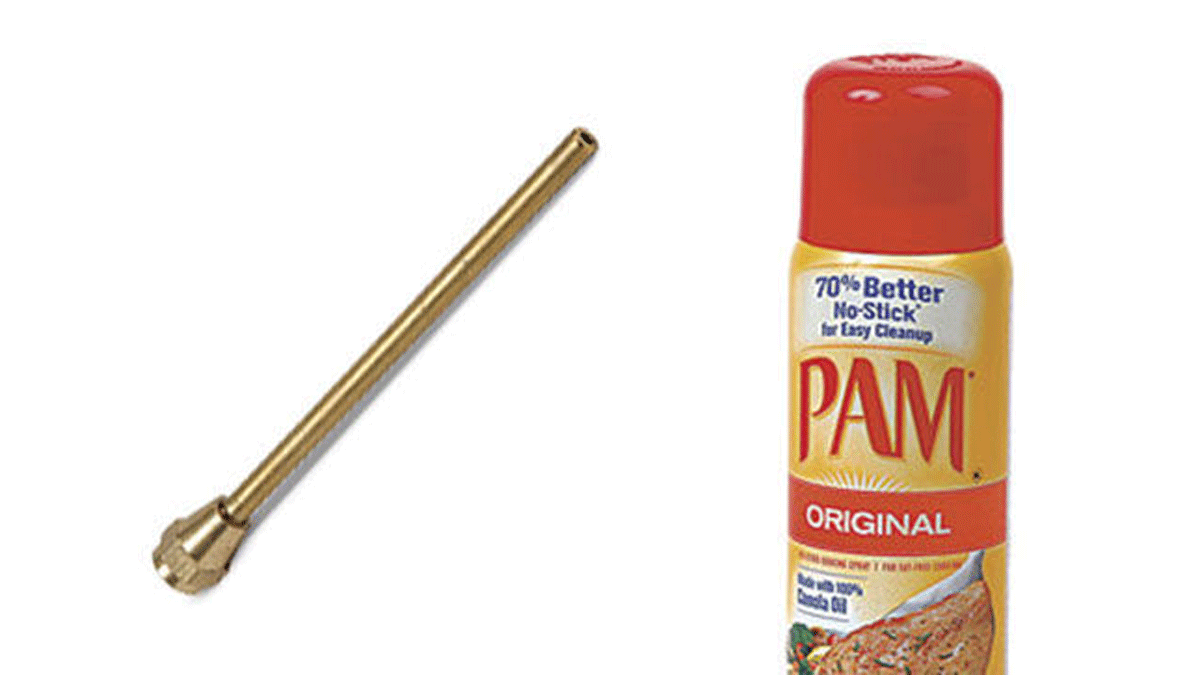
Consider extension tips. Some guns accept small-diameter metal extension tips that make it easier to slip the nozzle into the space between the jamb and the rough opening. Other guns have a barbed tip that accepts flexible plastic nozzles.

Cooking spray ($4). A light coat of cooking spray on the gun’s nozzle prevents dispensed foam from sticking to the gun, resulting in a neater job and easier cleanup.

Sign up for eletters today and get the latest how-to from Fine Homebuilding, plus special offers.

Sign Up

Get home building tips, offers, and expert advice in your inbox

×

Pro-style foam gun, $56 Dan Thorton

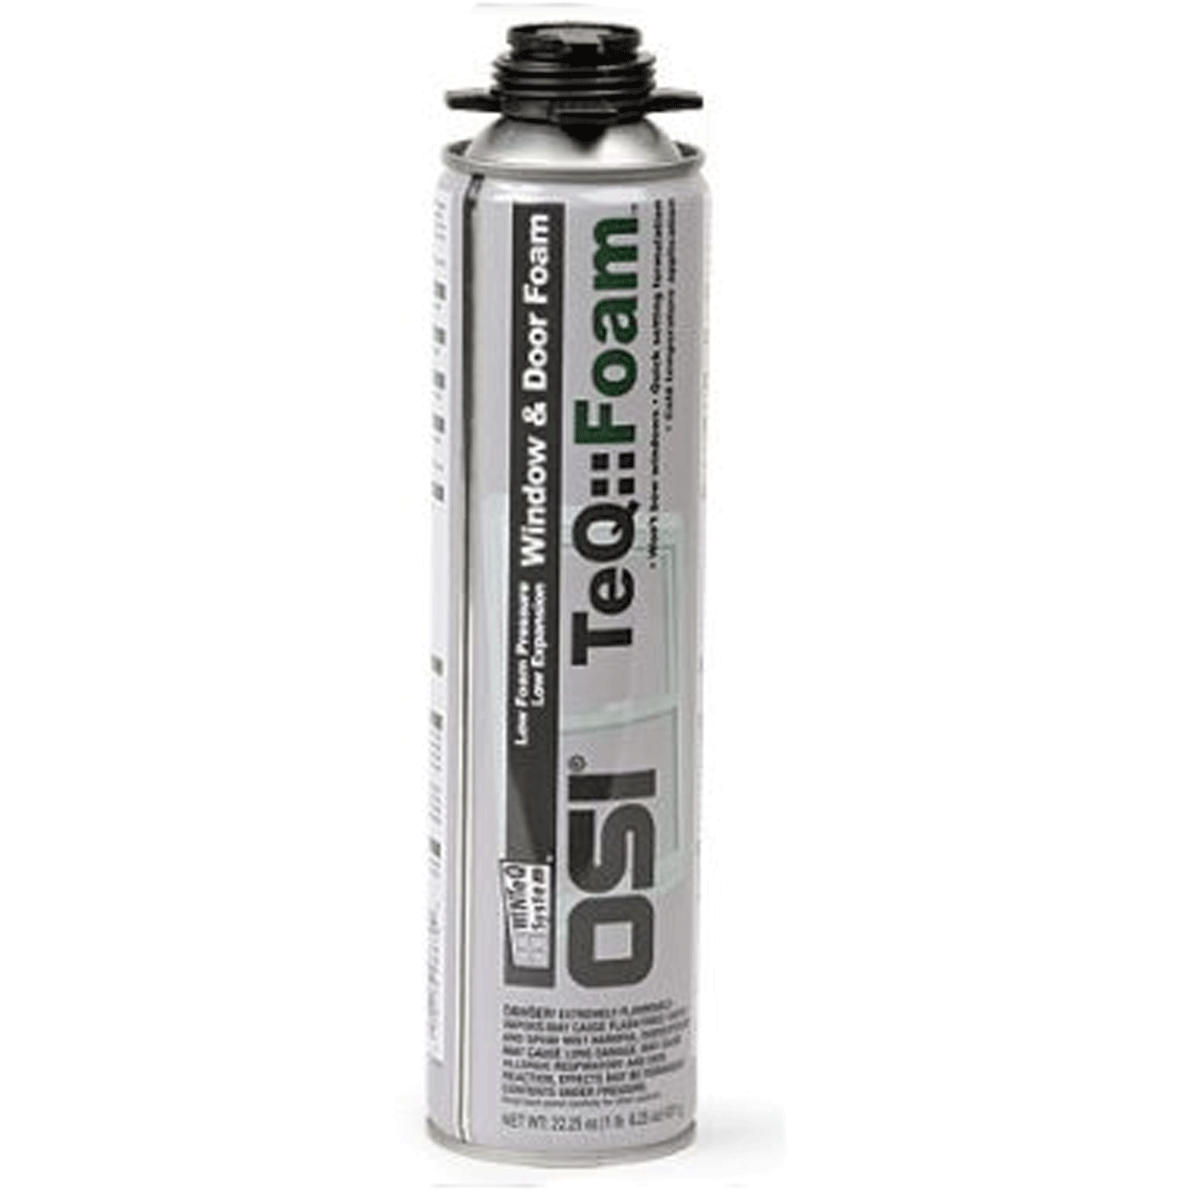
Gun-dispensed foam, $15 for a 20-oz can Dan Thorton

Foam cleaner, $19 Dan Thorton

X
X

New Feature

Fine Homebuilding Forums

Ask questions, offer advice, and share your work

Log in or create an account to post a comment.

Sign up Log in

Become a member and get full access to FineHomebuilding.com

Up Next

Featured Story

how to choose the best windows and doors

The Cornerstones of Comfort: How To Choose the Right Windows and Doors for Your Climate

In this webinar, Passive House expert Enrico Bonilauri shares his strategy for evaluating the wide range of window and door options on the market so you can make the best choice for your budget and your needs.

Featured Video

Builder’s Advocate: An Interview With Viewrail

Learn more about affordable, modern floating stairs, from design to manufacturing to installation.

Related Stories

  • Keep Craft Alive: Josh Salinger, Construction Business Owner

  • Luxurious Lime Paint

  • Shingle Holder

  • Retrofit of a Timber-Frame Farmhouse

Discussion Forum

Recent Posts and Replies

  • |
  • |
  • |
  • |
  • |
  • |
View More Create Post

Highlights

  • Fine Homebuilding All Access
  • Fine Homebuilding Podcast
  • Tool Tech

    Plus, get an extra 20% off with code GIFT20

  • "I have learned so much thanks to the searchable articles on the FHB website. I can confidently say that I expect to be a life-long subscriber." - M.K.

    Get home building tips, offers, and expert advice in your inbox

    Sign Up See all newsletters

Video

View All
  • Podcast 193: Understanding Permeability, Insulating Behind Fiberboard Sheathing, and Building a Patio Door

  • How to Frame an Arched Doorway

  • How to Test Paint Stripper for Your Next Refinishing Project

  • Video: Build a Dutch Door

View All

Doors

View All
  • steel-framed windows

    Phenomenal Fenestration

  • door control

    Temporary Door Control

  • how to choose the best windows and doors

    The Cornerstones of Comfort: How To Choose the Right Windows and Doors for Your Climate

  • Help with Heavy Doors

View All

BOOKS, DVDs, & MERCH

Shop the Store
  • Fine Homebuilding Magazine Slipcase

    Buy Now
  • 2020 Fine Homebuilding Archive

    Buy Now
  • Code Check Building 4th Edition

    Buy Now
  • Musings of an Energy Nerd

    Buy Now
  • Shop the Store

Fine Homebuilding Magazine

  • Issue 297 - February/March 2021

    • Foundations for Success
    • Staircase Renovation
    • Ditch the Hose
  • Issue 296 - Dec 2020/Jan 2021

    • Insulating Glass Keeps Getting Better
    • Simple Way to Make Old Walls Straight and Plumb
    • Making Sense of Minisplits
  • Issue 295 - Kitchens & Baths

    • Condo Kitchen Reimagined
    • Row-House Remodel
    • Rise of the IAQ Monitor
  • Issue 294 - Oct/Nov 2020

    • Schoolhouse Reimagined
    • Tool Test: Folding Sawhorses
    • A Better Way to Build Tall Walls
  • Issue 293 - Aug/Sept 2020

    • A Practical Guide to Fall Protection
    • Installing Frameless Cabinets
    • Make Any Tablesaw Safer

Fine Homebuilding

Follow

Newsletter

Get home building tips, offers, and expert advice in your inbox

Sign Up See all newsletters

Membership & Magazine

  • Online Archive
  • Start Free Trial
  • Magazine Subscription
  • Magazine Renewal
  • Gift a Subscription
  • Customer Support
  • Manage Preferences

Taunton Network

  • Green Building Advisor
  • Fine Woodworking
  • Fine Gardening
  • Threads
  • About
  • Contact
  • Advertise
  • Privacy Policy
  • Careers
  • Copyright
  • Terms of Use
  • Accessibility

© 2021 The Taunton Press, Inc. All rights reserved.

    Main Menu

  • How-To
  • Design
  • Tools & Materials
  • Video
  • Blogs
  • Forum
  • Reader Projects
  • Magazine
  • Members
  • FHB House
  • Podcasts

  • FHB Podcast
  • ProTalk
  • Account

  • Log In
  • Join

    Podcasts

  • FHB Podcast
  • ProTalk
  • Popular Topics

  • Kitchens
  • Business
  • Bedrooms
  • Roofs
  • Architecture and Design
  • Green Building
  • Decks
  • Framing
  • Safety
  • Remodeling
  • Bathrooms
  • Windows
  • Tilework
  • Ceilings
  • HVAC

    Magazine

  • Current Issue
  • Past Issues
  • Magazine Index
  • Subscribe
  • Online Archive
  • Author Guidelines

    All Access

  • Member Home
  • Start Free Trial
  • Gift Membership

    Shop the Store

  • Books
  • DVDs
  • Taunton Workshops

    More

  • FHB Ambassadors
  • Reader Projects
  • Podcast
  • Customer Support

    Account

  • Log In
  • Join

Newsletter

Get home building tips, offers, and expert advice in your inbox

Sign Up See all newsletters

Follow

Join All Access

Become a member and get instant access to thousands of videos, how-tos, tool reviews, and design features.

Start Your Free Trial

Subscribe

FHB Magazine

Start your subscription today and save up to 52%

Subscribe

We hope you’ve enjoyed your free articles. To keep reading, become a member today.

Get complete site access to expert advice, how-to videos, Code Check, and more, plus the print magazine.

Start your FREE trial

Already a member? Log in