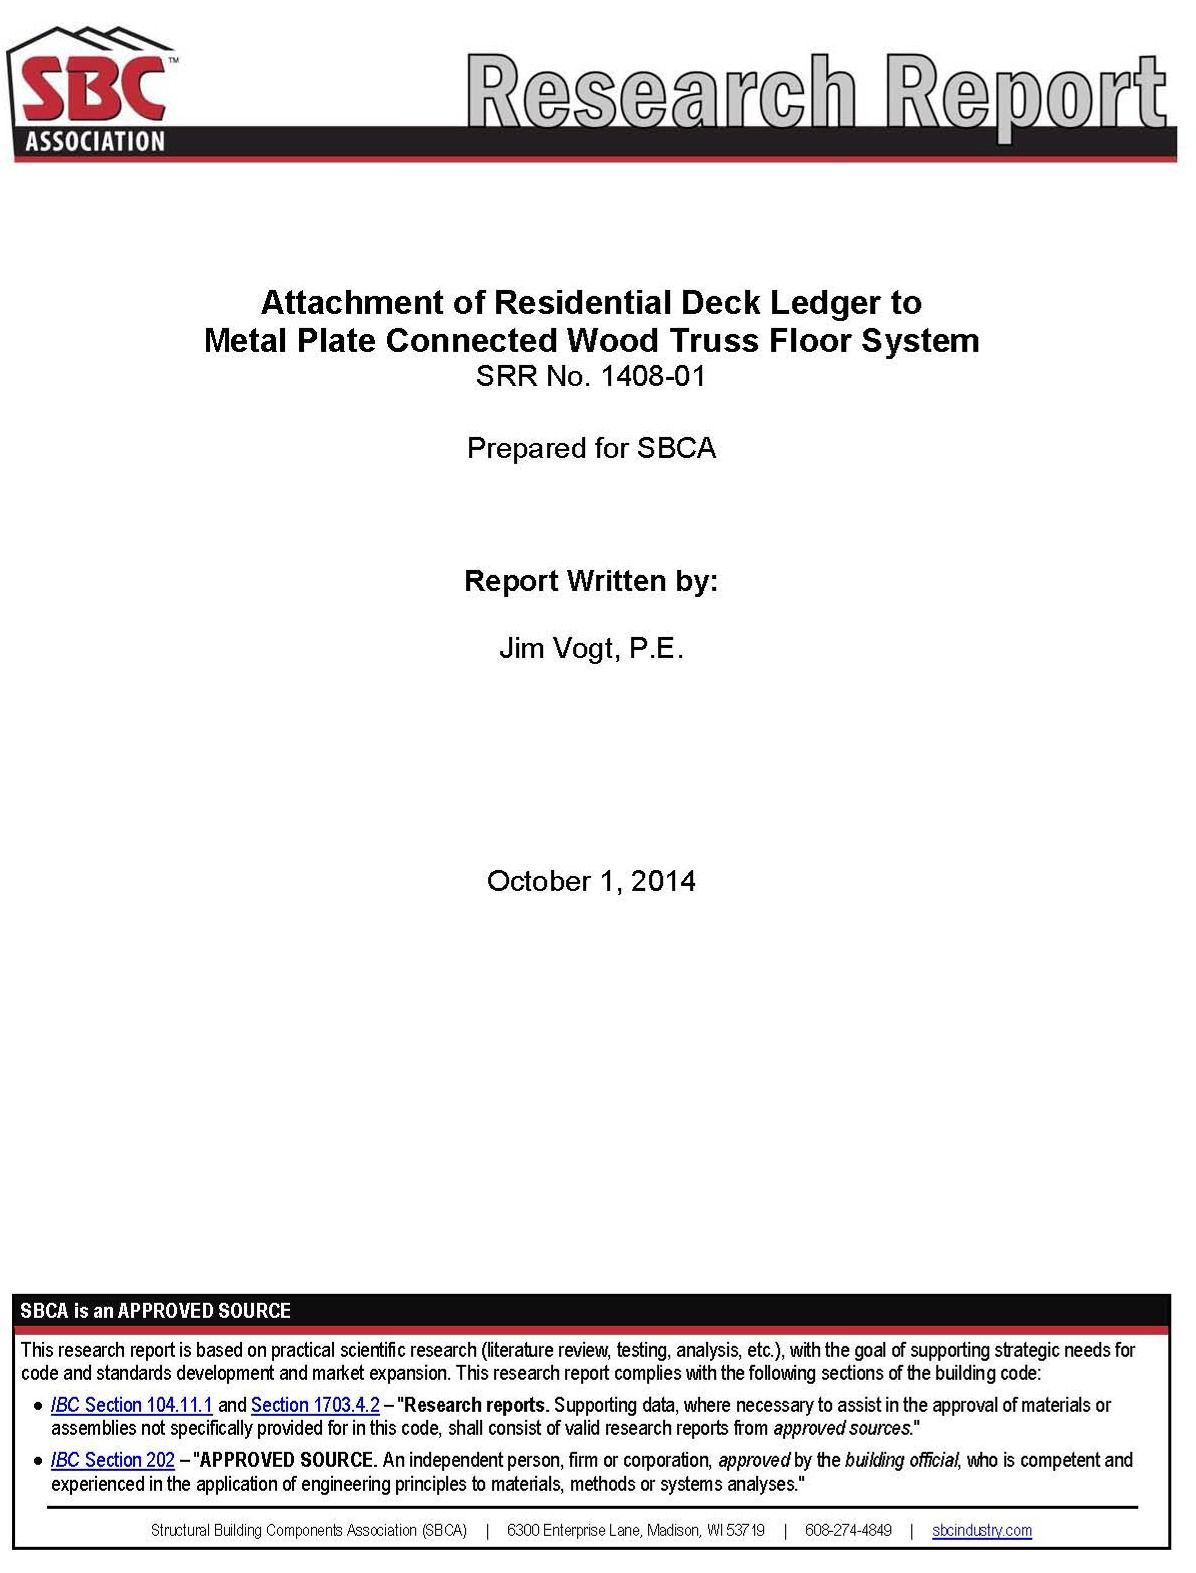
 The SBCA’s research report Attachment of Residential Deck Ledger to Metal Plate Connected Wood Truss Floor System is a mouthfull, but it is packed with details and fastener tables that make it clear how to mount a deck ledger to a truss floor system. The report has the same title as a 2010 Tech Note (see previous blog post) but is clearer to understand.
The report and its details and fastening schedules will need to be approved by the local building official before using them.

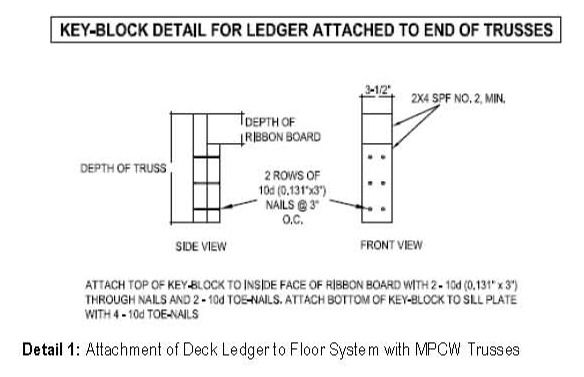
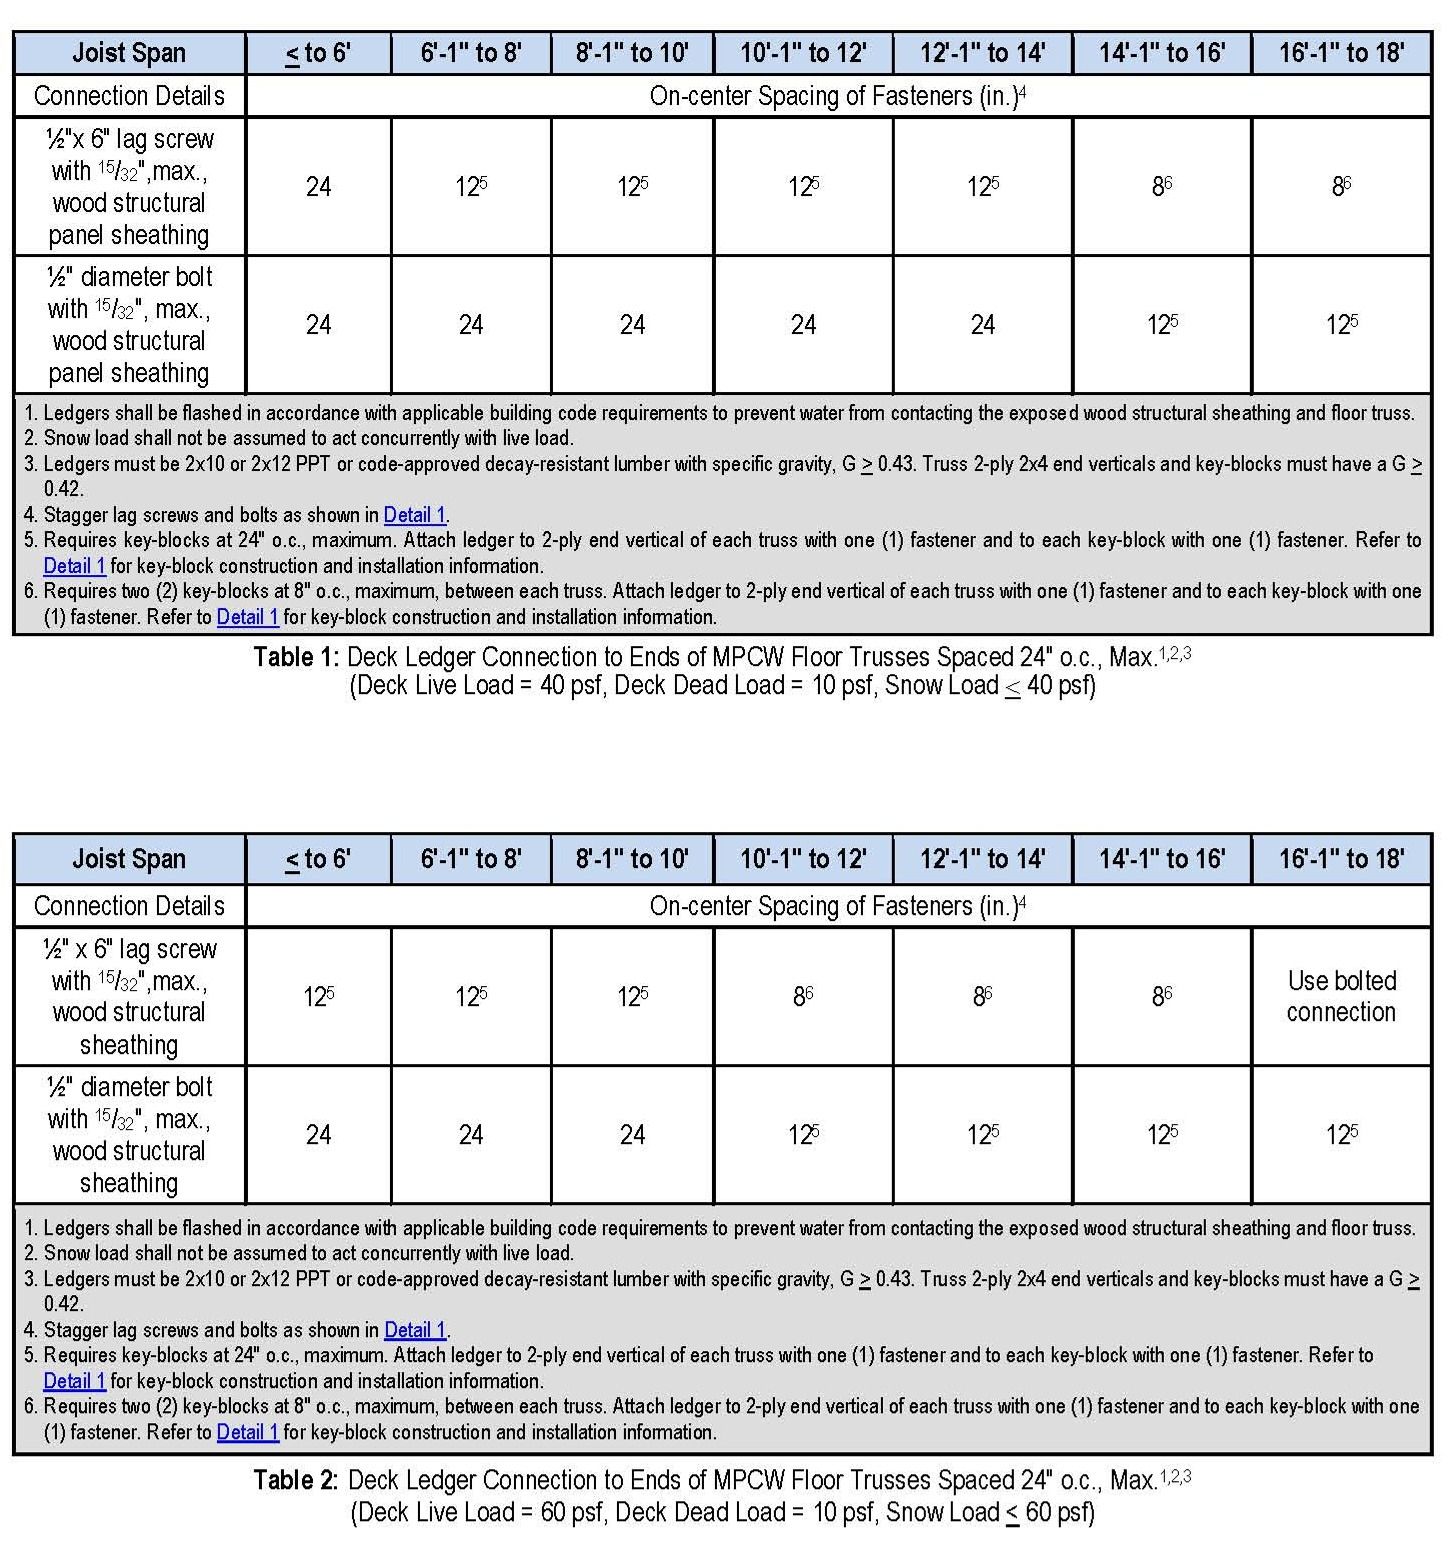
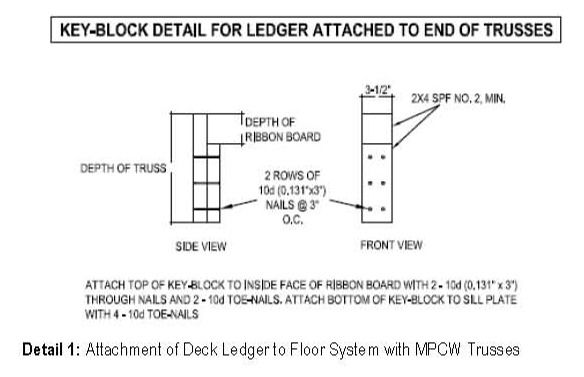
In most cases you’ll need to install “key-blocks” (doubled-up 2×4 blocks) between the ribbon board and the sill plate at a frequency to match the fastener spacing tables. This means if you’re installing a deck on an existing house you may have to cut into a finished ceiling to install the blocking.
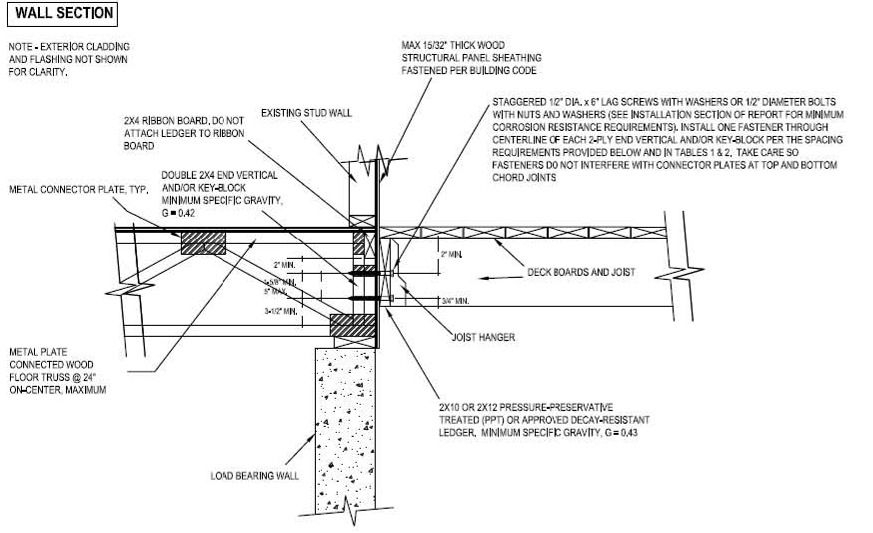
Fasteners are driven through the ledger and into the double 2x truss end and key-blocks. Only one fastener per block or truss location is permitted.

The figure text includes a lot of installation information. One important condition to note is that the deck ledger board is limited to a 2×10 or 2×12. So if you’re framing a deck with 2x8s, be sure to use a larger ledger for proper mounting.

There are fastener tables for mounting a ledger to the end of floor trusses (shown) and for mounting to the side of a floor truss (the end truss). One table is for the code-minimum 40 psf live / snow load and the other for 60 psf live / snow loads.
Other details include fastener placement on the ledger, Key-Blocks for the side of a ladder-framed floor truss, and a lateral load connection based on the 2015 IRC 750 lb. lateral load detail.
The report is available by contacting the SBCA.
Fine Homebuilding Recommended Products
Fine Homebuilding receives a commission for items purchased through links on this site, including Amazon Associates and other affiliate advertising programs.

8067 All-Weather Flashing Tape

Handy Heat Gun

Affordable IR Camera
