FHB Logo Facebook LinkedIn Email Pinterest Twitter Instagram Plus Icon Close Icon Navigation Search Icon Navigation Search Icon Arrow Down Icon Video Guide Icon Article Guide Icon Modal Close Icon Guide Search Icon Skip to content
Subscribe

In every issue you'll find...

  • Expert insights on techniques and principles
  • Unbiased tool reviews
  • Step-by-step details to master the job
  • Field-tested advice and know-how
Subscribe Now!
Subscribe
  • How-To
  • Design
  • Tools & Materials
  • Videos
  • Blogs
  • Forum
  • Magazine
  • Members
  • FHB House
  • Podcast
  • Join
  • Log In
Subscribe

Rhode Island 2016

The 2016 FHB House is energy-smart, connected, healthy, and durable. It’s small and sensible. Most of all, it’s a valuable model home, meant to educate designers and builders who aspire to create high-performance houses that are exceptional in their quality, comfort, and style.

How-To

Exterior Insulation

A Roxul ComfortBoard IS installation offers advantages: thermal break, increased wall R-value, and drainage

By Mike Guertin

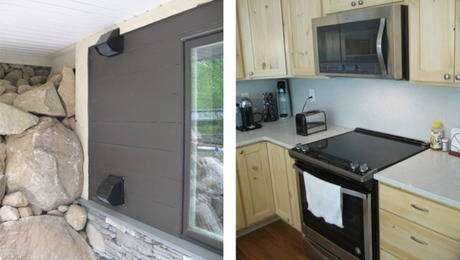
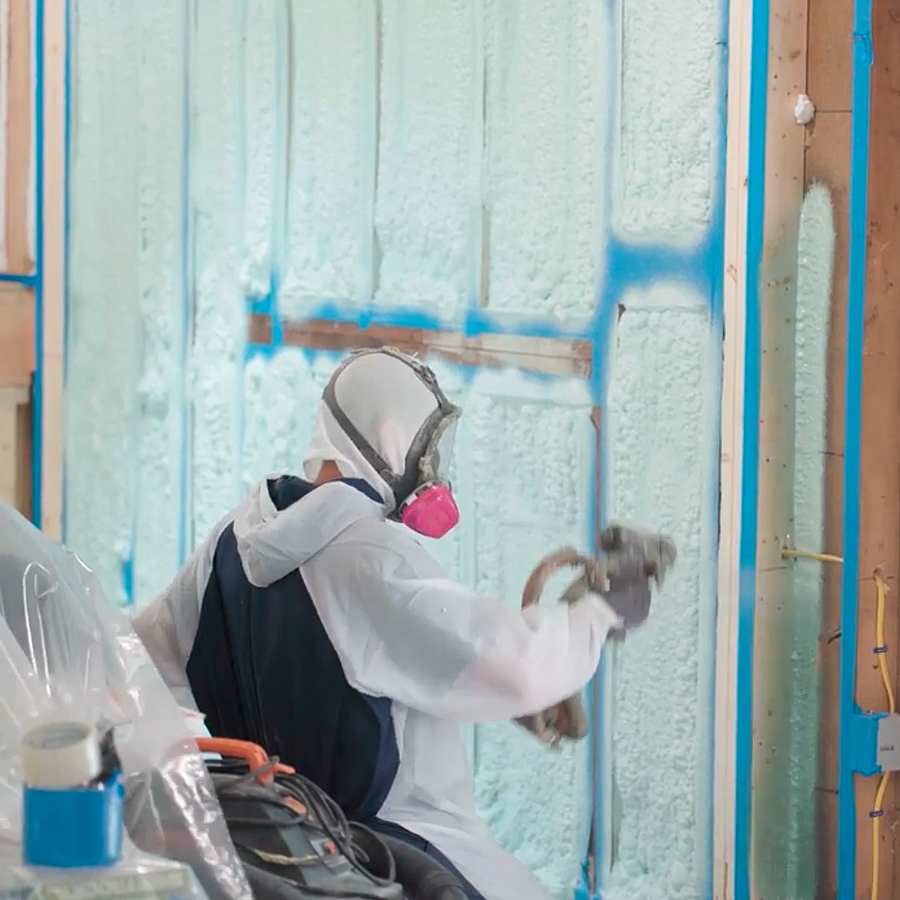
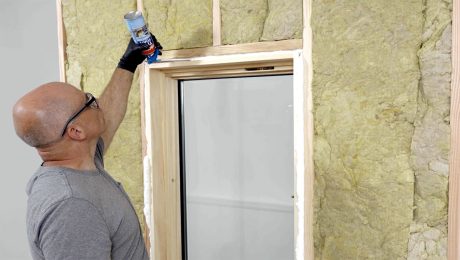
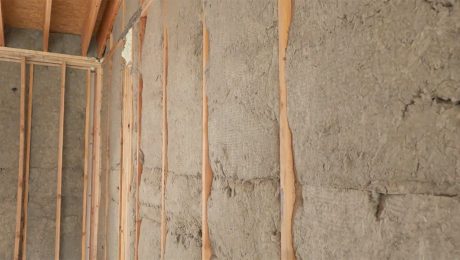
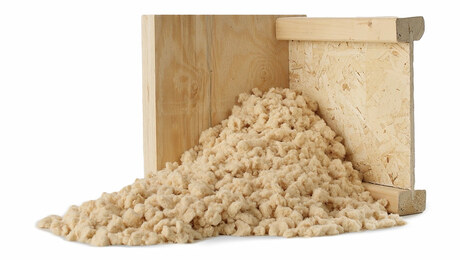
The exterior of the house will be covered with a 2-in. layer of Roxul ComfortBoard IS. Exterior insulation serves several functions: It increases the overall R-value for the wall, it’s a thermal break between the wall framing and the exterior, and it insulates the wall sheathing from the exterior in winter to reduce the chance of condensation on the inside face. Another advantage of Roxul insulation is that water drains through it. We are creating a vented rain screen, but should any water reach the space and wet the Roxul, the water will drain right through it.

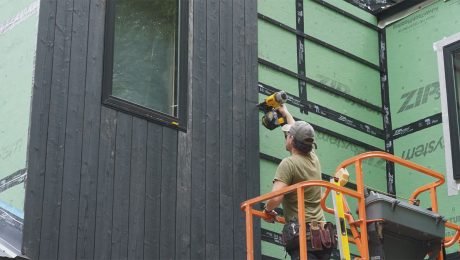
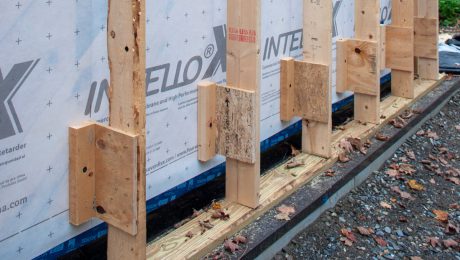
I’ve installed exterior insulation on homes for the last 14 or so years using EPS, XPS, and polyiso. This is my first time using Roxul. The main installation difference between the foam insulation board and Roxul is that Roxul is more compressible. That means we have to be careful when screwing the 1×3 furring. If we overdrive the screws, the unevenness of the furring will telegraph through the siding.Roxul 3Roxul 1

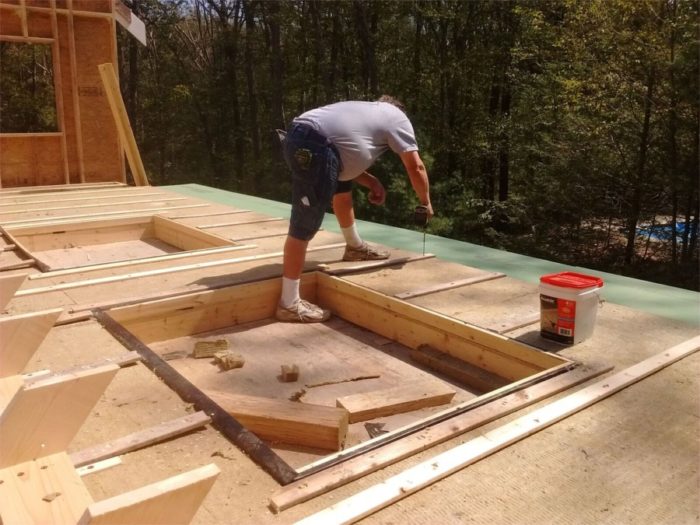
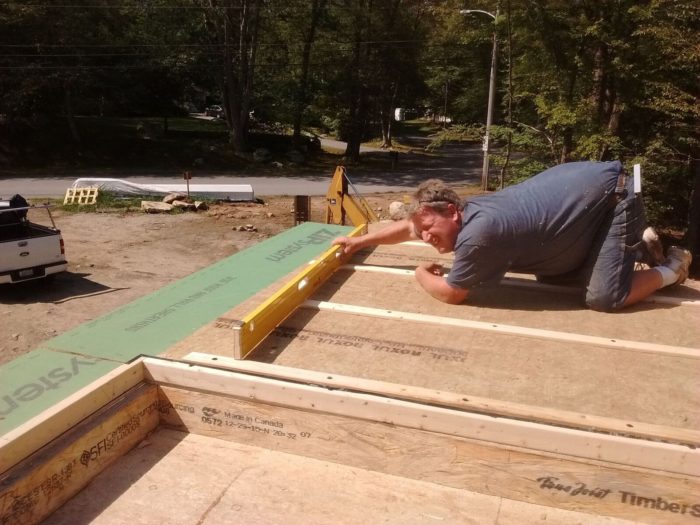
We selected 4-1/2-in. FastenMaster’s HeadLok screws. They are sized to bite into the studs by 1-1/2 in. Following a test report, we’re installing them 12 in. apart. To get a flat plane when driving the screws, we’re checking the furring surface with a straightedge.

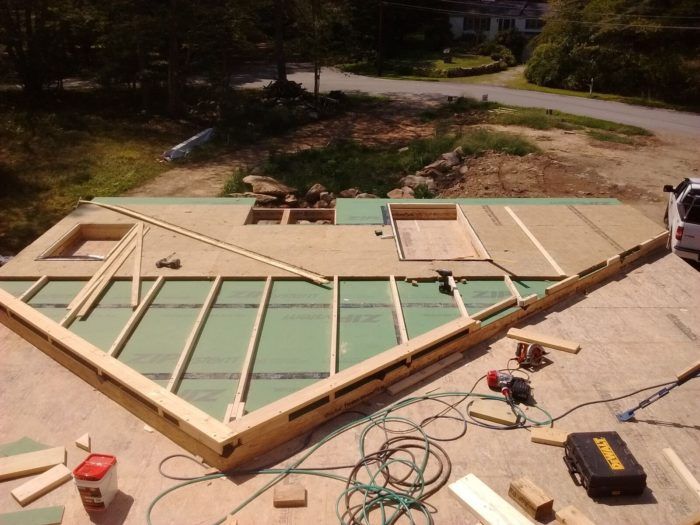
At this point, we’re installing the Roxul insulation before tilting up the gable ends and second-floor walls, so the process is simple. We just lay the straightedge over the furring and tweak screws in or out to get the plane flat. Later, when we install the Roxul on the first-floor walls, it may be a two-person job—one to hold the straightedge and another to drive the screws.

One other step to the process is drilling a slight countersink hole for the HeadLok screws. We use a 3/4-in. paddle bit and just bump it into the furring for 1/16 in. We could get away without drilling countersinks for the heads, but I’m afraid that slightly proud heads will cause some courses of siding to not lie flat.


Sign up for eletters today and get the latest how-to from Fine Homebuilding, plus special offers.

Signing you up...

This site is protected by reCAPTCHA and the Google Privacy Policy and Terms of Service apply.
See all newsletters
See all newsletters
×

Get home building tips, offers, and expert advice in your inbox

Signing you up...

This site is protected by reCAPTCHA and the Google Privacy Policy and Terms of Service apply.
See all newsletters
See all newsletters

New Feature

Fine Homebuilding Forums

Ask questions, offer advice, and share your work

Rhode Island 2016 Videos

Navigate the Build

  • Introduction
  • Foundation
  • Framing
  • Windows and Doors
  • Insulation
  • Roof
  • Siding and Trim
  • Mechanicals
  • Interior Finishes
  • Kitchen and Baths
  • Outdoor Spaces
  • Completed Home

Behind the Build

  • Kansas 2022
  • Wisconsin 2021
  • Nebraska 2021
  • Connecticut 2020
  • Kentucky 2019
  • California 2018
  • Vermont 2017
  • Rhode Island 2016
  • Twitter
  • Facebook
  • LinkedIn
  • Pinterest
  • Email

View Comments

  1. user-5179848 | Aug 29, 2016 01:59pm | #1

    I'm very much enjoying the ProHome series. I'm not a builder, just a DIY remodeler in Sonoma County, CA. I've re-sided about 75% of our house (among many other upgrades). We've been using foil backed polyiso, using the same HeadLOK screws, HardiPlank, etc. Two questions:

    You mention a test report that has guided you to install screws at 12" instead of what I believe was Hardie's recommendation of minimum 18". Could you link or source that? By practice we added screws at roughly 16" intervals (my dad is long-standing member of Over-Builder's Anonymous).

    Can you estimate time increase of countersinking balanced with how often you actually ran into the problem of proud screw heads? We considered countersinking a couple times but it hasn't seemed like it was ever really a problem. At 12" screw spacing perhaps it becomes more of an issue.

    One random comment: we once electrified two exterior walls of polyiso foil by nicking an electrical cable with a slight, off-angle miss of a HeadLOK screw. The wall was probably electrified for a couple weeks (we're slow) and was only discovered while kneeling in wet ground and touching the wall. Big jump, tested the foil, entirety of both sides of house ringing the tester. Thankfully I take loads of pictures and I was able to isolate the offending screw in 20". The nick of the cable was tiny, pretty amazing.

    Christopher Peck
    Sonoma County, CA

  2. User avater
    Mike_Guertin | Aug 30, 2016 10:24pm | #2

    REply to user - 5179848:
    The report was commissioned by Roxul and done by Building Science Corp. I think you can get a copy from Roxul directly by request.

    I drilled countersink holes on the furring we installed 24 oc on the 34 ft long second floor wall yesterday. It took me about 15 minutes.

    Your experience with grazing the hot wire is important note to anyone working on existing homes. A screw or nail can easily short or worse - 'electrify' the screw or in your case the aluminum backing on polyiso. We're lucky in that regard - new construction so there are no wires to hit (yet).

  3. User avater
    user-5604481 | Sep 01, 2016 12:32pm | #3

    I'm trying to get Lowe's in Waterford, MI to order some 2 inch comfort board for my exterior insulation. They will only order if I get half a semi load! I drove to Sarnia, ONT to get some from the Lowe's there, but its a 3 hour round trip with two border crossings involved. The more Fine Homebuilding illuminates Roxul Comfortboards benefits the sooner we may be able to get this product in the states. Its Perm ratings are great and allow your walls to dry to the outside, unlike foam board insulation. Call your local Lowe's and ask for it, maybe we can start a movement, like Alice's restaurant!

  4. Pat_Kiernan | Sep 05, 2016 05:17pm | #4

    One Roxul Report is available here:

    http://www.roxul.com/products/residential/technical+bulletins

    "Load and Deflection Testing"

    The Application and Installation guides on that page may also be helpful.

    If you want more detail, download look here:

    http://buildingscience.com/documents/insights/bsi068_rocks_dont_burn

    http://buildingscience.com/documents/bareports/ba-1204-external-insulation-masonry-walls-wood-framed-walls/view

    Scroll down and look towards the right side for download links of full reports.

Log in or create an account to post a comment.

Sign up Log in

Become a member and get full access to FineHomebuilding.com

More Rhode Island 2016

View All
  • Makeup Air for the Range Hood
  • Finishing the Basement
  • A Look at the Finished Home
  • Range Exhaust
View All

Fine Homebuilding House - Rhode Island 2016 Sponsors

  • AdvanTech Logo
  • American Standard Logo
  • AMVIC Logo
  • Boral_CulturedStone Logo
  • Boral_Flag Logo
  • Boral_TruExterior Logo
  • CertainTeed Logo
  • Coravent Logo
  • Dryerbox Logo
  • DXV Logo
  • Flir Logo
  • Gladiator Logo
  • MAXUSA Logo
  • ProtectoWrap Logo
  • Roxul Logo
  • Sikkens Logo
  • Weyerhaeuser Logo
  • Integrity Logo
  • SoftPlan Logo
  • Tamarack Logo
  • TiteBond Logo
  • TrusJoist Logo
  • Whirlpool Logo
  • Zehnder Logo
  • ZipSystem Logo
  • Feeney Logo

Up Next

Video Shorts

Featured Story

Forming Foundation Walls

In the first episode of FHB House Kansas, Travis and Joe of Catalyst Construction walk through details of their foundation walls.

Featured Video

How to Install Exterior Window Trim

Learn how to measure, cut, and build window casing made of cellular PVC, solid wood, poly-ash boards, or any common molding material. Plus, get tips for a clean and solid installation.

Related Stories

  • Podcast 481: Detailing a Slab, High-Performance Water Heaters, and DIY Dense-Pack
  • Podcast 479: One Story or Two, Basement Bunkers, and the Best DIY Spray Foam
  • The Fine Homebuilding Interview: Emily Mottram
  • Sheathing and Insulation in One

Discussion Forum

Recent Posts and Replies

  • |
  • |
  • |
  • |
  • |
  • |
View More Create Post

Highlights

Fine Homebuilding All Access
Fine Homebuilding Podcast
Tool Tech
Plus, get an extra 20% off with code GIFT20

"I have learned so much thanks to the searchable articles on the FHB website. I can confidently say that I expect to be a life-long subscriber." - M.K.

Get home building tips, offers, and expert advice in your inbox

Signing you up...

This site is protected by reCAPTCHA and the Google Privacy Policy and Terms of Service apply.
See all newsletters
See all newsletters

Video

View All
  • Podcast 481: Detailing a Slab, High-Performance Water Heaters, and DIY Dense-Pack
  • Podcast 479: One Story or Two, Basement Bunkers, and the Best DIY Spray Foam
  • Podcast 396: Protecting Foundation Insulation, Recycling Greywater, and Drying a Damp House
  • Insulating an Old Farmhouse
View All

Insulation and Weatherizing

View All Insulation and Weatherizing Articles
  • Sweet 16 website page with a bright blue background
    Live: The Selected Entries of the Wall Assembly–Sweet 16
  • Framing and sheathing on a net-zero home
    Detailed Assemblies for an Airtight Small Home
  • Foundation Insulation Options for a Concrete-Free Slab
  • An external air barrier
    How Good Is Your Air Barrier?
View All Insulation and Weatherizing Articles

BOOKS, DVDs, & MERCH

Shop the Store
  • Code Check Building 4th Edition
    Buy Now
  • 2021 Fine Homebuilding Archive
    Buy Now
  • Outdoor Projects
    Buy Now
  • Pretty Good House
    Buy Now
  • Shop the Store

Fine Homebuilding Magazine

  • Issue 309 - Aug/Sept
    • 10 Steps to Install Crown Molding on Cabinets
    • How to Get Sturdy Walls Without OSB
    • Choosing the Right Construction Tape for the Job
  • Issue 308 - July 2022
    • Pretty Good House Book Excerpt: Copper Farmhouse
    • 10 Dos and Don'ts for Electric In-Floor Heat
    • A Sturdy Rail for Outdoor Stairs
  • Issue 307 - June 2022
    • How to Raise a Post-Frame Home
    • Trimming Deck Stairs
    • Evolving an Energy-Efficient Envelope
  • Issue 306 - April/May 2022
    • Framing Stairs to an Out-of-Level Landing
    • Building a Zero-Energy Home for Less
    • Good-Looking and Long-Lasting Traditional Gutters
  • Issue 305 - Feb/March 2022
    • The Steady Surge in Residential Solar
    • The Fine Homebuilding Interview: William B. Rose
    • How Good Is Your Air Barrier?

Fine Homebuilding

Follow

  • twitter
  • facebook
  • instagram
  • pinterest

Newsletter

Get home building tips, offers, and expert advice in your inbox

Signing you up...

This site is protected by reCAPTCHA and the Google Privacy Policy and Terms of Service apply.
See all newsletters
See all newsletters

Membership & Magazine

  • Online Archive
  • Start Free Trial
  • Magazine Subscription
  • Magazine Renewal
  • Gift a Subscription
  • Customer Support
  • Privacy Preferences

Taunton Network

  • Green Building Advisor
  • Fine Woodworking
  • Fine Gardening
  • Threads
  • About
  • Contact
  • Advertise
  • Careers
  • Copyright
  • Terms of Use
  • Site Map
  • Do not sell my information
  • Privacy Policy
  • Accessibility
  • California Privacy Rights

© 2022 The Taunton Press, Inc. All rights reserved.

X
X
This is a dialog window which overlays the main content of the page. The modal window is a 'site map' of the most critical areas of the site. Pressing the Escape (ESC) button will close the modal and bring you back to where you were on the page.

Main Menu

  • How-To
  • Design
  • Tools & Materials
  • Video
  • Blogs
  • Forum
  • Reader Projects
  • Magazine
  • Members
  • FHB House

Podcasts

  • FHB Podcast
  • ProTalk

Webinars

  • Upcoming and On-Demand

Account

  • Log In
  • Join

Podcasts

  • FHB Podcast
  • ProTalk

Webinars

  • Upcoming and On-Demand

Popular Topics

  • Kitchens
  • Business
  • Bedrooms
  • Roofs
  • Architecture and Design
  • Green Building
  • Decks
  • Framing
  • Safety
  • Remodeling
  • Bathrooms
  • Windows
  • Tilework
  • Ceilings
  • HVAC

Magazine

  • Current Issue
  • Past Issues
  • Magazine Index
  • Subscribe
  • Online Archive
  • Author Guidelines

All Access

  • Member Home
  • Start Free Trial
  • Gift Membership

Shop the Store

  • Books
  • DVDs
  • Taunton Workshops

More

  • FHB Ambassadors
  • Reader Projects
  • Podcast
  • Customer Support

Account

  • Log In
  • Join

Newsletter

Get home building tips, offers, and expert advice in your inbox

Signing you up...

This site is protected by reCAPTCHA and the Google Privacy Policy and Terms of Service apply.
See all newsletters
See all newsletters

Follow

  • twitter
  • facebook
  • instagram
  • pinterest

Join All Access

Become a member and get instant access to thousands of videos, how-tos, tool reviews, and design features.

Start Your Free Trial

Subscribe

FHB Magazine

Start your subscription today and save up to 70%

Subscribe

We hope you’ve enjoyed your free articles. To keep reading, become a member today.

Get complete site access to expert advice, how-to videos, Code Check, and more, plus the print magazine.

Start your FREE trial

Already a member? Log in