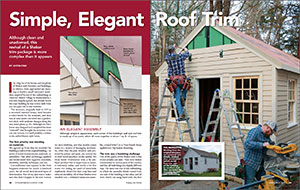
FHB Logo Facebook LinkedIn Email Pinterest Twitter Instagram Plus Icon Close Icon Navigation Search Icon Arrow Down Icon Video Guide Icon Article Guide Icon Modal Close Icon Guide Search Icon Skip to content
Main Menu
Subscribe

In every issue you'll find...

  • Expert insights on techniques and principles
  • Unbiased tool reviews
  • Step-by-step details to master the job
  • Field-tested advice and know-how
Subscribe Now!
Subscribe
  • How-To
  • Design
  • Tools & Materials
  • Videos
  • Blogs
  • Forum
  • Magazine
  • Members
  • FHB House
  • Podcast
  • Join
  • Log In
Main Menu Subscribe
How-To

Installing Shaker-style Roof Trim

In this video, learn how to install an elegant but tricky roof-trim detail modeled after a Shaker garden shed at historic Hancock Shaker Village.

Transcript: One side of the building is pretty close to being wrapped up–we’re just wrapping up the siding now. From the inside out, what we have here is Zip System® sheathing, we have core event furring strips to create a gap, and we have LP SmartSide Lap Siding for the trim. We’re using Boral TruExterior, which is a poly ash material. The idea here is that we’re using really durable materials that can take a punch. We want this building to really last and because we’re doing it kind of as a weekend by weekend project, it was important that it be able to stand up to the elements while we were building it whereas wood trim and wood siding could start to soak up water while we’re in the middle of the process.

Background and building a roadmap

Read the article: Simple, Elegant Roof Trim

What we’re talking about now is the roof trim. In appearance, it’s a fairly simple trim detail that we modeled after this Shaker Shed at the Hancock Shaker Village. We reverse engineered how that trim went together, which they hand-cut, and actually, their model varied from one side of the building to the other, but we looked at all the different corners of their building and we kind of came up with our version of it as faithful to the original as we could.

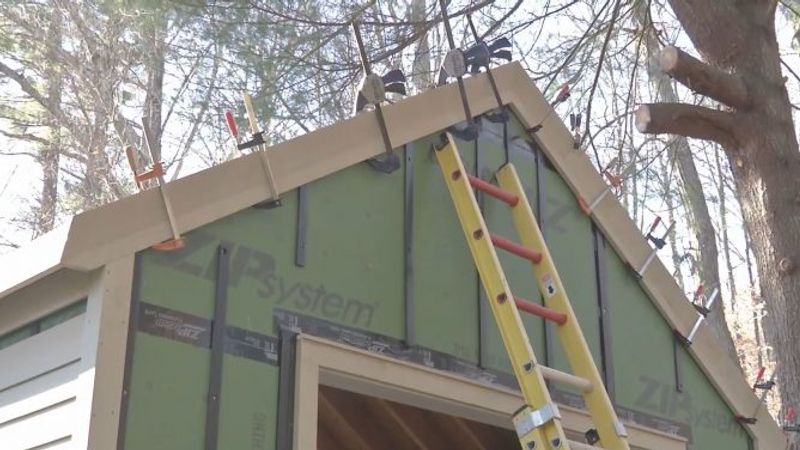
You can see this is kind of the magic where it all comes together. This is the view where you really get a sense of how complicated this is. Now, I have this little mock-up that we built back in the shop to kind of make sure we knew all of our angles and it took some fussing, but I think we got there. This is kind of the roadmap to making these cuts and it’s a kind of a head-scratcher. It’s really easy to get confused in the middle of this and have a piece oriented the wrong way, but let me show you how we do it.

So, we’re going to start with this piece back here and as you can see we already have the eave trim on and we already had the bottom piece of rake trim, so now we just need to add that secondary piece of crown molding at the top. This should be fairly straightforward, but let’s see how it goes.

This is another piece of Boral TruExterior–it’s 5/4 x 6. We’re going to use this for our top piece of crown. When in doubt, just hold it up and use the building as as your guide to make sure you’re not screwing it up because these pieces of trim are not are not inexpensive and one wrong cut and you could end up wasting a whole piece. The easiest way to keep track of this, because it does get confusing, is to write down all of your notes from your mock-up right on the mock up itself and that includes not just the degrees of miter and bevel, but also instructions like have this side facing out at this side against the table. When you’re on the job-site you don’t want to have to think about it. Just have a roadmap. It’s hard enough even with this.

Test the fit

All right, let’s see how it fits. That’s pretty good. What I might do here is knock a little bit off the bottom of this piece so it’s got a bevel and it sits tighter. Just to make sure I get a snug joint on this piece and the one up there, I’m just going to bevel a little bit with the block plane. This stuff actually planes out beautifully­–it’s just like wood although you may have to re-sharpen your blade after.

Looks pretty good to me. We’ve got a nice tight miter with a little gap right here, but that’s fine. We’re going to add some polyurethane adhesive there so that it’s going to foam and fill out.

I’m just going to nail this sparingly and then I’m going to go grab some quick clamps and I’m actually going to pinch it tight until the glue sets up. You can see the clamps really pull that thing nice and tight together and eliminate any gaps you might have running up along the rake.

We’ll leave those on for at least an hour–sometimes more. What you want to see is the glue starting to foam out and we can come back after it dries and just chisel it off. You notice that I stopped short here and, in this case, I didn’t have any stock that made it from one end to the other in one piece, but even if I did I actually kind of like cutting it. It allows me to finesse one end and then the other, and this seam in the middle, if it’s glued and then painted, it disappears.

Next, I’m just going to cut this little section with the miter at top and then we’ll do the other side. Last up we have to fit this top piece of trim which is going to be compound miter at the top, check the fit, and it’s good to go.


Sign up for eletters today and get the latest how-to from Fine Homebuilding, plus special offers.

Sign Up

Get home building tips, offers, and expert advice in your inbox

×
X
X

New Feature

Fine Homebuilding Forums

Ask questions, offer advice, and share your work

Log in or create an account to post a comment.

Sign up Log in

Become a member and get full access to FineHomebuilding.com

Up Next

Featured Story

FHB-Podcast, episode 319

Podcast 319: Building in a Flood Zone, Who Pays for Warranty Work, and Converting Attics to Living Space

Brian, Rob, and Patrick hear form listeners about protecting foundation insulation and building Baltic-birch cabinets before taking listener questions on foundation designs for flood zones, who pays labor costs for warranty work, and attracting clients with COVID-safe work practices.

Featured Video

SawStop's Portable Tablesaw is Bigger and Better Than Before

The 10-in. Jobsite Saw PRO has a wider table, a new dust-control port, and a more versatile fence, along with the same reliable safety mechanism included in all SawStop tablesaws.

Related Stories

  • Shingle Holder

  • Sidewall Shingles With a Flare

  • Make a Copper Flashing Boot

  • Truss Options

Discussion Forum

Recent Posts and Replies

  • |
  • |
  • |
  • |
  • |
  • |
View More Create Post

Highlights

  • Fine Homebuilding All Access
  • Fine Homebuilding Podcast
  • Tool Tech

    Plus, get an extra 20% off with code GIFT20

  • "I have learned so much thanks to the searchable articles on the FHB website. I can confidently say that I expect to be a life-long subscriber." - M.K.

    Get home building tips, offers, and expert advice in your inbox

    Sign Up See all newsletters

Video

View All
  • Exterior PVC Trim: Windows and Doors

  • how to install PVC blocking for plumbing and electric fixtures

    Exterior PVC Trim: Wire and Pipe Penetrations

  • how to install PVC corner boards

    Exterior PVC Trim: Corners, Inside and Out

  • how to install PVC water table trim

    Exterior PVC Trim: Water Table and Cap

View All

Exterior Siding and Trimwork

View All
  • Smart Siding Tool

  • High-Strength, Long-Life Lap Siding

  • Simple, Elegant Trim for a Shed

  • Streamlined Skirtboard

View All

BOOKS, DVDs, & MERCH

Shop the Store
  • Fine Homebuilding Magazine Slipcase

    Buy Now
  • Musings of an Energy Nerd

    Buy Now
  • 2020 Fine Homebuilding Archive

    Buy Now
  • Code Check Building 4th Edition

    Buy Now
  • Shop the Store

Fine Homebuilding Magazine

  • Issue 297 - Feb/Mar 2021

    • Foundations for Success
    • Staircase Renovation
    • Ditch the Hose
  • Issue 296 - Dec 2020/Jan 2021

    • Insulating Glass Keeps Getting Better
    • Simple Way to Make Old Walls Straight and Plumb
    • Making Sense of Minisplits
  • Issue 295 - Kitchens & Baths

    • Condo Kitchen Reimagined
    • Row-House Remodel
    • Rise of the IAQ Monitor
  • Issue 294 - Oct/Nov 2020

    • Schoolhouse Reimagined
    • Tool Test: Folding Sawhorses
    • A Better Way to Build Tall Walls
  • Issue 293 - Aug/Sept 2020

    • A Practical Guide to Fall Protection
    • Installing Frameless Cabinets
    • Make Any Tablesaw Safer

Fine Homebuilding

Follow

Newsletter

Get home building tips, offers, and expert advice in your inbox

Sign Up See all newsletters

Membership & Magazine

  • Online Archive
  • Start Free Trial
  • Magazine Subscription
  • Magazine Renewal
  • Gift a Subscription
  • Customer Support
  • Manage Preferences

Taunton Network

  • Green Building Advisor
  • Fine Woodworking
  • Fine Gardening
  • Threads
  • About
  • Contact
  • Advertise
  • Privacy Policy
  • Careers
  • Copyright
  • Terms of Use
  • Accessibility
  • CA Privacy Rights

© 2021 The Taunton Press, Inc. All rights reserved.

    Main Menu

  • How-To
  • Design
  • Tools & Materials
  • Video
  • Blogs
  • Forum
  • Reader Projects
  • Magazine
  • Members
  • FHB House
  • Podcasts

  • FHB Podcast
  • ProTalk
  • Account

  • Log In
  • Join

    Podcasts

  • FHB Podcast
  • ProTalk
  • Popular Topics

  • Kitchens
  • Business
  • Bedrooms
  • Roofs
  • Architecture and Design
  • Green Building
  • Decks
  • Framing
  • Safety
  • Remodeling
  • Bathrooms
  • Windows
  • Tilework
  • Ceilings
  • HVAC

    Magazine

  • Current Issue
  • Past Issues
  • Magazine Index
  • Subscribe
  • Online Archive
  • Author Guidelines

    All Access

  • Member Home
  • Start Free Trial
  • Gift Membership

    Shop the Store

  • Books
  • DVDs
  • Taunton Workshops

    More

  • FHB Ambassadors
  • Reader Projects
  • Podcast
  • Customer Support

    Account

  • Log In
  • Join

Newsletter

Get home building tips, offers, and expert advice in your inbox

Sign Up See all newsletters

Follow

Join All Access

Become a member and get instant access to thousands of videos, how-tos, tool reviews, and design features.

Start Your Free Trial

Subscribe

FHB Magazine

Start your subscription today and save up to 52%

Subscribe

We hope you’ve enjoyed your free articles. To keep reading, become a member today.

Get complete site access to expert advice, how-to videos, Code Check, and more, plus the print magazine.

Start your FREE trial

Already a member? Log in