
Building Brick Arches
A seasoned mason's guide to planning and constructing this classic Roman-styled architectural feature.
Synopsis: Mason John Carroll walks through the process of building four semicircular brick arches for the support structure under an addition. Step-by-step photographs depict building and setting the forms, laying the first and subsequent courses, revealing the inner arch, and finishing the joints. Carroll explains how to calculate the brick spacing for each course, and which tools best fill, pack, and mold the mortar for a concave profile.
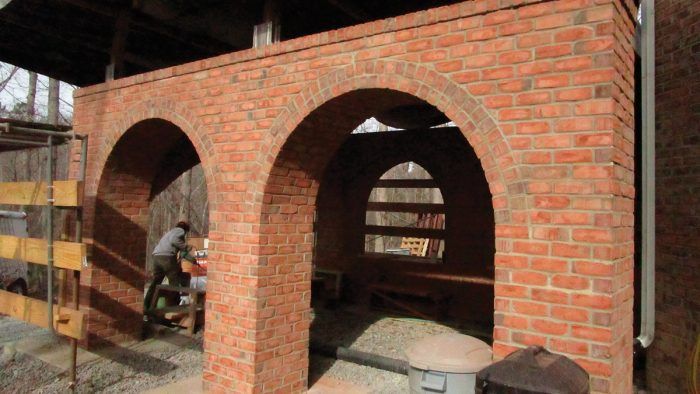
I’ve been doing masonry work for decades, and the vast majority of that work involves setting rectangular shapes down in straight lines. But once in a while, I get to work outside the straight lines and build brick arches, which demand a higher level of planning and layout. I recently built a series of brick arches for the support structure under an addition.
Although the arch is a very strong and time-tested architectural element, the arches for this project were mainly aesthetic. The actual support for the addition came from six cast concrete pillars that were placed before I arrived. My job was to add brick veneer around the columns and then to connect the columns with arches: four semicircular arches (what I call Roman arches) on the sides and a segmental arch at one end. This article will cover my approach to the general process of laying out and building the Roman arches.
The grade under this addition sloped down, and on the higher side, the contractor had joined the columns with poured-concrete sections at bench height, while on the lower side he left those spaces empty to provide walkout access. The first task was laying the brick veneer around the concrete columns up to where the arches would begin. I went 18 courses high, and with some careful planning, the top courses all ended up three bricks wide, which gave me an all-important consistent starting point for building the arches.
Space the bricks
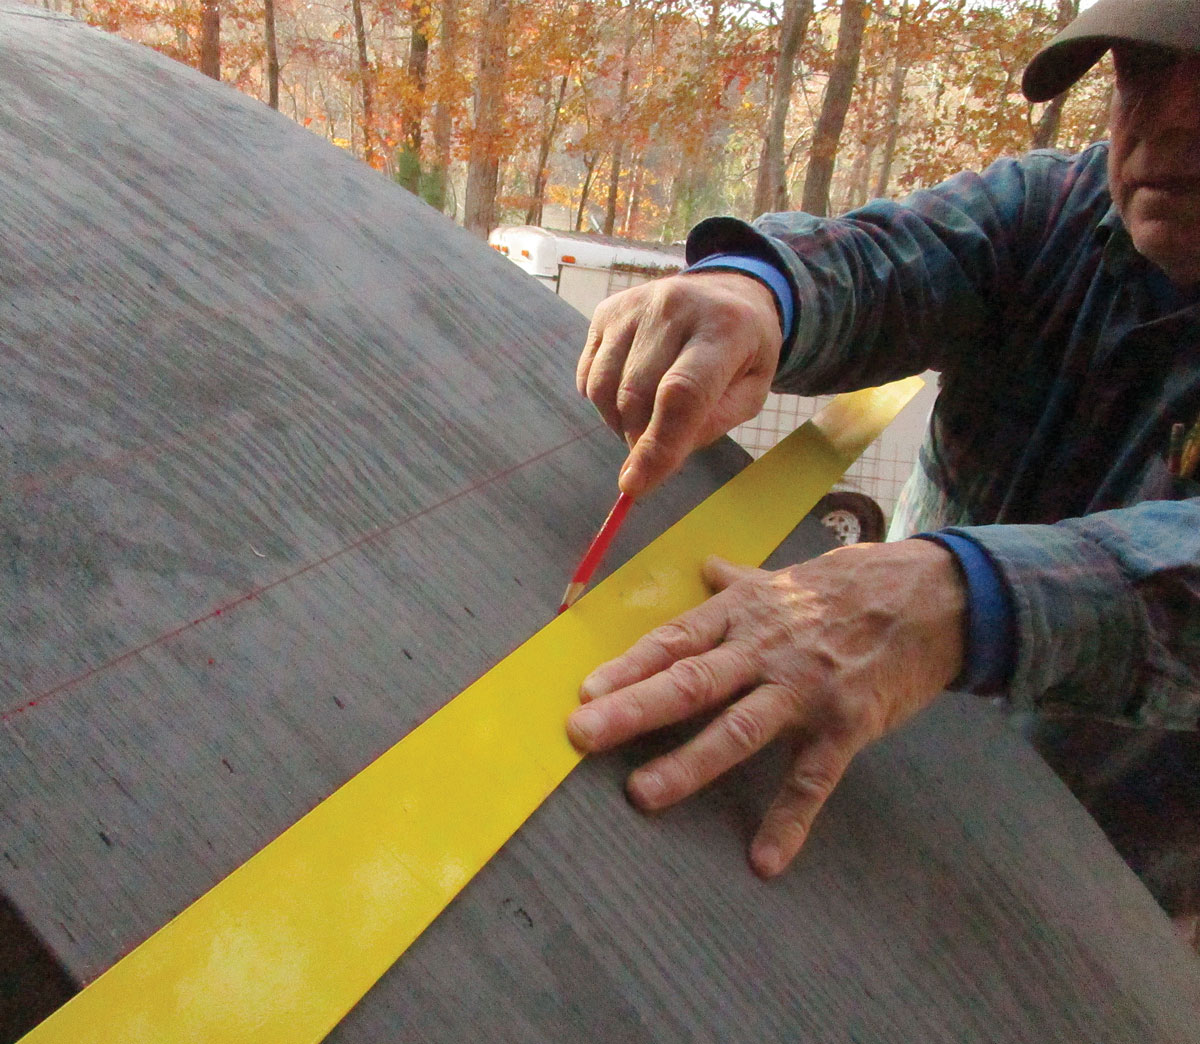
I planned to lay the bricks for the arch in an offset (staggered) “running bond” pattern. To have the same pattern where the arch meets the columns on both sides, you need an odd number of courses. To lay out an odd number of courses on an arch, masons start with a “keystone” brick that straddles the exact center of the arch. I begin by marking the form’s center (its apex), then I measure and mark half the thickness of a brick in both directions.
To get the spacing for the courses on the first layer, I first rip a 1⁄8-in.-thick strip of wood from clear 2x material for a story pole. I hold one end of the strip at the bottom of the form, tight to the course on the column where the arch starts, bend the strip around the form, and transfer the location of the center brick onto the strip.
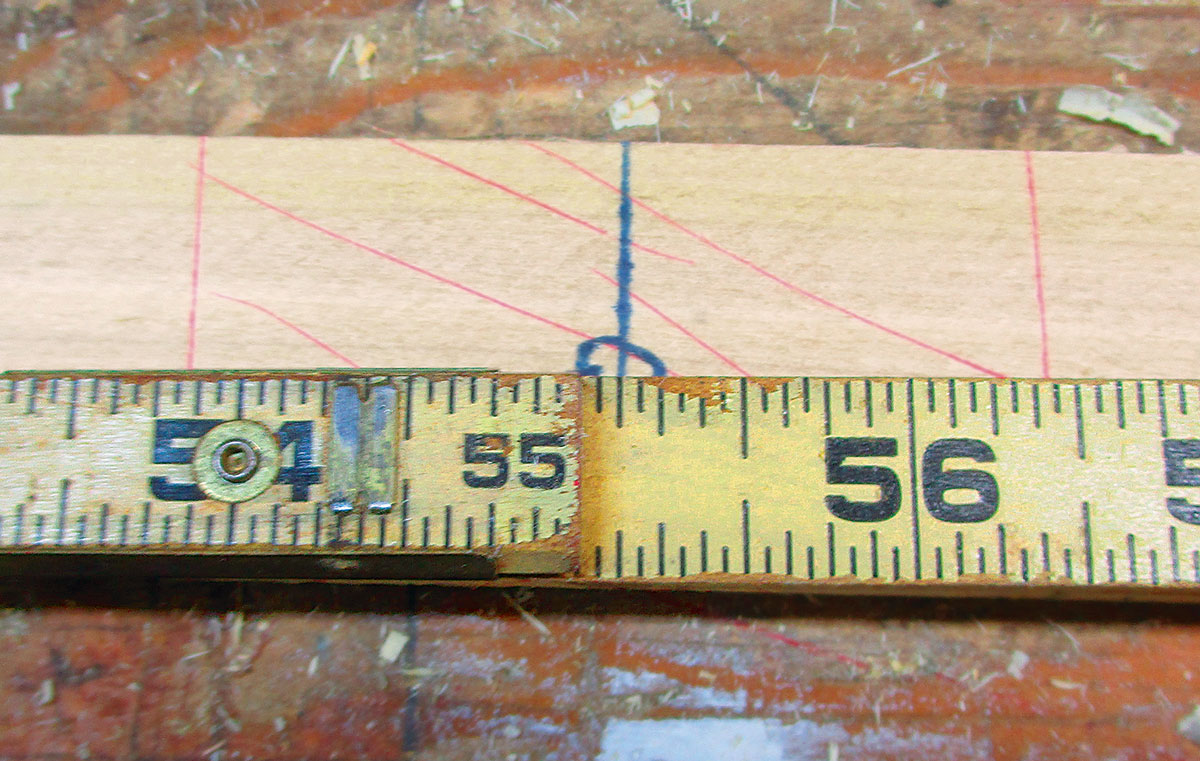
After laying the strip flat on top of the workbench, I measure the distance from the end that touched the column to the far side of the center brick 1 . In a typical mason’s layout, each “space” represents the size of one brick plus one mortar joint. By measuring to the far side of the center keystone brick, the number of spaces (bricks plus mortar joints) in the layout will be consistent for both sides of the arch. For these arches, the distance from the column to the far side of the center brick was 56-7⁄16 in., which I divided by 3-1⁄8 in.—the course spacing I’d used on the columns below the arches. I convert those measurements to decimal equivalents before doing the division to get the number of spaces; the result of this particular math problem is just over 18.
Because the tapered mortar joints on the arch are wider at the top, this spacing tends to look too big in the finished arch. I add a space, making it 19, and re-divide the overall distance by this figure. For this arch, that results in a spacing of 2.9703947 in., or about 1⁄32 in. shy of 3 in. This spacing yields a fairly narrow 1⁄4-in. mortar joint where the rowlock courses rest on the form, but the tapered mortar joints make that spacing look acceptable.
In most construction—especially in masonry work—1⁄32 in. is usually negligible, so rounding up the spacing to an even 3 in. would seem to make sense. But when 1⁄32 in. is added 19 times, the cumulative gain of 9⁄16 in. in 18 courses becomes significant; the last course would not fit in the remaining space. To solve the cumulative error problem, use a regular old calculator and convert to metric measurements, which eliminates the process of changing inches to decimals and back again for the layout.
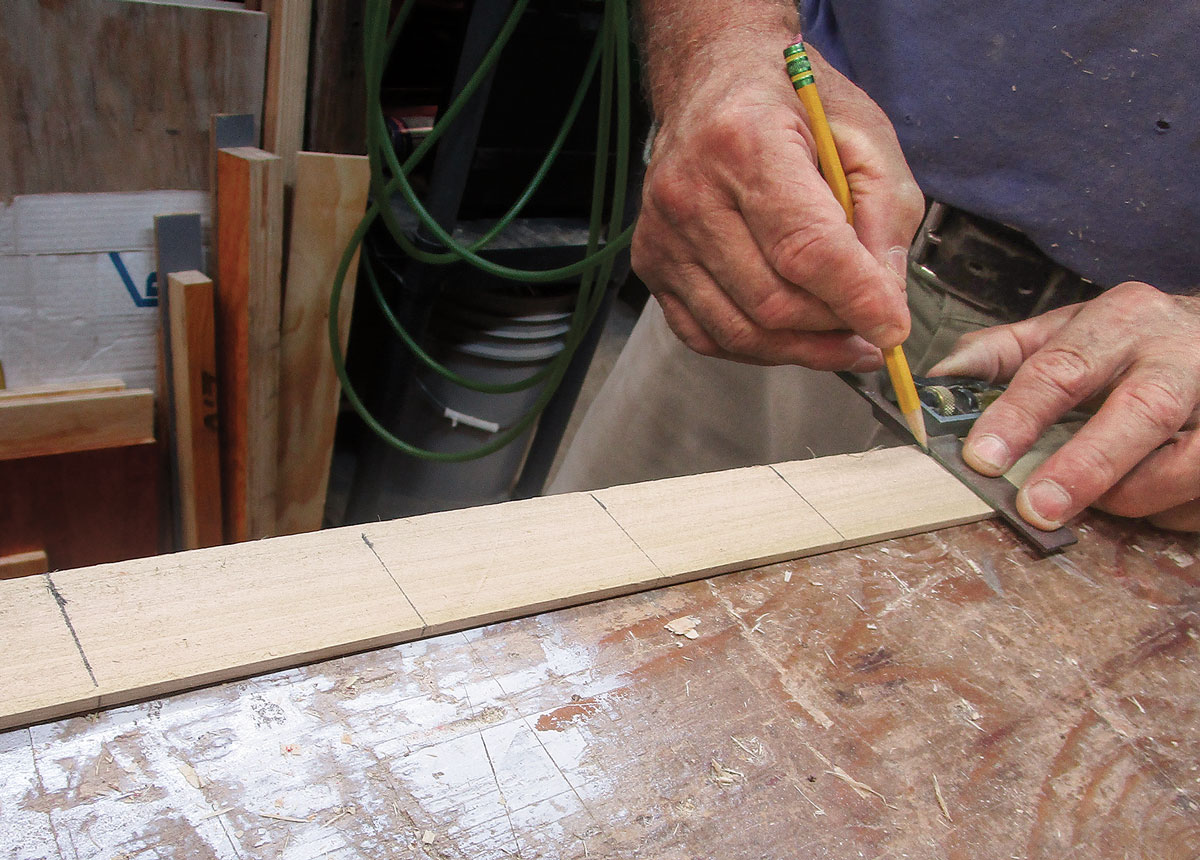
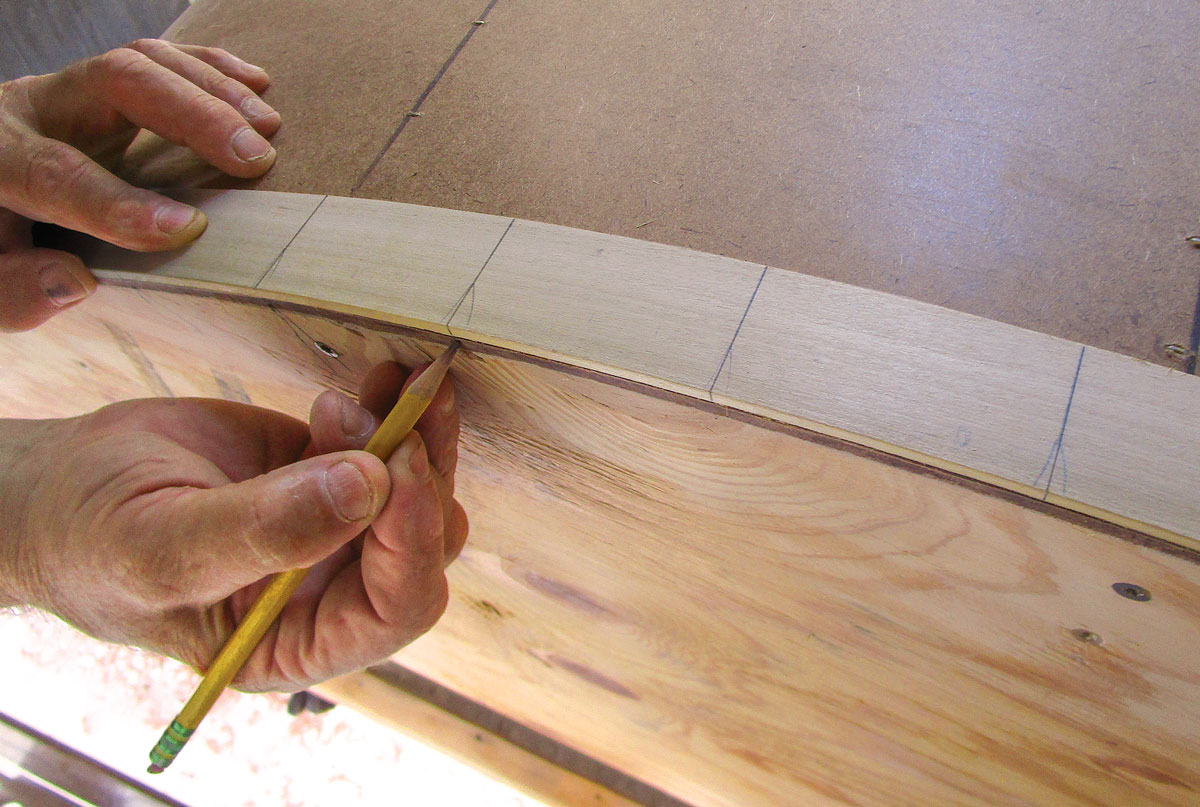
I then carefully transfer those measurements to the story-pole strip 2. The rounding represents less than 1 mm between spaces, or less than 1⁄25 in. With the spaces laid out on the strip, I transfer the layout to the form 3 . I mark the entire form on both sides and connect the layout marks with lines across the form to guide the actual course placement 4.
Lay the first course
To create the rowlock courses around the arch, the edge of the bricks have to lay flat against the curved form. To continue the running-bond pattern from the columns, I start every other course with a half brick. To keep the outside faces of the bricks in plane with the wall, I set them just inside guide strings I stretched between my corner poles.
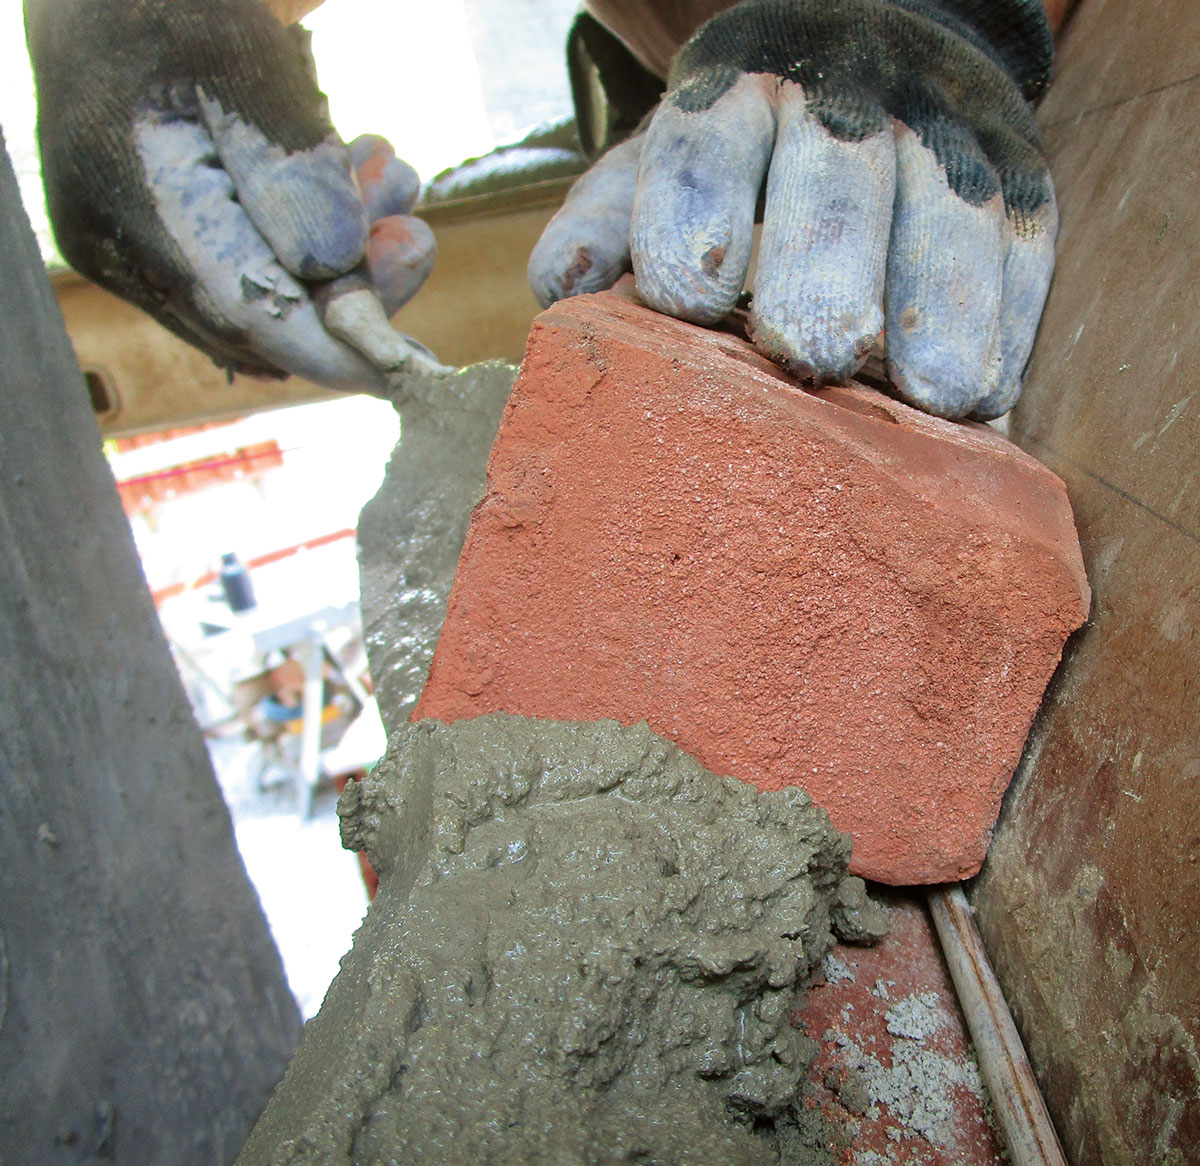
For structural purposes I want to fully pack the joints with mortar. But I also want to end up with neat, clean, and properly finished mortar joints on the inside face of the arch, which is hidden until the form is removed. To satisfy both of these goals, I pack the top edge of each brick about three-quarters full as I lay the bricks, leaving the bottom quarter clear of mortar 1. That bit I fill and tool after removing the form.
The orientation of the bricks changes as you work up and around the arch, starting nearly level but becoming increasingly vertical as you go up. The “keystone” brick in the center of the arch is completely vertical. On the bottom courses, I lay down a bed of mortar on the preceding course, but as the courses tilt up, it’s easier to butter each brick with mortar as I set it in place.

From Fine Homebuilding #298
To read the entire article, please click the View PDF button below.
Related Links:
