Foundation Insulation and Sill Overhang
I am a builder in Wisconsin, and we recently went through a code update, with the REScheck energy software now often resulting in requiring 1.5″ to 2″ foam for the exterior of basement foundations. We build homes with full basements in our region, historically using 1″ exterior foam for the full height, down to the footing.
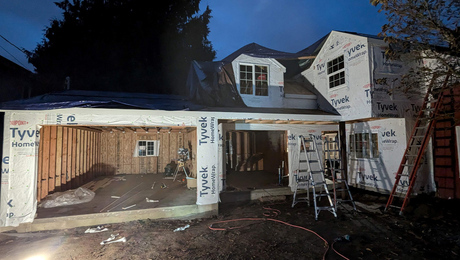
Our typical home uses 2×6 exterior walls with OSB on the exterior. We use I-Joist floor systems. I have attached a cross section for this home to this post.
Our inspectors (local and state) are holding us to a 3/4″ to 1″ maximum overhang for the sill over the foam.
The problem is that when we go to 2″ foam, our exterior wall assembly does not line up with the foam, interrupting the drainage plane, and causing some issues with finishing this transition area.
We could always add 1/2″ foam to the exterior of the OSB (new wall bracing requirements necessitate that we stick with fully sheathing the home with OSB), but I would like to avoid the added cost of another layer of material on the exterior of the home.
My questions is: Are they correct in the maximum 3/4″ to 1″ maximum overhang? If they would allow a 1″ overhang for a 2×4 sill, why wouldn’t they allow a greater overhang for a 2×6 or 2×8 sill? Is there something I am missing, or an alternate solution?
Thanks in advance for your help on this.


Replies
I belive the max overhang is 1/3 the with of the framing, at least that is what we always used.
I have no problem wit a 2" overhang of a 2x6 sill, provided that the truss manufactures details for a cantilevered joist are met.
I assume the structural rim board is not bearing on the foundation, and that is what is causing your BI's concern.
mj, ICC certified building inspector
It would seem to make sense that if a 2x4 wall is sufficient structurally, then you could overhang 2" with a 2x6 wall. What about extending the joists out the 2" instead?
What would he do on the side parallel to the run of the joists?On the sides perpendicular to the joists, if he runs the joists out farther, with the rim unsupported, then I believe he'd need crush blocks inside the rim to take the weight of the wall above. The installation diagrams at http://www.ilevel.com show a lot of details that may be of use.Another possibility, admittedly going a lot further in terms of energy efficiency, is to do a double framed wall, with the inner wall bearing wall and roof loads down directly through the rim to the sill and foundation. The outer wall frame would carry only itself, sheathing, and windows, needing minimum bearing on the foundation. The BI will have to approve that, and maybe he'll want an engineer's stamp if it's over his head and wants to cover the other end.
The framing parallel to the foundation would have to be modified to allow an overhang. Depending on the loads and span, a lookout like a roof rake might work - bring it back a structural bay or two. The iLevel material you mentioned will probably be helpful.I'm not so sure the trouble and cost of a double wall would be worth the increased energy savings. Another option is to inset the wall framing the thickness of your sheathing, change to 2x4 framing and run the rigid insulation from foundation to roof.I still haven't come across a good detail to protect/cover the foundation insulation you see above grade.
For styrofoam exposed above grade, there are a number of products that address protection. One coating type material is:http://www.styro.net/FoundationandICFCoatings.htmlThere also are various sheet goods that can be used.
Why not overhang your sill plate 1" and overhang your wall plate. This will give 2", and you can pad out the rim area with 1" foam.
The rim is a hard place to insulate anyways, so you're killing two birds...
Jon Blakemore
RappahannockINC.com Fredericksburg, VA
This might add up to the same thing but I didn't quite get the sense of your suggestion; anyway -
how about insetting the rim board 2", ie almost having it in the middle of the studs bearing on it. That way you can carry the 2" foam up to cover the rim entirely and have no overhang of the sill over the edge of the foundation.
"...anyway -
how about insetting the rim board 2", ie almost having it in the middle of the studs bearing on it. That way you can carry the 2" foam up to cover the rim entirely and have no overhang of the sill over the edge of the foundation."
Any termite issues in Wisconsin at the OP's location? If so, then first the exterior foam might have to be borate-loaded EPS, and second I would think the OP would want the foam to terminate at a metal termite shield between sill and foundation.I suppose if a termite shield is used anyway, as a precaution, a separate piece of foam could be cut and fit over the rim, with the shield sticking out between the foam edges. Just thinking.
Or nasty Carpenter ants, which are fairly ubiquitous. I wouldn't use non-treated foam outside the foundation.
Tim,We're in the same book but not on the same page.My rim board is 1" out from yours. So the sill plate hangs over the concrete 2", the rim hangs over the concrete 1", and the 2x4 (or 2x6) wall plate is in the same plane as the concrete.
Jon Blakemore RappahannockINC.com Fredericksburg, VA
Got it. Another possible solution to the original problem that might work is what I think is called a brick-ledge at the top of the concrete; I guess that the best choice for any particular case depends on local code, local suppliers/workers and so on.
No termite issues here.
The 'rule of thumb' quoted by both local and state building code officials is that the bearing overhang can only be 1/2 of the thickness of material. (i.e., a 2x material could only overhang 3/4") In my research, I have discovered that builders that have been using 2" foundation foam have been able to double the sill plate in order to get a 1.5" overhang.
The alternative of creating a cantilever with the joists ended up being a costly solution in complying with the joist manufacturer's cantilever detail on the parallel joist ends.
Adding foam to the exterior above grade walls in order to match up the drainage plane was cost-prohibitive as well, as it requires two trips around the exterior. (OSB Wall sheathing plus foam)
In the end, I was able to modify my HVAC system by upgrading to a 95% efficient furnace, allowing me to pass the ResCheck calculation with only 1" foam. This required inputting each wall into the software separately and specifying the direction each faced, but it resulting in a passing score.
In this instance I was able to stick with 1" foam, but I am sure that in the future that will not always be the case with the new energy requirements.
We are doing the same on a house on Widbey Island. Maybe because of earthquake based codes, it is not uncommon to use 3x6 PT for mudsill and often for bottomplate and studs where sheeting breaks...in fact double sheeted walls need to have ply beaking on different studs so two out of three studs are 3x...but I digress.
We are actually using 3x8s over there, but from what I just learned from others in this thread, half of a 3x being 1 1/4'' plus 1/2'' sheating gets you close.
If you have all ready poured you have the issue of bolts heights. We are almost exclusively speced with 5/8'' bolts and 3'' square plate washers. Makes for fun layout when the concrete guys center everything on our lay out....