*
Discussion Forum
Discussion Forum
Up Next
Video Shorts
Featured Story
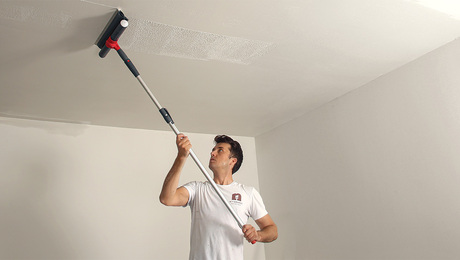
Skim-coating with joint compound covers texture, renews old drywall and plaster, and leaves smooth surfaces ready to paint.
Featured Video

Highlights


"I have learned so much thanks to the searchable articles on the FHB website. I can confidently say that I expect to be a life-long subscriber." - M.K.


Replies
*
I am building a house with a 12 slope(trussed). After trusses and sheathing I plan to put a covered front porch on using timbers and I could use some help on joinery.
Im using 4x8 header material, 4x6 exposed rafters with loft decking and 4x6 posts.
Any advice on joining the rafters to the roof, the rafters to the header and the header to the posts would be greatly appreciated. The porch will be a 5.
I've framed a number of houses but never a timber porch so any advice at all would help. Ideally I'd like to be talked through it from the footings on up but the joinery advice will help a lot too. Thanks in advance. Jeff ( enclosed is a picture)
*
All right Jeff!
Looks like you're planning to use tradtitional joinery techniques, keep it exposed, right? Or are you going to use metal fasteners?
What is the wood species?
Is the porch ceiling sloped or flat?
As far as the process from the footings up goes, are you planning to have a timber sill or will the footings support posts?
If it's going to have a sill around the perimter, they would be locked at that corners with a dovetail joint. The posts would join to the sill with a pegged mortise and tenon. Then if you go with a regular plate, a shouldered mortise and tenon is a good system, with a 45 degree knee brace between the two timbers, one on each side of the post parallel with the sill.
Atop the plate, the rafters will come to rest on a birdsmouth, with or without a mortise and tenon, depending on the situation. I'm thinking it may not be worth your time to join the two roofs together using timber framing joinery, rather use metal connectors and nails.
Does this help?
*
Yes that helps but sorry to dissappoint you but I'm not talking about that type of joinery---I'm going to use metal connectors and nails I just don't know which to use. I will have five posts under the deck with 5 4x6 finished posts (white pine ) on top of those. THe other side will be ledgered to the house. on top of posts will be a 4x8 header. 4x6 rafters with an open ceiling at a 5 slope. Simply put, how do i attach the header to the posts, the rafters to the header and the rafters to the sheathed trusses. Also, I need to raise the finished posts off the deck an 1/8th to 1/4 inch for water purposes. Any recommendations?(underneath the deck I'll have 6x6 treated on the footings)Thanks Mad Dog, Jeff
*
FYI you may find what you need to be readily available from Simpson, the metal connector company, check out http://www.strongtie.com. They can also do some pretty nice looking custom hangers.
noel
*Might be able to avoid hangers on at least the rafter connections, use the birdmouth with a pegged hole bored from the top. This would keep you from staring at Simpsons from within the porch, and give you some timber framing experience too. You could drawbore the hole, that is, drill your holes in the rafters about 1/16 inch further away from the holes in the "header," this technique forces the joint to close very tight.But, not everyone is interested in learning the craft, though I highly suggest it.MD
*Jeff, The best books are by Tedd Benson, Timberframe & The Timber-Frame Home. There is also Jack A Sobon's Build A Classic Timber-Framed house. check at your library. Some of the cuts are pretty easy and look a lot better then cheap metal connections. Or, you might try to lag bolt things together. If you recess the heads of the bolts you could cover them up with pegs. That will give the look of a true timber-frame, and if you have to put this up before the timbers dry completely, you can later remove the pegs, retighten the joints and reinsert the pegs. Remember to predrill all holes and it will help if you use a little bees wax or soap.
*Good advice Frenchy, those are excellent texts with reference to the joints I mentioned and how to cut them. The lag bolt idea could be carried to other details too.
*maybe an ECC series cap, which is a more substantial piece of iron, for the post to beam connections. You might sandblast, then wash with a chem solution to patina a pleasing color. Grind the flanges that come down the 4x6 posts with some tapers, like on a gate hinge. The top corners could be softened with the grinder as well. If you gotta use that stuff, at least leave your mark on it. Hmmn... Mad Dog, what would the 4x6 rafter to ledger detail be in traditional joinery? does it look just like a tight fitting plumb-cut , or can the joining method be exposed? Anyone, are porches in seismic regions subject to the same uplift criteria as the rest of a house? Can a porch roof with 4x10 hdrs/ 4x8 rafters turn a corner on a radius? I'd like to round the corners of the floor on a three sided porch, and have the roof follow it as well, yet have no posts in the radius portion of the corner. I am not sure what to call this kind of hip, as each rafter is of a different pitch through the corner.(right?) I've considered building up a laminated marine grade ply radius header to turn 90 degrees by using the floor as a template. I've also thought about using a 4x10 cantilever through the second floor on a 45 through the corner, to join to the rafter that extends from the building on a 45, at their intersection. That is, if there even is a rafter that will extend at a 45 off the building corner. This might form a load bearing member to take extra weight off my corner header. This will probably be a no-go if I have to have some kind of radius header engineered. I'm not worthy of all the thought this post would take to answer, (yet).
*Nathan, most timber frame rafters have birds mouths with or without tenons, ending flush with the plate on the plumb cut (no overhang). These joints are always pegged. The joint can be exposed, but from below it doesn't usually look like much.As for your question about the rounded corners, what is the radius you had in mind? If you just wanted to round off the corner, this should be possible. If you want to make a big radius, more complicated without the posts.MD
*Mad Dog78" apprx. is width of porch, and 78" radius from corner. I noticed posts in the corners of some much larger porches this weekend, but the ceilings were closed. I would like to show off some joinery technique in the rafters here, and if possible end posts at the start of the radius. Will also check out texts referenced. It seems I'm recently taking on projects that involve things I've never done before, will this involve much in the way of new tools for the frame? Compared to conventional stick framing, how much added time should a rookie at joinery expect to take? ( kinda vague I know...) thanks Nathan
*Tools. Well, consider that when timber framing was state of the art, the highest tech tool was a drilling machine that set up on the timber and bored a hole straight down through it by turning two levers.After that, there is efficiency. You can buy giant saws, oversized hand planers, mortising machines, flat bed trucks with cranes and a big, dry building to store all the material and tools in and work the timbers.So, how practical is really the question. I add tools as I need them, as in, I can no longer effectively produce without a spindle sander or a 24" bandsaw! Trouble you have is you don't know how far you want or need to go with timber framing so for now, you better not look at too many Mafell power tools!But I really recommend working with hand tools. Even if you have the fancy power tools, your joints will be lousy if you can't use a chisel to precise effect. Use as many hand tools as is practical for you, then add power as long as the speed doesn't compromise the workmanship. Don't let this happen and you will excel. Besides, what is craftsmanship? Creating with your hands and developing finely made work. Do that with hand tools, the old way, and the personal rewards are tremendous. You'll have to invest a lot of time but if you keep improving and developing a keener eye and sense of how to do things, the speed will pick up. But don't even bother comparing time with this to stick framing. If you need to be that quick, forget it.Now, the porch--you say it's only 78" wide? Shouldn't be too heavy of a roof if that's the case. But I can't see how you could get a radius like that without structural support underneath, even if you laminated a bunch of LVLs or something; what I mean is, how are you going to create the arc? I'm going to look back at what you described before and see if I can understand better.Good luck nathan.
*mad dog- I 'll try to do this with words, as I don't have a scanner yet. Create the arc. Do you want to know the process of building up a laminated ply header? Probably not. Could build one any width and any length needed with the right jig, and the porch floor will be perfect. The structural support, that creates the arc, (from your question). I guess the problem I see is one of header length. The header could not simply span the distance of the arc between the two posts at the corner. It would just rotate. So the header has to "cantilever" off two posts that are at the beginning of the arc, and travel to the adjacent posts on each side, to be fastened down to those posts, and tied into the headers that run parallel with the building. Oughta work, yes? The other structural/architectural concept ( I like that word better than idea) I had was picking up this radius header with a member of the second floor joist system. Could a 4x10 that cants out at the corner on a 45, pick up either the center of the corner header, or pick up the rafter that is headed to the center of the corner header? I suppose if the porch header is below the second floor joist height, then the rafter would intersect the 4x10 first This would look similar to a common truss bottom cord (4x10) intersecting the top cord (diagonal porch rafter) at f.o.framing, then this corner header would stand in place of fascia etc...If this doesn't give you some idea of what I've got turning in my mind, I'll have to draw a picture and send if your'e still open to thinking about it. My old boss said I was always building "thingys"... " thats what might be happening here, thought I'd throw it out to opinion, thanks for yours. Nathan
*Yes I know that you can create the radius using laminations, but they are not structural unless they get really thick (and heavy) in my opinion, since the loads are perpendicular to the laminations (the same reason a truss wouldn't support a load while laying on its side.)If I understand the next part, I think you are considering hanging the header off the bottom truss chord, which would be bad.But I don't think I'm with you yet, maybe a picture would help.
*You the Man 'Dog. You ready to come out here yet? I could use a good man like you.
*will post a pic soon, and no, we isn't together on this quite yet.
*