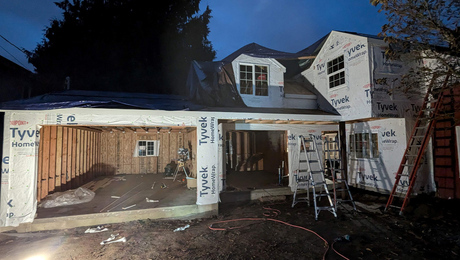
We’re about to start a bedroom addition and plan on intersecting the existing roof with a blind, or “California” valley. the existing roof is made up of 1X4 skip sheathing, wood shakes, and two (I think) layers of asphalt comp. shingles.
The owners do not want to re-roof the entire house at this time, so I was going to go down to the 1X4’s and sheathe the intersecting area with 1/2″ CDX Ply. then add 2X’s flat in the valley to accept the valley jacks.
Question: Can I just run sheathing up the valley area, or do I need to sheathe the area like I would in new construction- staggered joints, etc?
Thanks!


Replies
I don't quite picture all that you are describing but I've got two comments,
You can't have asphalt shingles over shakes. Wood shingles, maybe, but never shakes. It would be torn to shreds from the first time you walked over it.
You should never, ever, have a dead valley. It will leak. Is this california blind valley the same thing? Can you post a drawing or photo?
Excellence is its own reward!
"The first rule is to keep an untroubled spirit.
The second is to look things in the face and know them for what they are."
--Marcus Aurelius
what's a dead valley?Jon Blakemore
In this view of intersecting roofs, if you don't build a cricket or redesign the structure, you have a dead valley because the water stops dead.
.
Excellence is its own reward!
"The first rule is to keep an untroubled spirit.
The second is to look things in the face and know them for what they are."
--Marcus Aurelius
I never heard it called a California valley, but I have seen these, and never liked the look.
A “California Valley” consists of shingles lapped 12” past the valley center line and covered with a “bleeder strip” parallel with the center of the valley Shingles lapped from the other side are cut along the bleeder strip.
OK, I know that as a closed valley or a lapped valley.
So if the Q is how to junction an addition sheathed with plywood to one with the old skip shaething, he can use a wide rolled metal to support it.
Excellence is its own reward!
"The first rule is to keep an untroubled spirit.
The second is to look things in the face and know them for what they are."
--Marcus Aurelius
Thanks to those that replied so far, but this is not a roofing, or shingling question, it's a framing question.
A blind or California valley is a way of framing interstecting roofs without the use of valley rafters. The main roof is framed straight through with commons, then sheathed. The intersecting roof is framed over the sheathing with valley jack rafters.
So, back to my question. Can the prep of the existing roof just consist of sheathing in the valley area only, or do I need to strip the roof and sheathe in a conventional manner with staggered joints, etc?
Thanks!
Jim, I think I would just run a 2×6 0r 2×8 up both sides and land your rafters on that. I've seen the rafters landed on just the ply, or on a 2× over the ply. Since you already have the skip sheathing I can't see what the ply will do for you. Joe H
i think 2xs would be fine also i did a valley like this but it was over an existing roof that was sheathed with 1x planks about a 100 years ago but instead of laying 2xs down under my rafters i just used 1x rough lumber dont forget to set these back far enough so that the sheathing intersects your existing roof where you want it to on a shallow pitch roof id coinsider ripping some stock at an angle so the new sheathing makes full contact along the entire edge although this may be overkill
good luck
Now that I understand the Q, I agree with joe.
Why do you California guys think the way you do something doesn't happen anyplace else and then name it after yourselves..
Excellence is its own reward!
"The first rule is to keep an untroubled spirit.
The second is to look things in the face and know them for what they are."
--Marcus Aurelius
I saw the "California" valley in the newest FHB at the local library yesterday. They called it something else, and some dudes from Pittsburg figgured another one out using dimensional shingles and so we now have Pittsburg valleys. It's a good article on roofing. Maybe you can come up with one called a Piffin Valley?
Piffin Valley
How's this, I learned it first for slates and then found that a lot of guys on the island use it for all valleys. It looks good but it is the slowest way to flash and trim a valley that I can think of. You have to run both sides at once like you do with a woven valley.
You run the base lining of bituthene or thirty # and roll metal up the valley first. Then chaulk a center line to keep things straight.
Then you cut up a big bunch of metal slips 10" x 10" and fold them on a diagonal. You will use these just like step flashing.
Then as each course of shingle is cut to the chalk line a step flash piece is laid under the pair where they meet in the center. A nail at the outboard points of the step flash holds it in place. That nail generally ends up near the top edge of the average asphalt shingle.
The advantages are that you have a very straight, neat, sharp valley with no metal showing but you ahve the strength of the metal instead of just rrelying on the shingle fibre for strength. For an archy grade shingle it helps the roof look good.
Hope this was clearer than mud.
;).
Excellence is its own reward!
"The first rule is to keep an untroubled spirit.
The second is to look things in the face and know them for what they are."
--Marcus Aurelius
I get what you're saying. I had to read it a couple times though. That sounds very effective, and aesthetically good looking too. I see a lot of roofs where the valleys are not at all pleasing to look at, to the point of distraction - especially mill finish widely exposed aluminum, and crooked cuts, bad weaving, tar etc.
A lot of that is in the craftsmanship. Without paying attention to a straight line, this way can look like hell too..
Excellence is its own reward!
"The first rule is to keep an untroubled spirit.
The second is to look things in the face and know them for what they are."
--Marcus Aurelius
Thanks to all. I did the math and it will take two 12 foot 2X6's up each valley, no sheathing, just nailed on top of the skip sheathing and I will bevel the leading edge so the sheathing edge has something to land on.
Thanks!
MALIBUJIM,
What's the angle that you will bevel the sleeper (Blind Valley) on?
It's not really necessary to bevel the sleeper, I've never done it but not to discourage from doing so. It's a nice job if you did.
There's a thread on JLC about this exact topic by Tim Uhler (Bling Valley) in the Rough Framing Forum.
Ken Drake Excellent roof framer (GURU) gave a formula for it.
When the two roof pitches are the same:
Double the backing bevel and subtract from 90° - answer = saw tilt
When the two roof pitches are different:
Add the two different backing bevels together and subtract from 90° - answer = saw tilt
Joe Carola
Edited 7/20/2003 5:21:29 PM ET by Framer
To Malibujim
You may want to take into consideration that when the homeowners do reoof the house, the skip sheathing is not going to be suitable for asphalt or fiberglass shingles unless they replace the roof with wood or shake shingles. If they use asphalt or fiberglass shingles they will need a plywood base to cover the existing skip sheathing. Therefore, I would install plywood at the valley (3/8 to 7/16" minimum) and then layout the rafters as you spoke of. Also sounds like you could have some fun sealing the valley from leaks if the homeowners dont reroof at this time. (just food for thought!)