FHB Logo Facebook LinkedIn Email Pinterest Twitter Instagram Plus Icon Close Icon Navigation Search Icon Navigation Search Icon Arrow Down Icon Video Guide Icon Article Guide Icon Modal Close Icon Guide Search Icon Skip to content
Subscribe
Log In
  • How-To
  • Design
  • Tools & Materials
  • Videos
  • Blogs
  • Forum
  • Magazine
  • Members
  • FHB House
  • Podcast
Log In

Discussion Forum

Discussion Forum

Putting flooring under door casing

FastEddie | Posted in Construction Techniques on February 25, 2007 05:32am

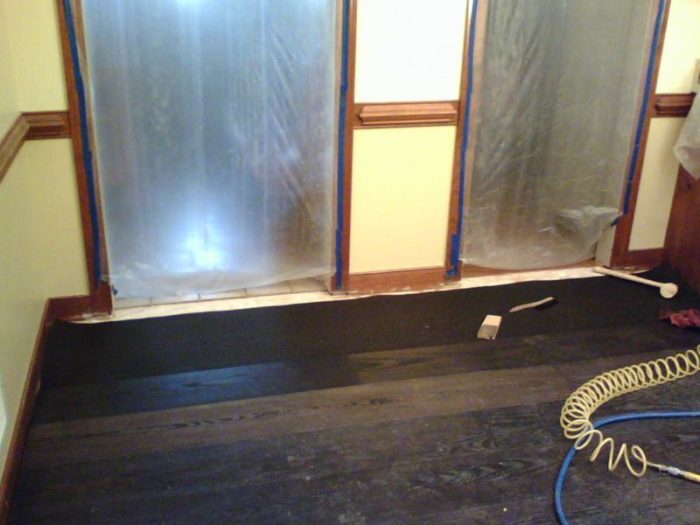
Installing a wood floor in the kitchen.  There are two doors on the parallel side of the room.  I have undercut the door trim and casing to slightly more than the wood thickness (about 7/8 for 3/4 wood).  So how exactly do I get the last board in place?  There is a side wall on the left and a base cabinet on the right.  On the other side of the doorway there is tile in the hall and wood in the dining room.


“Put your creed in your deed.”   Emerson

“When asked if you can do something, tell’em “Why certainly I can”, then get busy and find a way to do it.”  T. Roosevelt


Edited 2/25/2007 9:42 am ET by FastEddie

Reply

Replies

  1. calvin | Feb 25, 2007 07:15pm | #1

    Some times two pc is the way to go in that doorway when you can't place the last one and push it into the opening enough to get the second to last one in, then pull the last back.............

    You copy?

    Rare case, cut off the bottom of the groove and slip it down into the opening.

    A great place for Information, Comraderie, and a sucker punch.

    Remodeling Contractor just outside the Glass City.

    http://www.quittintime.com/


  2. Piffin | Feb 25, 2007 07:26pm | #2

    you'll need to piece that together in place and probably take backs off groove on some of it. This is a spot where the wide boards make it harder.

    You figuring to do a shoe at the baseboard?


    Welcome to the
    Taunton University of
    Knowledge FHB Campus at Breaktime.
     where ...
    Excellence is its own reward!

    1. calvin | Feb 25, 2007 07:40pm | #3

      Paul mentions shoe.  If you do, undercut the base back a couple inches each side of the casing.  You'll need to cover with the shoe, but you also need to run the floor under the base at the casing butt.A great place for Information, Comraderie, and a sucker punch.

      Remodeling Contractor just outside the Glass City.

      http://www.quittintime.com/


    2. FastEddie | Feb 25, 2007 09:24pm | #4

      Yes, shoe mould stained the same as the floor, which BTW is almost 9" syp.  But I can't put shoe over the door trim, and that's the problem.  I have considered cutting off the bottom of the base along that wall, since it will be covered anyway.

      I had thought of the multiple pieces, but was hoping I had overlooked something.

      I used my biscuit joiner shimmed up on thin ply scraps, and it works great."Put your creed in your deed."   Emerson

      "When asked if you can do something, tell'em "Why certainly I can", then get busy and find a way to do it."  T. Roosevelt

      1. karp | Feb 26, 2007 11:32pm | #5

        Start at the door and work back, if your going to cut off the bottom of a groove to fit the last piece then wtf.  Little tricky to measure back 1 piece, but nicer than multiple pieces in the doorway and , its hard to tell from the picture, but I don't think you will get the last piece in anyway.

        1. BoJangles | Feb 26, 2007 11:48pm | #6

          That's the way I do it.  You can use short blocks in place of the next to last piece for measuring puposes, then cut the last piece and slip into place. Don't nail the last piece yet.

          Slip the next to last piece into place , tighten up with a fine pry bar between the wall and the last piece and nail both pieces into place.


        2. FastEddie | Feb 27, 2007 12:26am | #7

          I had that thought this morning on a long drive to a jobsite.  I'll rip the bottom off the groove of the second to last board, and measure & cut the last one to fit, then pull the second one out etc.

          What do you mean about not getting the last piece in place?"Put your creed in your deed."   Emerson

          "When asked if you can do something, tell'em "Why certainly I can", then get busy and find a way to do it."  T. Roosevelt

          1. karp | Feb 27, 2007 04:00pm | #8

            If you were to take the floor right up to the last piece that then has to fit under the casing, then the last piece would have to be slid in sideways. Or if you were slide two pieces under the case and then put a piece inbetween, it would have to come from the finish floor side of the adjacent room, which i'm assuming is higher.  savvy?

          2. FastEddie | Feb 27, 2007 05:18pm | #9

            Your assumption are correct.  But here's the plan: it will take a bit of put-in/take-out, but I'll put the second to last board in place, measure & cut the last piece, remove the second piece, slip the last one in place, and drop in the second one, which will have the bottom of the groove cut off.  For this floor, I am face nailing two places on each floor joist, so there's no worry about not nailing the tongue of thesecond piece.  I will probably put in two last pieces, one for each doorway with a joint in the center wall.

             "Put your creed in your deed."   Emerson

            "When asked if you can do something, tell'em "Why certainly I can", then get busy and find a way to do it."  T. Roosevelt

          3. karp | Feb 27, 2007 07:54pm | #10

            Good to go. Although, as an after thought, I've seen our hardwood guy use glue in tricky situations like yours. Should I ask him what type of adhesive he's using?

          4. FastEddie | Feb 27, 2007 09:54pm | #11

            No thanks.  it's a nail-down install.  The entire floor will have rose-head face nails, two per board every 16""Put your creed in your deed."   Emerson

            "When asked if you can do something, tell'em "Why certainly I can", then get busy and find a way to do it."  T. Roosevelt

Log in or create an account to post a comment.

Sign up Log in

Become a member and get full access to FineHomebuilding.com

Video Shorts

Categories

  • Business
  • Code Questions
  • Construction Techniques
  • Energy, Heating & Insulation
  • General Discussion
  • Help/Work Wanted
  • Photo Gallery
  • Reader Classified
  • Tools for Home Building

Discussion Forum

Recent Posts and Replies

  • |
  • |
  • |
  • |
  • |
  • |
View More Create Post

Up Next

Video Shorts

Featured Story

Hole Saws That Are a Cut Above

The Spyder carbide-tipped hole saws cut quickly with a quick-release arbor that makes it easy to remove the core.

Featured Video

Micro-Adjust Deck-Baluster Spacing for an Eye-Deceiving Layout

No math, no measuring—just a simple jig made from an elastic band is all you need to lay out a good-looking deck railing.

Related Stories

  • Podcast 548: PRO TALK With Design/Build Operations Manager Jessica Bishop-Smyser
  • Strategies for Venting a Roof Valley
  • Podcast 547: Basement Insulation, Historic Preservation Resources, and Shipping Container ADUs
  • Podcast 547: Members-only Aftershow—Fine Homebuilding House memories

Highlights

Fine Homebuilding All Access
Fine Homebuilding Podcast
Tool Tech
Plus, get an extra 20% off with code GIFT20

"I have learned so much thanks to the searchable articles on the FHB website. I can confidently say that I expect to be a life-long subscriber." - M.K.

Get home building tips, offers, and expert advice in your inbox

Signing you up...

This site is protected by reCAPTCHA and the Google Privacy Policy and Terms of Service apply.
See all newsletters
See all newsletters

BOOKS, DVDs, & MERCH

Shop the Store
  • Pretty Good House
    Buy Now
  • 2023 Tool Guide
    Buy Now
  • 2022 Fine Homebuilding Archive
    Buy Now
  • Code Check Building 4th Edition
    Buy Now
  • Shop the Store

Fine Homebuilding Magazine

  • Issue 314 - April/May 2023
    • 7 Options for Countertops
    • Tool Test: Wood-Boring Bits
    • Critical Details for Ductless Heat Pumps
  • Issue 313 - Feb/March 2023
    • Practical System for a Seismic Retrofit
    • Fine Homebuilding Issue #313 Online Highlights
    • Practical System for a Seismic Retrofit
  • Issue 312 - Dec 2022/Jan 2023
    • Tool Test: Cordless Tablesaws
    • Gray-Water System for a Sustainable Home
    • Insulate a Cape Roof to Avoid Ice Dams
  • Issue 311 - November 2022
    • 7 Steps to a Perfect Exterior Paint Job
    • Options for Smarter Home-Energy Tracking
    • The Fine Homebuilding Interview: James Metoyer
  • Issue 310 - October 2022
    • Choosing a Tile-Leveling System
    • Choosing Between HRVs and ERVs
    • Custom Built-in Cabinets Made Easy

Fine Homebuilding

Follow

  • twitter
  • facebook
  • instagram
  • pinterest

Newsletter

Get home building tips, offers, and expert advice in your inbox

Signing you up...

This site is protected by reCAPTCHA and the Google Privacy Policy and Terms of Service apply.
See all newsletters
See all newsletters

Membership & Magazine

  • Online Archive
  • Start Free Trial
  • Magazine Subscription
  • Magazine Renewal
  • Gift a Subscription
  • Customer Support
  • Privacy Preferences

Taunton Network

  • Green Building Advisor
  • Fine Woodworking
  • Fine Gardening
  • Threads
  • About
  • Contact
  • Advertise
  • Careers
  • Copyright
  • Terms of Use
  • Site Map
  • Do not sell or share my information
  • Privacy Policy
  • Accessibility
  • California Privacy Rights

© 2023 The Taunton Press, Inc. All rights reserved.

X
X
This is a dialog window which overlays the main content of the page. The modal window is a 'site map' of the most critical areas of the site. Pressing the Escape (ESC) button will close the modal and bring you back to where you were on the page.

Main Menu

  • How-To
  • Design
  • Tools & Materials
  • Video
  • Blogs
  • Forum
  • Reader Projects
  • Magazine
  • Members
  • FHB House

Podcasts

  • FHB Podcast
  • ProTalk

Webinars

  • Upcoming and On-Demand

Podcasts

  • FHB Podcast
  • ProTalk

Webinars

  • Upcoming and On-Demand

Popular Topics

  • Kitchens
  • Business
  • Bedrooms
  • Roofs
  • Architecture and Design
  • Green Building
  • Decks
  • Framing
  • Safety
  • Remodeling
  • Bathrooms
  • Windows
  • Tilework
  • Ceilings
  • HVAC

Magazine

  • Current Issue
  • Past Issues
  • Magazine Index
  • Subscribe
  • Online Archive
  • Author Guidelines

All Access

  • Member Home
  • Start Free Trial
  • Gift Membership

Shop the Store

  • Books
  • DVDs
  • Taunton Workshops

More

  • FHB Ambassadors
  • Reader Projects
  • Podcast
  • FHB House
  • Customer Support

Account

  • Log In
  • Join

Newsletter

Get home building tips, offers, and expert advice in your inbox

Signing you up...

This site is protected by reCAPTCHA and the Google Privacy Policy and Terms of Service apply.
See all newsletters
See all newsletters

Follow

  • twitter
  • facebook
  • instagram
  • pinterest

Join All Access

Become a member and get instant access to thousands of videos, how-tos, tool reviews, and design features.

Start Your Free Trial

Subscribe

FHB Magazine

Start your subscription today and save up to 70%

Subscribe

We hope you’ve enjoyed your free articles. To keep reading, become a member today.

Get complete site access to expert advice, how-to videos, Code Check, and more, plus the print magazine.

Start your FREE trial

Already a member? Log in