
Elegant Eaves for a Truss Roof
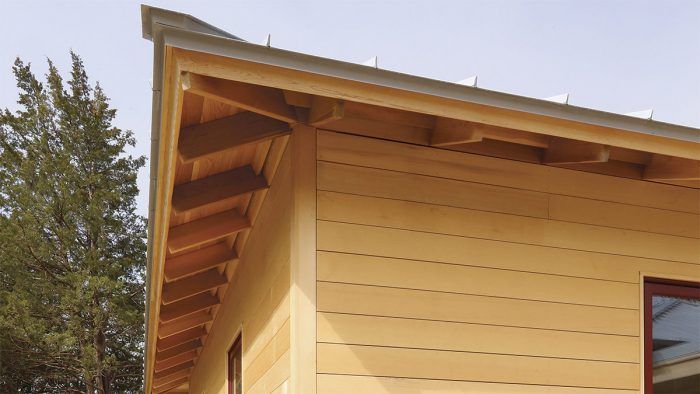
Cedar rafter tails and trim add a handsome touch to this roofline.
Synopsis: Architect Steve Baczek and Jim Wolffer of Shoreline Builders describe the process of adding an exposed eave to a sing-story, hip-roofed house. To add eaves without sacrificing energy efficiency, the authors used clipped heel trusses designed to drop below the wall’s top plate inside the house to make room for blown cellulose insulation and a vent channel below the roof deck. The article includes step-by-step photos of the cedar eave installation, and a drawing with details of the eave assembly.
Even as we develop more and more standard assemblies for tight, well-insulated building envelopes, there are always some details that require extra thought and ingenuity. Roof overhangs tend to be one of these details. Not only can continuous rafter tails cause a thermal bridge, but they can create a difficult area to air-seal as well. Of course, this all depends on where you locate your air and thermal barriers.
On this single-story, hip-roofed house on Cape Cod, we decided to use the eaves to add some character with exposed cedar rafter tails. Here in New England, eaves are more commonly boxed in with a fascia and soffit. So not only did we have to figure out how not to have this detail be a weak link in the building envelope, we had to figure out how to finish the overhang so the homeowners would be looking up at something more pleasing than the underside of the OSB roof sheathing.
An energy-smart overhang
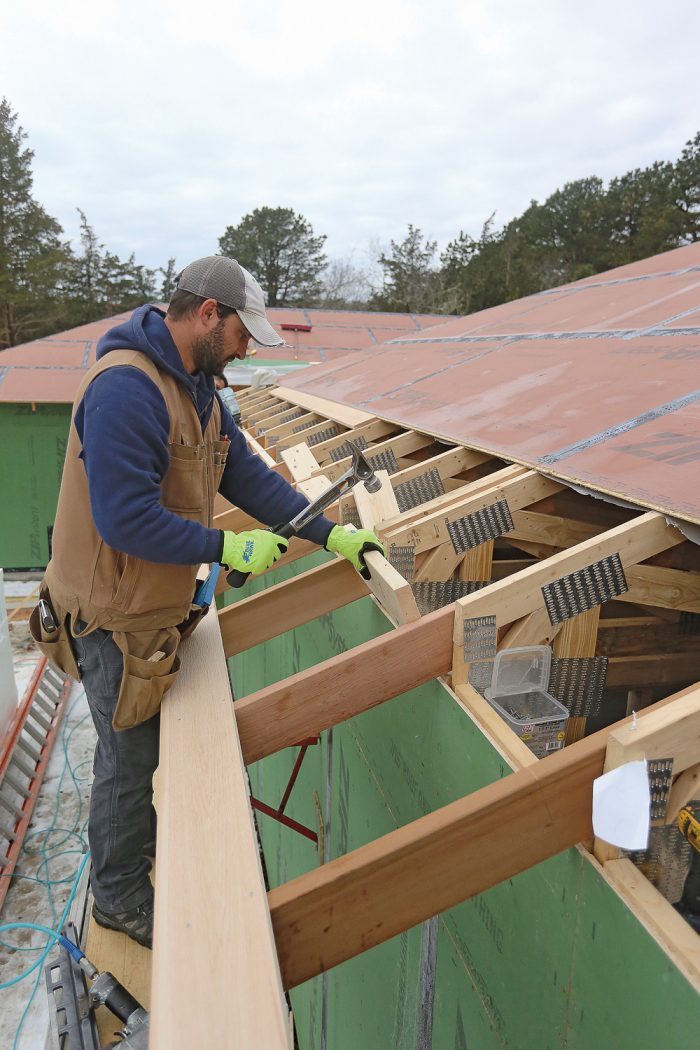
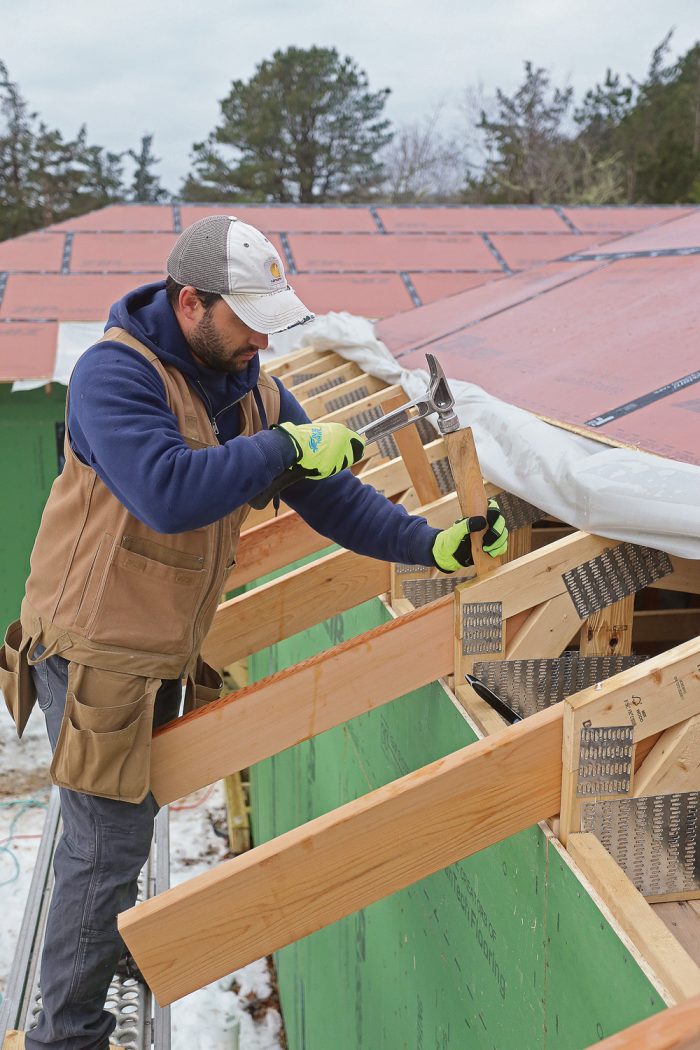
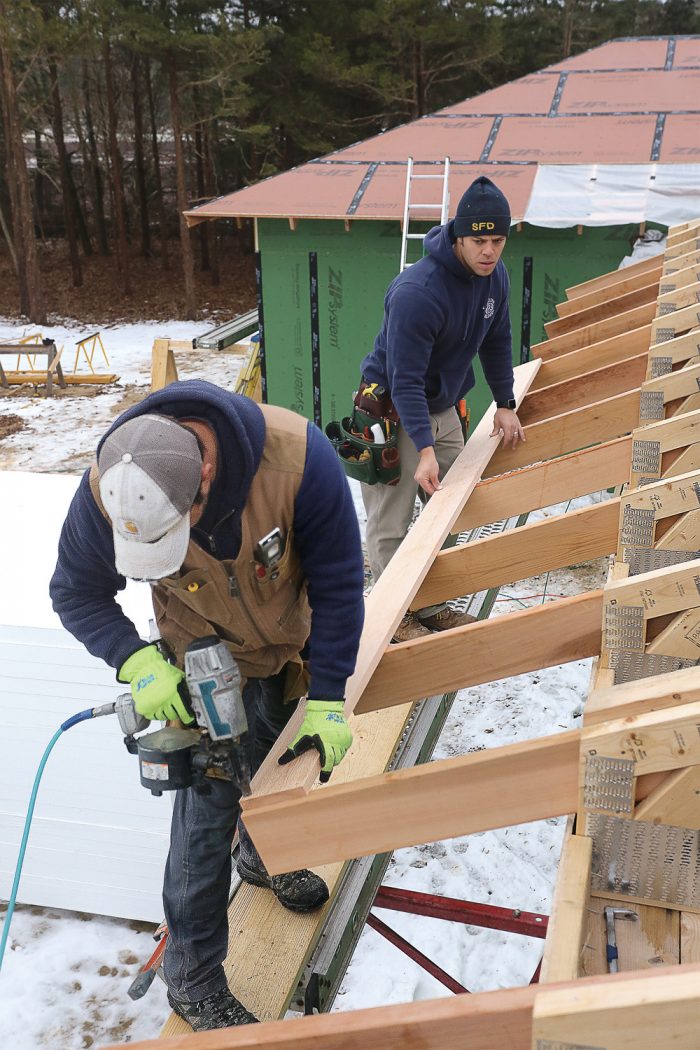
With the ability to span long distances, roof trusses are an affordable way to create an open floor plan, but they aren’t the best option for an exposed eave detail. In this case, clipped heel trusses are used and the rafter tails are applied. Because the rafter tails are sistered to the trusses, the truss designer had to be aware of the plan in order to offset the layout. The trusses are designed to drop below the wall’s top plate inside the house to make room for 24 in. of blown cellulose (R-90) in the ceiling and 12 in. (R-45) at the truss heel above the top plate, and for a vent channel below the roof deck. The Zip System R-sheathing is the primary air barrier on the walls and the drywall ceiling is the primary air barrier inside, along the ceiling. The two are connected by the top plates and blocking, which are air-sealed with Tremco Acoustical Sealant. The size, length, and nailing pattern of the rafter tails was determined by a structural engineer to resist uplift in this high-wind zone.
Details for a cedar eave
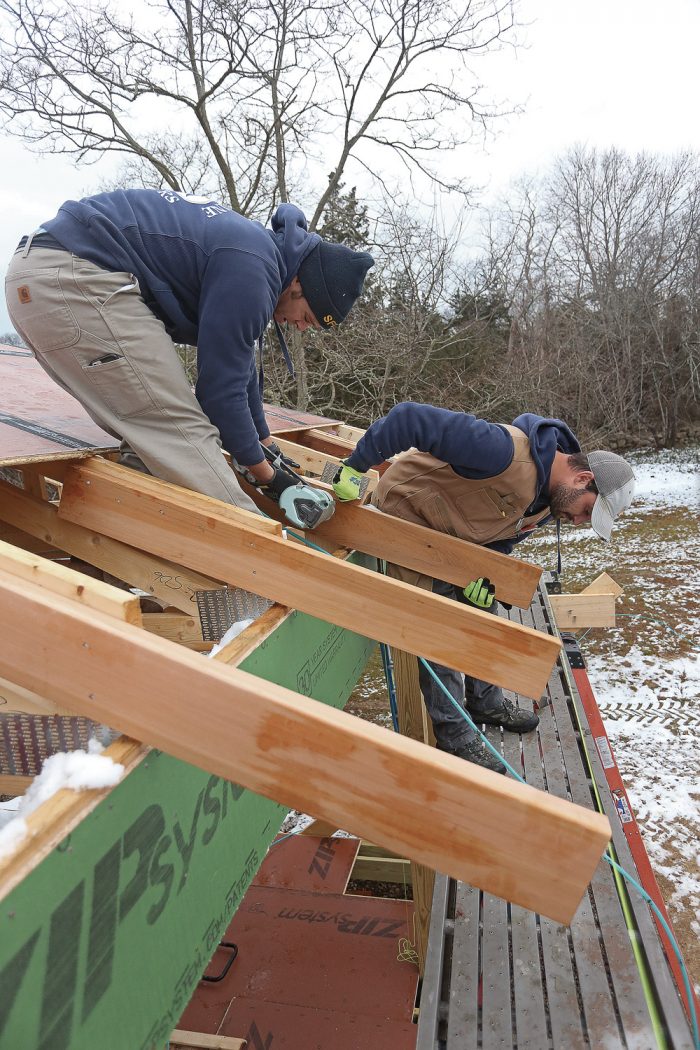
The home is T-shaped with two separate 5-pitch hip roofs separated by a 12-ft. section of flat roof. The building has 380 linear ft. of roof eave with one long, 64-ft. stretch. The trick is to install the rafter tails 24 in. apart and end up with a perfectly straight fascia board and eave line. The rafter tails are held down 7⁄8 in. from the top of the trusses so that cedar boards can be installed as the first layer of sheathing, exposing decorative cedar sheathing boards from below. With the top of the cedar boards now in plane with the top of the trusses, the bottom course of Zip System roof sheathing ties the 24-in. overhang and the roof trusses together.

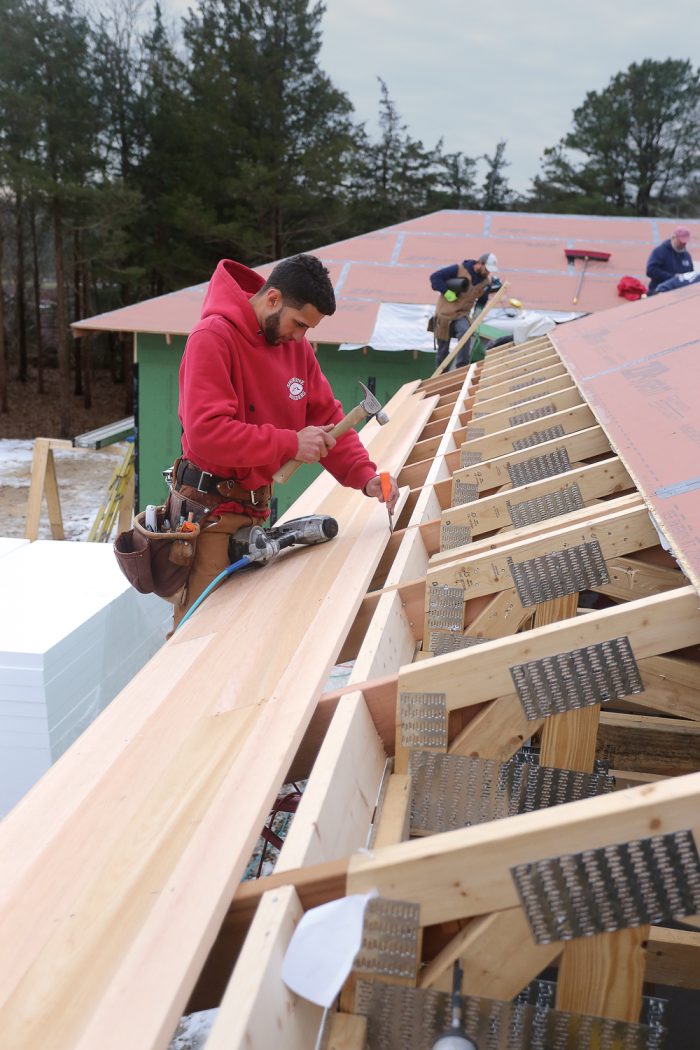


Shadowlines with purpose
Both the ventilation channel under the eaves and the boards to hold the metal drip edge away from the fascia provide opportunities to dress up the eave with even more shadowlines.


Cutting corners
The hip-rafter tail catches both the back side and the bottom edges of the fascia boards to support the miter. With all the compound bevels, it takes some trial and error to cut the first piece. Start with all of the rafter tails installed along the length of the adjacent eaves and run the fascia boards to the miter at the corner. Then cut the first hip-rafter-tail profile with a coping saw and slide it into place beneath the fascia to test the fit. Once you have the first one fit, you can use it to make a template for the others.

Photos by Brian Pontolilo
Related stories:
From Fine Homebuilding #277
For many more photos and practical advice on framing eaves, please click the View PDF button below.
Fine Homebuilding Recommended Products
Fine Homebuilding receives a commission for items purchased through links on this site, including Amazon Associates and other affiliate advertising programs.
Sledge Hammer

Ladder Stand Off
Stabila Extendable Plate to Plate Level

View Comments
Beautiful!
So many great and handsome details here. I am curious how the hip trusses are framed, in particular the extension of the corner rafter tail. Steve, can you provide or point me to any additional info on this?
Obliged,
David
Is there any potential issue with buckling here on those tight butt joints?