Perfect Roof Rafters
Focus your efforts on the pattern rafter, and the rest of the roof falls into place easily.

Synopsis: Taking lessons learned from timber framing, Sam Koerber uses chalklines, a framing square, and knife lines to carefully lay out pattern rafters, ensuring that his roof rafters line up nicely without the need to trim and shim them once in place. Online Extra: Behind the Scenes: How Fine Homebuilding Articles are Captured.
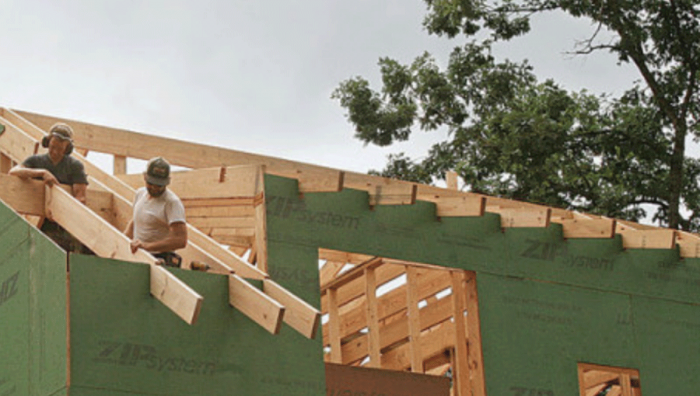
My process for framing a roof starts the same as anybody else’s: laying out and cutting a pattern rafter, which I then use as a template to cut the rest of the rafters to make up the roof frame. Just like everybody else, I choose a flat, straight, and dry piece of stock for the pattern rafter, which I crown so that any natural arch is facing up when installed, and I set the piece atop a pair of sturdy sawhorses that are at a comfortable working height. From there, I get a bit more fussy than most with the layout, which I believe pays off big time in terms of the quality of my frames.
Lessons learned from timber framing
Most of the time, framers use a 6-in. rafter square to lay out the plumb and seat cuts of a rafter. But two practices on recent jobs have convinced me to change up my approach. First, I’ve begun to incorporate components of timber framing into otherwise stick-framed houses; second, I do exposed rafter tails on most builds. Timber framing has taught me to use chalklines and a framing square for accurate layout on boards that don’t have a reliable straight edge for reference. It also has taught me that a knife makes crisper layout lines than a pencil. Those same layout techniques have improved the consistency of the exposed rafter tails, ensuring that they not only look crisp and uniform but that they line up nicely without trimming and shimming once in place. Now, even on roofs without exposed rafter tails, I use this technique because it works better than the conventional methods.
Lumber, even the dimensioned stock we use for framing, is far from perfect. Referencing the ridge, seat, and other cuts off the edge of a board can throw off the layout more than you might think. Wany edges from the milling process, natural dips and humps in the board, and knots and other grain patterns all affect the trueness of a board edge. The conventional approach means trying to fit a long 2x between walls and roof when the layout of the angles is based only on the 6 in. of wood that is directly in contact with the rafter square. Snapping your reference lines eliminates the inaccuracies.
Trust your rafter
Does such a fussy level of accuracy really matter with rough framing? My answer is that it’s not about being perfect for the sake of perfection; it’s about making the rest of the job go easier. If I’m confident that my rafters are laid out and cut to a high level of accuracy, I can trust them. This way, if they don’t fit perfectly, I have a clue that something else in my framing is out of whack and needs to be adjusted. Maybe the top plate is a little crooked, the walls are slightly out of plumb, or the ridge board is cupped, crooked, or set too high or too low. Two wrongs don’t make a right, and correcting these other components makes more sense to me than altering the ridge or seat cuts of a perfect rafter to fit a problematic frame.
 For more photos, drawings, and details, click the View PDF button below.
From Fine Homebuilding #256
Fine Homebuilding Recommended Products
Fine Homebuilding receives a commission for items purchased through links on this site, including Amazon Associates and other affiliate advertising programs.

Hook Blade Roofing Knife

Roof Jacks

Fall Protection


