FHB Logo Facebook LinkedIn Email Pinterest Twitter Instagram Plus Icon Close Icon Navigation Search Icon Navigation Search Icon Arrow Down Icon Video Guide Icon Article Guide Icon Modal Close Icon Guide Search Icon Skip to content
Subscribe

In every issue you'll find...

  • Expert insights on techniques and principles
  • Unbiased tool reviews
  • Step-by-step details to master the job
  • Field-tested advice and know-how
Subscribe Now!
Subscribe
  • How-To
  • Design
  • Tools & Materials
  • Videos
  • Blogs
  • Forum
  • Magazine
  • Members
  • FHB House
  • Podcast
  • Join
  • Log In
Subscribe

Fine Homebuilding Project Guides

Framing

Guide Home
Chapter
  • Introduction to Framing
  • Framing Tools, Techniques, and Materials
  • Framing Floors
  • Framing Walls
  • Framing Stairs
  • Framing Roofs
  • Efficient Framing Methods
  • Timber Framing
Building Skills

Simple Steps for Window- and Door-Framing Layout

Learn a few measuring shortcuts that make accurate rough-opening layouts a snap.

By Larry Haun

Synopsis: Professional framer Larry Haun shares a few measuring shortcuts that make accurate rough-opening layouts a snap.


A faster way to center a window on a wall

When you need to layout a window that centers on an interior wall, you could do a lot of measuring both ways to find the center and then find the edges of the rough opening, but there’s an easier way: Put the header tight to one inside corner, and measure the remaining length of the wall from the other end of the header to the opposite end of the wall. Then, divide that measurement in half. The number you get will be the distance from each end of the wall to the corresponding side of the window rough opening. This method save a lot of time, and it’s accurate.

Mark the layout for a window and adjacent studs

Once you mark the location and width of the rough opening on the wall plates, it’s time to continue the wall layout. First, draw an X to the outside of the rough-opening marks and a horizontal line to the inside of the marks. Then, with the header sitting on top of the plates, take your tape-measure or stud-layout tool and continue your stud layout through the window location, including marking the layout of cripples on header. be sure to extend these marks onto the bottom plate and top plates.

Rules of thumb for locating a door in a corner

How far you come out from a corner depends on how wide your door casings will be. If you have simple 2-1/2-in. trim like the Habitat for Humanity house in this video, a single stud in the corner will bring the rough opening out far enough to fit the casing. If you’re building a house with more elaborate trim work, the edge of the rough opening might come out 5 inches or more from the corner to leave room for the casing.

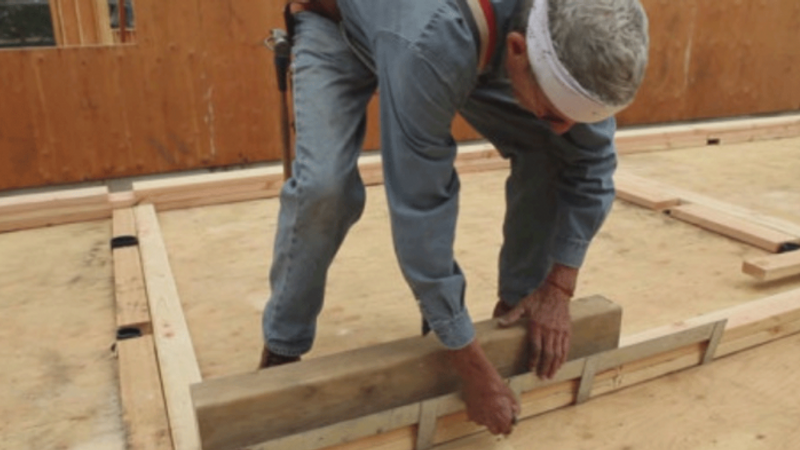
Lay down the header and mark similar to a window rough opening

Because we’re laying out a door on an small interior wall, the layout can just start at the corner of the wall. Also, you don’t need to mark stud locations on the bottom wall plate because cripple studs will only go over the header above the door rough opening. Other than that, just use your tape measure or layout guide to mark studs, as you would for a window.

Watch Larry Haun and Scott Grice’s previous videos on wall framing:

  • 3 Tips for Laying Out Studs on Wall Plates
  • 6 Tips for Spreading Wall Plates on a Subfloor
  • The Top 10 Tips for Wall-Framing Layout on a New Subfloor

Further Resources

  • Anatomy of a Stud-Framed Wall
  • Video: Wall-Framing Layout
  • How It Works: Wall Framing

Sign up for eletters today and get the latest how-to from Fine Homebuilding, plus special offers.

Signing you up...

This site is protected by reCAPTCHA and the Google Privacy Policy and Terms of Service apply.
See all newsletters
See all newsletters
Previous: How to Lay Out and Frame a Rough Opening for a Door Next: How to Frame a Door Opening

Guide

Framing

Chapter

Framing Walls

View Comments

  1. shrivelednoodle | Jul 25, 2011 07:31am | #1

    Great video. Very informative.
    Curious where I could get my hands on one of those fancy stud layout sticks. The one in the video looks custom made. If it's not, who makes them?

Log in or create an account to post a comment.

Sign up Log in

Become a member and get full access to FineHomebuilding.com

Framing

Framing

Trusted, in-depth guidance from the pros for framing a durable, code-compliant house

View Project Guide

View All Project Guides »

Become a member and get unlimited site access, including the Framing Project Guide.

Start Free Trial

Introduction to Framing
  • House Framing Concepts, Tips, and More
Framing Tools, Techniques, and Materials
  • Tools
  • Techniques
  • Framing Lumber
  • Steel
Framing Floors
  • Floor Framing
  • Engineered Floors
  • Floor Sheathing
Framing Walls
  • Wall Framing Basics
  • Layout
  • Wall Assembly
  • Raising and Straightening Walls
  • Framing Rough Openings
  • Blocking
Framing Stairs
  • Stair Layout
  • Building Stairs
Framing Roofs
  • Roof-Framing Basics
  • Roof Design
  • Laying Out and Cutting Rafters
  • Framing Valleys
  • Working with Trusses
  • Dormers
  • Special Situations
Efficient Framing Methods
  • Advanced Framing
  • Double-Stud Walls
Timber Framing
  • Timber-Frame Construction
  • Timber-Frame Design

Fine Homebuilding

Follow

  • twitter
  • facebook
  • instagram
  • pinterest

Newsletter

Get home building tips, offers, and expert advice in your inbox

Signing you up...

This site is protected by reCAPTCHA and the Google Privacy Policy and Terms of Service apply.
See all newsletters
See all newsletters

Membership & Magazine

  • Online Archive
  • Start Free Trial
  • Magazine Subscription
  • Magazine Renewal
  • Gift a Subscription
  • Customer Support
  • Privacy Preferences

Taunton Network

  • Green Building Advisor
  • Fine Woodworking
  • Fine Gardening
  • Threads
  • About
  • Contact
  • Advertise
  • Careers
  • Copyright
  • Terms of Use
  • Site Map
  • Do not sell or share my information
  • Privacy Policy
  • Accessibility
  • California Privacy Rights

© 2023 The Taunton Press, Inc. All rights reserved.

X
X
This is a dialog window which overlays the main content of the page. The modal window is a 'site map' of the most critical areas of the site. Pressing the Escape (ESC) button will close the modal and bring you back to where you were on the page.

Main Menu

  • How-To
  • Design
  • Tools & Materials
  • Video
  • Blogs
  • Forum
  • Reader Projects
  • Magazine
  • Members
  • FHB House

Podcasts

  • FHB Podcast
  • ProTalk

Webinars

  • Upcoming and On-Demand

Account

  • Log In
  • Join

Podcasts

  • FHB Podcast
  • ProTalk

Webinars

  • Upcoming and On-Demand

Popular Topics

  • Kitchens
  • Business
  • Bedrooms
  • Roofs
  • Architecture and Design
  • Green Building
  • Decks
  • Framing
  • Safety
  • Remodeling
  • Bathrooms
  • Windows
  • Tilework
  • Ceilings
  • HVAC

Magazine

  • Current Issue
  • Past Issues
  • Magazine Index
  • Subscribe
  • Online Archive
  • Author Guidelines

All Access

  • Member Home
  • Start Free Trial
  • Gift Membership

Shop the Store

  • Books
  • DVDs
  • Taunton Workshops

More

  • FHB Ambassadors
  • Reader Projects
  • Podcast
  • Customer Support

Account

  • Log In
  • Join

Newsletter

Get home building tips, offers, and expert advice in your inbox

Signing you up...

This site is protected by reCAPTCHA and the Google Privacy Policy and Terms of Service apply.
See all newsletters
See all newsletters

Follow

  • twitter
  • facebook
  • instagram
  • pinterest

Join All Access

Become a member and get instant access to thousands of videos, how-tos, tool reviews, and design features.

Start Your Free Trial

Subscribe

FHB Magazine

Start your subscription today and save up to 70%

Subscribe

We hope you’ve enjoyed your free articles. To keep reading, become a member today.

Get complete site access to expert advice, how-to videos, Code Check, and more, plus the print magazine.

Start your FREE trial

Already a member? Log in