
Installing a Rubber Roof
Forget the mess of asphalt roll roofing—for flat or low-slope roofs, EPDM membranes are the smart way to go.
Synopsis: This article explains how to install a low-slope roof made from EPDM, a synthetic rubberlike material with many advantages over more conventional asphalt materials. Basically, the roof is glued to a substrate. But details count.
Not long ago, we’d cringe whenever we’d get a job that had a flat roof or a roof with a really shallow pitch. Add a couple of extra details such as a 6-ft. French door opening onto a wooden deck over the roof with kneewalls on two sides, and we’d hear voices screaming in our sleep: “I’m going to leak, I’m going to leak.”
The only way we could guarantee a watertight job was to have a copper roof pan fabricated to cover the flat part of the roof. But copperwork ain’t cheap, and we’d still have to do some fancy flashing. In most cases we were forced to fall back on that old inferior standby, roll roofing. Because of roll roofing’s poor track record, we always left the homeowners a bucket of tar at the end of the job. Eventually, they’d need it.
Then, about eight years ago, we installed our very first EPDM (ethylene propylene diene monomer), or single-ply rubber, membrane on a large flat roof, and since then the voices of doom have all but disappeared. Rubber roofing, used commercially for many years, is now finding its way onto more and more residential projects. Properly installed, a rubber roof can solve even the most difficult flashing details. And unlike with roll roofing, we’ve never been called back for a rubber-roof job that leaked, even on oceanfront projects that experience gale-force winds on a regular basis.
EPDM membrane is sold by the yard
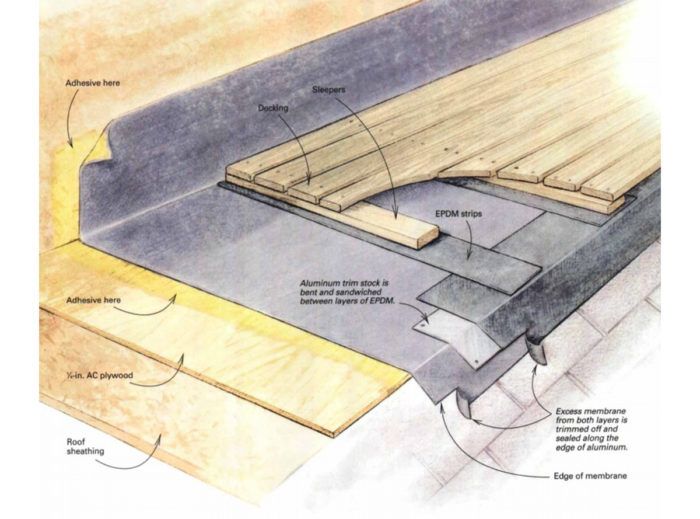
There are many different systems for installing EPDM membranes, including loose-laid and ballasted (where the membrane is put down without being attached directly to the roof); mechanically fastened, hot-applied fully adhered (also known as the torch-down system); and fully adhered. Each system has different performance characteristics that make it suitable for specific applications.

We primarily use the fully adhered system for installing rubber roofs. This system is the most cost effective and easiest for us to install by ourselves on the small-area roofs that we’re asked to do most often. Fully adhered installation systems don’t require special tools, and decks can be installed on top of them.
The first task is determining how much and what kind of rubber-roof membrane a job requires. The membrane we buy from a local roofing-supply company typically comes in 10-ft. by 50-ft. or 10-ft. by 100-ft. rolls, although some manufacturers offer various lengths and widths. For a small job such as the one in this article, we pay a few cents more per square foot to get the membrane cut to the length we need. The extra cost is offset by not having a lot of leftover material.
The membrane is also available 0.045 in. thick or 0.060 in. thick. However, for a fully adhered system, manufacturers recommend the 0.060-in. membrane because a tiny bit of the membrane is supposedly dissolved when the adhesive is applied. Also, for a job that’s going to see traffic or have anything put on top of it, the extra thickness is insurance against roof failure.
To read the entire article, click the View PDF button below:
Fine Homebuilding Recommended Products
Fine Homebuilding receives a commission for items purchased through links on this site, including Amazon Associates and other affiliate advertising programs.
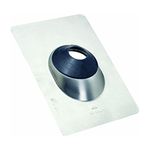
Flashing Boot

Ladder Stand Off
Fall Protection
