FHB Logo Facebook LinkedIn Email Pinterest Twitter Instagram Tiktok YouTube Plus Icon Close Icon Navigation Search Icon Navigation Search Icon Arrow Down Icon Video Guide Icon Article Guide Icon Modal Close Icon Guide Search Icon Skip to content
Subscribe
Log In
  • How-To
  • Design
  • Tools & Materials
  • Videos
  • Blogs
  • Forum
  • Magazine
  • Members
  • FHB House
  • Podcast
Log In

Fine Homebuilding Project Guides

Wiring

Guide Home
  • Working with Electricity
  • Tools and Materials
  • Receptacles and Switches
  • Lights and Fans
  • Rough-In
  • Outdoor Wiring
  • Panels and Subpanels
How-To

Subpanel Installation: Fitting and Fastening the Box

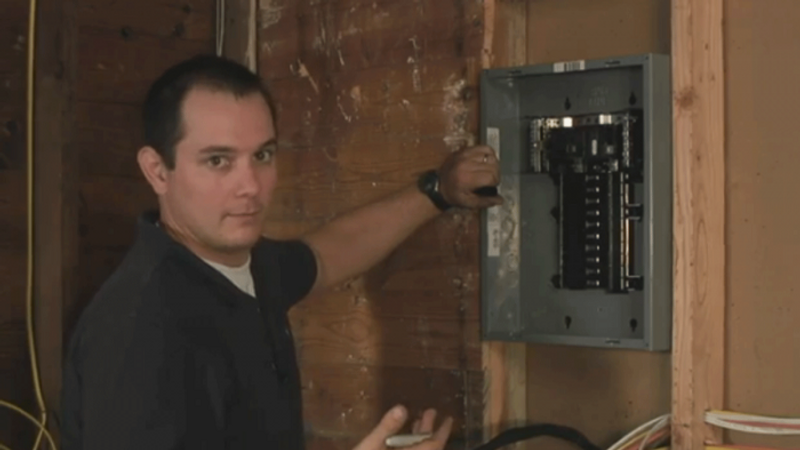
Electrician Brian Walo starts this project by measuring and marking the exact location for a new subpanel before screwing it to the studs.

By Brian Walo

Video transcript:

I’m installing a subpanel for a garage shop. The first thing I do is mark out where it’s going to be mounted in the wall. I generally use my own eye level with the main breaker as a good rule of thumb; I’m about 6 foot tall. Every jurisdiction varies a little bit depending on what electrical code’s being enforced, so obviously the best source of information is going to be your local jurisdiction.

I use just a regular old Sharpie and mark the bottom edge of the box so that I know approximately where I’m going to be putting it. The next step is to take out all the knockouts that I need for all the various wires. The first one I do is for the main feeder wire, which is a 4/3 Romex copper. I’m going to feed this through a 1-inch cable clamp on the bottom of this panel, right in the center. There are various tools for taking out the knockouts; probably the easiest thing is just to use a basic screwdriver and give it a little push. Make sure the knockout you’re about to remove is actually the right size for the cable clamp that you have. Now I put the retaining ring on there. It helps to know roughly on which side of the panel you’re going to set up that circuit so that you can run the wire through the bottom on the corresponding side. It will give you a little bit of an advantage. In this case, I’m going to try to keep them all pretty close to the center.

I have two number 10s, two number 12s, and two number 14-gauge wires. I will run the four smaller-gauge wires on this side of the main service entrance. I will run the two number 10s on the other side to get a bit of working room on both sides. If I have multiples, I work outward from the middle; it’s easier to run wire through the knockouts in the back before you come to the knockouts in the front, so you can get all that nicely tucked in and neat. All four I’ve just loosened up are for a ½-inch cable clamp or a 3/8-inch cable clamp. The other two will be for a ¾-inch cable clamp. These are a little bit different in that they have a concentric ring. You can use a screwdriver to pry them up a little bit. These all have spot welds on them that are designed to break off. It’s a lot easier to get these out of the way before the panel goes on the wall. The smaller ones are just punch-out discs, and you can take those and spin them off.

The last thing I need to do before I get this panel on the wall is mark how far proud of the wall it needs to sit before the drywall goes up. Typically, a new garage will have 5/8-inch drywall. So I need to set the panel out at least 5/8 inch so that it’s flush with the surface.

To install it in the wall, I use a 5/16 hex-head by 1-inch-long No. 8 screw to get into the wood. I use my marks primarily just to get it into position approximately where I want it before I drive it home.

View the other videos in this members-only video series:

  • Fitting and Fastening the Box
  • Running the Main Power Feed
  • Connecting Circuits and Breakers
  • Subpanel Safety Tips

Sign up for eletters today and get the latest how-to from Fine Homebuilding, plus special offers.

Signing you up...

This site is protected by reCAPTCHA and the Google Privacy Policy and Terms of Service apply.
See all newsletters
See all newsletters
Previous: Wiring a Subpanel Next: Subpanel Installation: Running and Connecting the Power Feed

Guide

Wiring

Chapter

Panels and Subpanels

Log in or create an account to post a comment.

Sign up Log in

Become a member and get full access to FineHomebuilding.com

Wiring

Wiring

Trusted, code-compliant guidance from the pros for working safely on any wiring project

View Project Guide

View All Project Guides »

Become a member and get unlimited site access, including the Wiring Project Guide.

Start Free Trial

Working with Electricity
  • Basics
  • Safety
  • Troubleshooting and Upgrades
Tools and Materials
  • Electrical Tools
  • Electrical Boxes
  • Cables and Wires
Receptacles and Switches
  • Materials
  • Wiring Receptacles
  • Wiring Switches
Lights and Fans
  • Lighting Design
  • Installing Lights
  • Fans
Rough-In
  • Planning
  • Installing Electrical Boxes
  • Running Cable
  • Retrofit Work
  • Making Connections in Boxes
  • Electrical Conduit
Outdoor Wiring
  • Basics
  • Outlets
  • Installing Lighting
Panels and Subpanels
  • Understanding Panels
  • Circuits
  • Installing a Subpanel

Fine Homebuilding

Follow

  • YouTube
  • instagram
  • facebook
  • pinterest
  • Tiktok
  • twitter

Newsletter

Get home building tips, offers, and expert advice in your inbox

Signing you up...

This site is protected by reCAPTCHA and the Google Privacy Policy and Terms of Service apply.
See all newsletters
See all newsletters

Membership & Magazine

  • Online Archive
  • Start Free Trial
  • Magazine Subscription
  • Magazine Renewal
  • Gift a Subscription
  • Customer Support
  • Privacy Preferences

Taunton Network

  • Green Building Advisor
  • Fine Woodworking
  • Fine Gardening
  • Threads
  • About
  • Contact
  • Advertise
  • Careers
  • Copyright
  • Terms of Use
  • Site Map
  • Do not sell or share my information
  • Privacy Policy
  • Accessibility
  • California Privacy Rights

© 2023 The Taunton Press, Inc. All rights reserved.

X
X
This is a dialog window which overlays the main content of the page. The modal window is a 'site map' of the most critical areas of the site. Pressing the Escape (ESC) button will close the modal and bring you back to where you were on the page.

Main Menu

  • How-To
  • Design
  • Tools & Materials
  • Video
  • Blogs
  • Forum
  • Reader Projects
  • Magazine
  • Members
  • FHB House

Podcasts

  • FHB Podcast
  • ProTalk

Webinars

  • Upcoming and On-Demand

Podcasts

  • FHB Podcast
  • ProTalk

Webinars

  • Upcoming and On-Demand

Popular Topics

  • Kitchens
  • Business
  • Bedrooms
  • Roofs
  • Architecture and Design
  • Green Building
  • Decks
  • Framing
  • Safety
  • Remodeling
  • Bathrooms
  • Windows
  • Tilework
  • Ceilings
  • HVAC

Magazine

  • Current Issue
  • Past Issues
  • Magazine Index
  • Subscribe
  • Online Archive
  • Author Guidelines

All Access

  • Member Home
  • Start Free Trial
  • Gift Membership

Shop the Store

  • Books
  • DVDs
  • Taunton Workshops

More

  • FHB Ambassadors
  • Reader Projects
  • Podcast
  • FHB House
  • Customer Support

Account

  • Log In
  • Join

Newsletter

Get home building tips, offers, and expert advice in your inbox

Signing you up...

This site is protected by reCAPTCHA and the Google Privacy Policy and Terms of Service apply.
See all newsletters
See all newsletters

Follow

  • YouTube
  • instagram
  • facebook
  • pinterest
  • Tiktok
  • twitter

Join All Access

Become a member and get instant access to thousands of videos, how-tos, tool reviews, and design features.

Start Your Free Trial

Subscribe

FHB Magazine

Start your subscription today and save up to 70%

Subscribe

We hope you’ve enjoyed your free articles. To keep reading, become a member today.

Get complete site access to expert advice, how-to videos, Code Check, and more, plus the print magazine.

Start your FREE trial

Already a member? Log in