FHB Logo Facebook LinkedIn Email Pinterest Twitter Instagram Tiktok YouTube Plus Icon Close Icon Navigation Search Icon Navigation Search Icon Arrow Down Icon Video Guide Icon Article Guide Icon Modal Close Icon Guide Search Icon Skip to content
Subscribe
Log In
  • How-To
  • Design
  • Tools & Materials
  • Videos
  • Blogs
  • Forum
  • Magazine
  • Members
  • FHB House
  • Podcast
Log In
Sponsored Post
How-To

How To Prep for a Perfect Paint Job

A systematic approach to masking, priming, sanding, and painting eliminates imperfections for a smooth painted finish.

By Tyler Grace

Sponsored by Sherwin-Williams

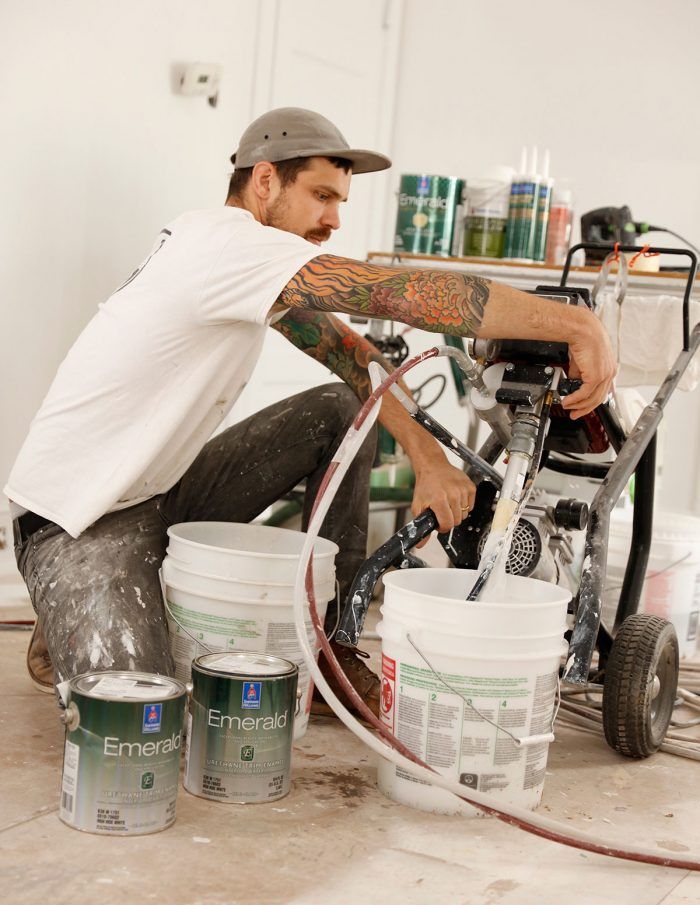
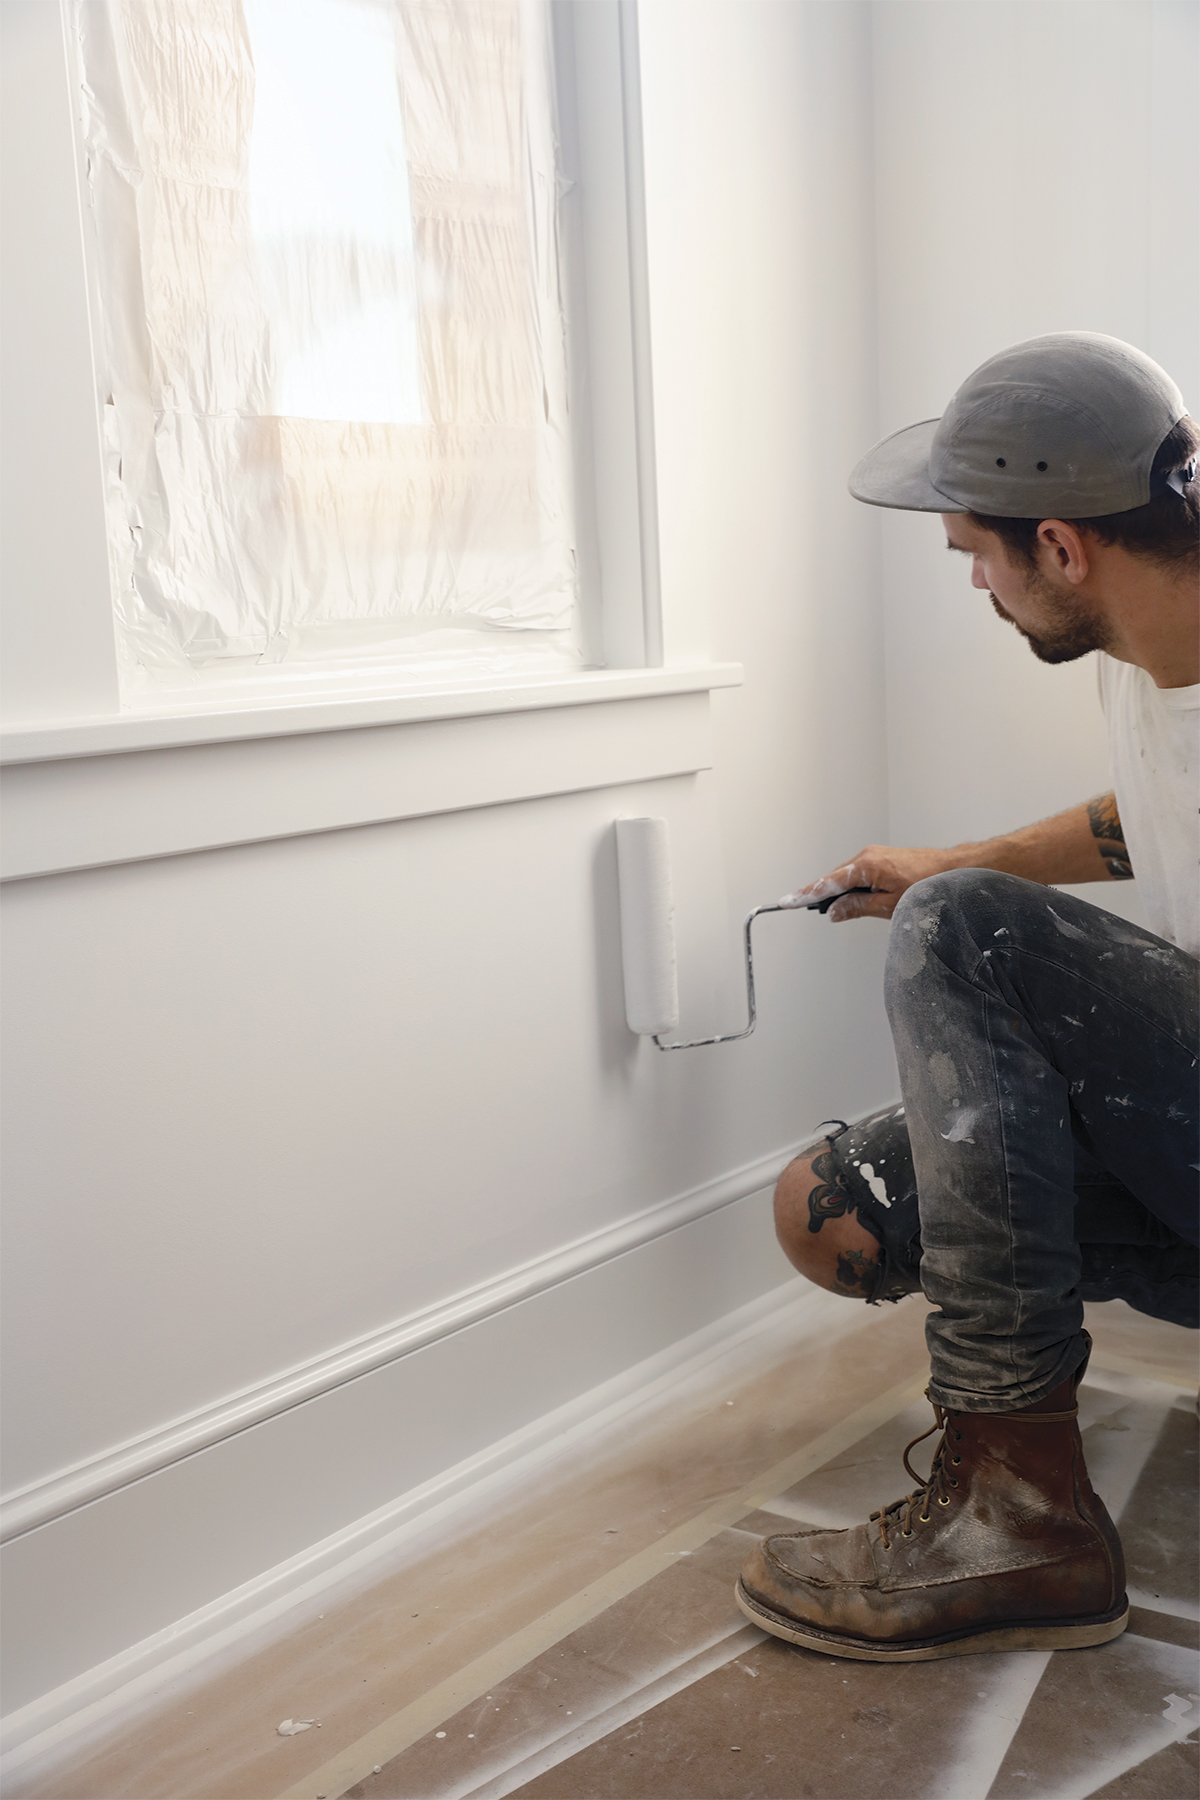
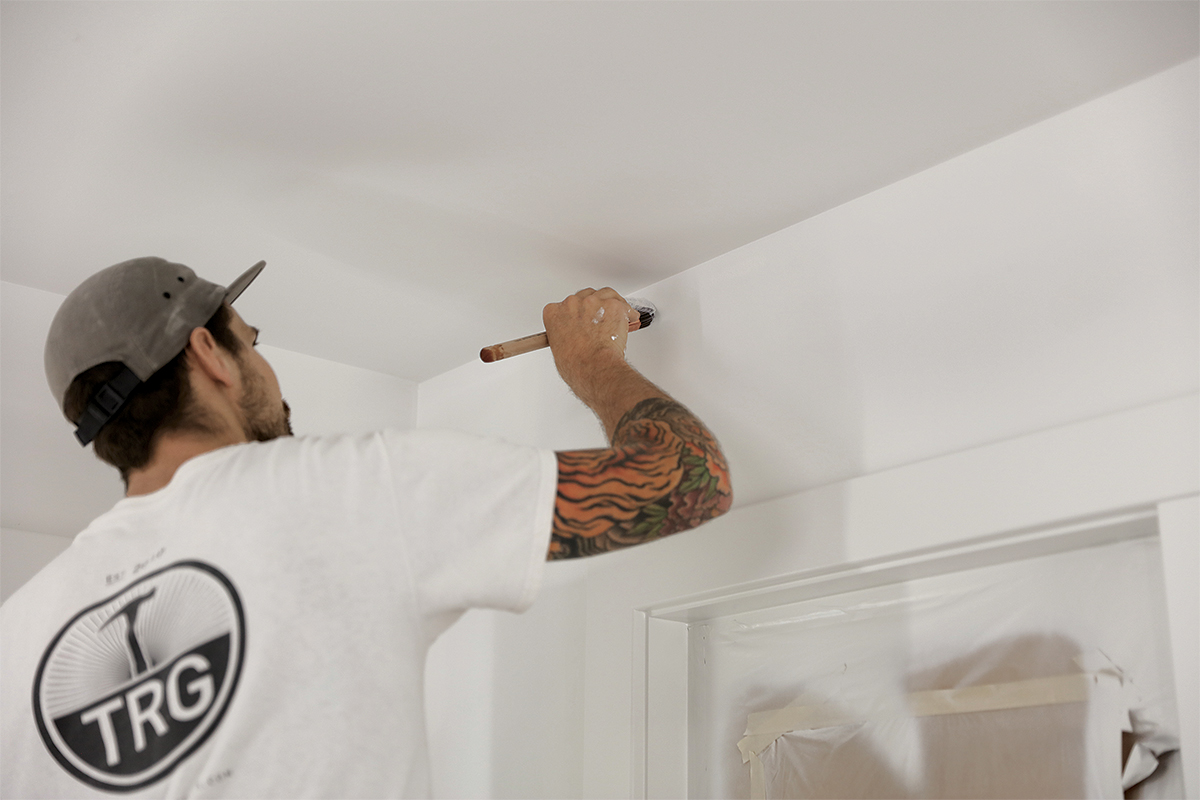
When it comes to a beautiful, durable interior paint job, there’s no single trick or shortcut—it’s a combination of choosing quality paints and being careful and meticulous about the preparation. For remodeler Tyler Grace of TRG Home Concepts, a perfect paint job is critical to his client’s happiness. Here’s a look at the system of preparation and application he’s developed to ensure a high-quality, flawless finish. Tyler uses Sherwin- Williams Emerald Designer Edition™ paint on the walls because it’s a premium paint formulated with advanced washability to protect color and sheen for years, and it leaves a smooth, uniform result. As much as materials matter, a truly flawless finish on your woodwork and walls also requires a healthy supply of sandpaper, some filler and caulk, and a lot of repetition. Tyler rolls the walls and uses a sprayer to paint the trim, but the process of preparing between each coat of primer and paint is the same whether using a brush or a sprayer—ensure the surface is smooth, evenly covered, and dust-free before applying the next coat.


Painting Trim

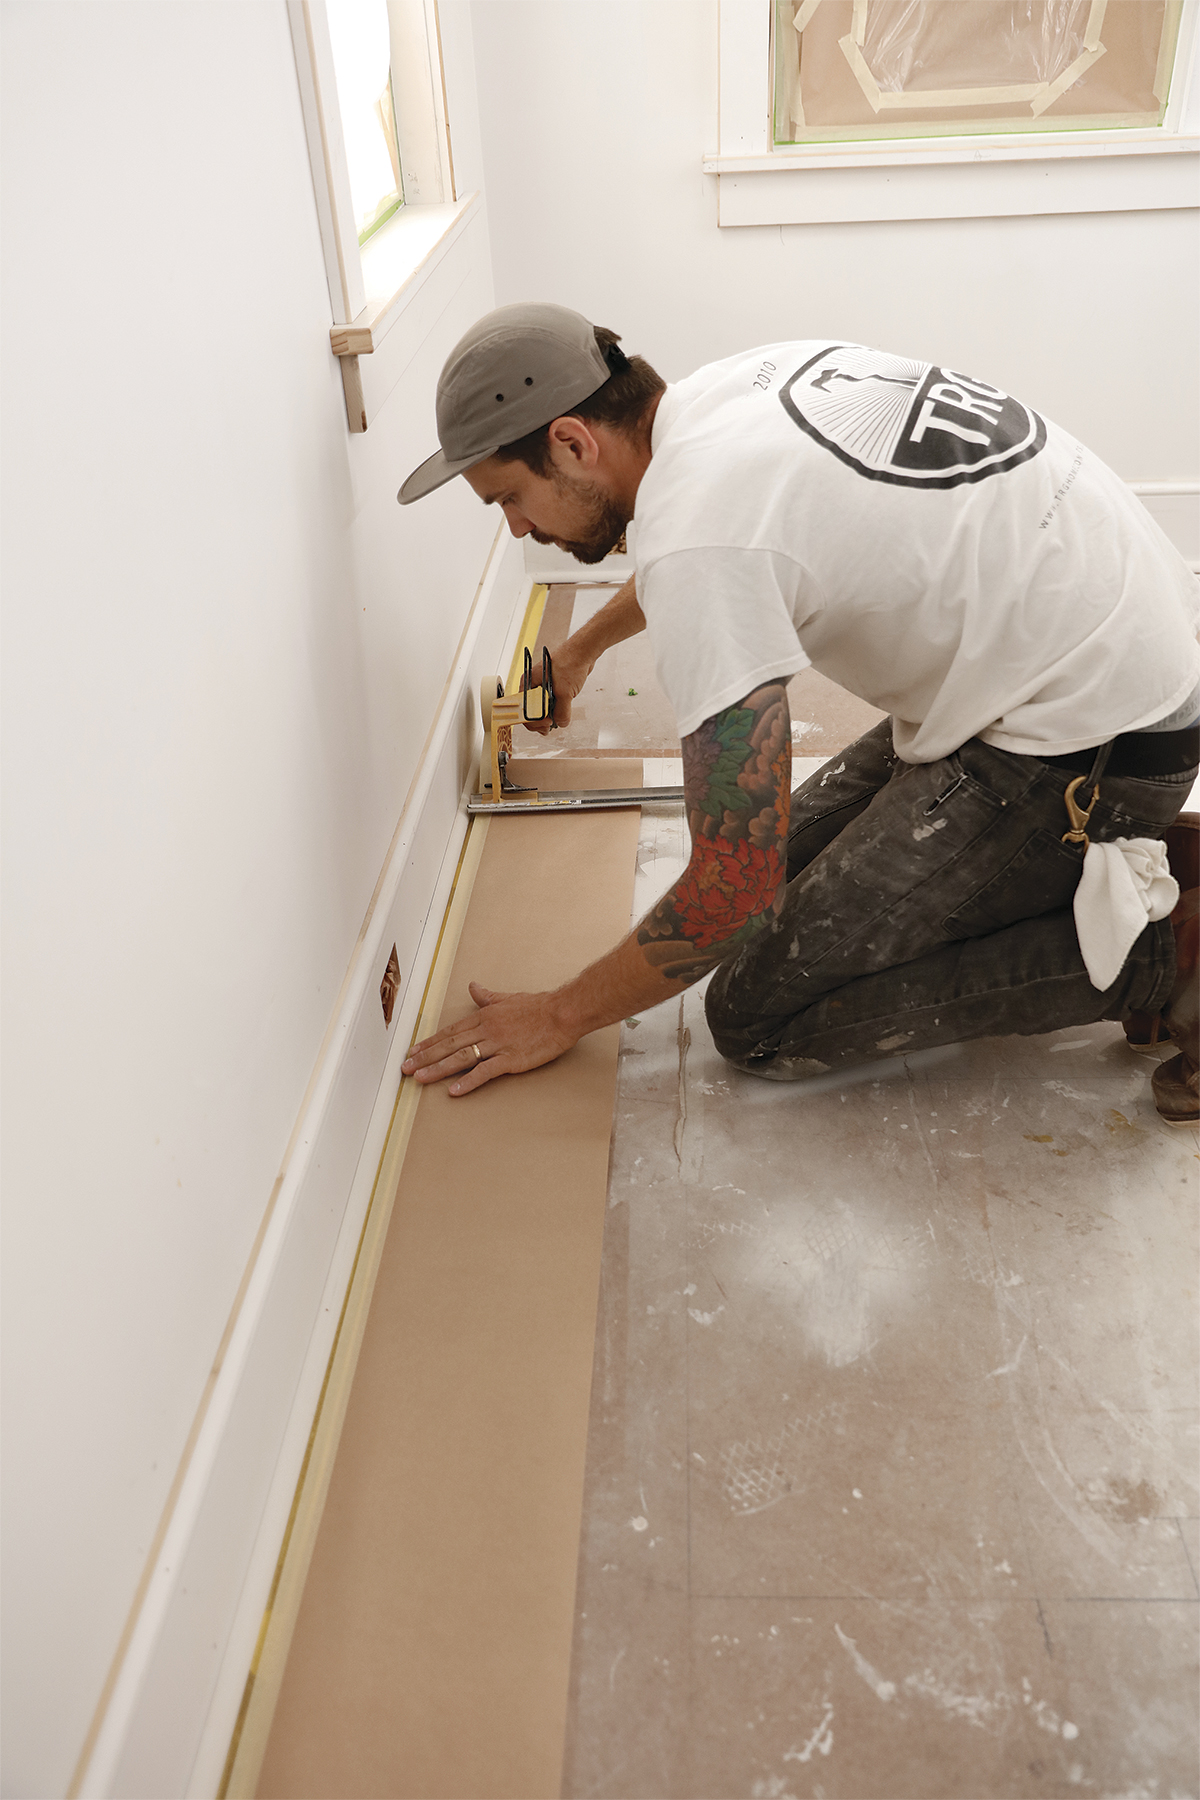
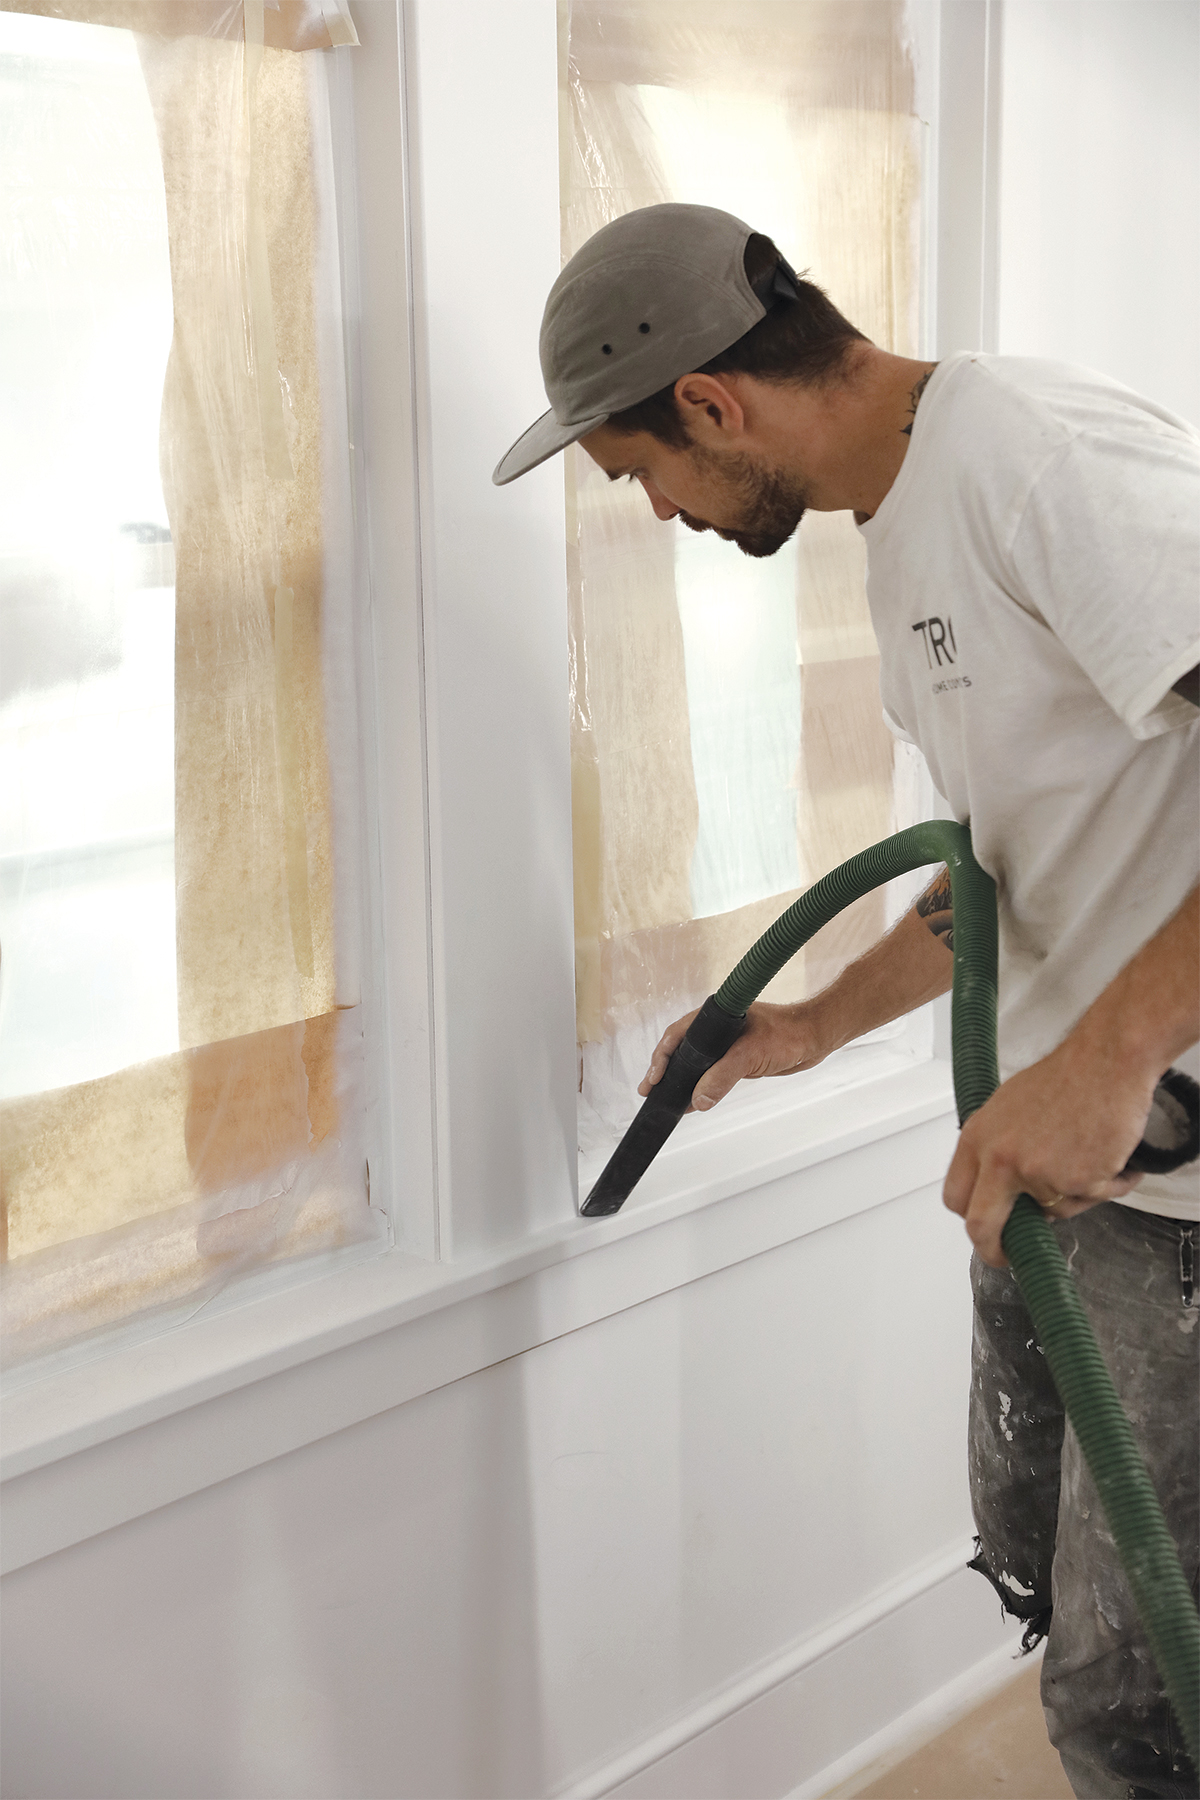
1. MASK AND PROTECT
The first step of any painting project is to wash the trim and walls with a cleaner-degreaser to make sure no contaminant is left on the surface. Then, protect floors, windows, and other surfaces that shouldn’t be painted. Use painter’s tape to seal along the edges of all painted surfaces and create a crisp paint line, and use masking paper, film, and drop cloths to protect adjoining surfaces.
mask for paint
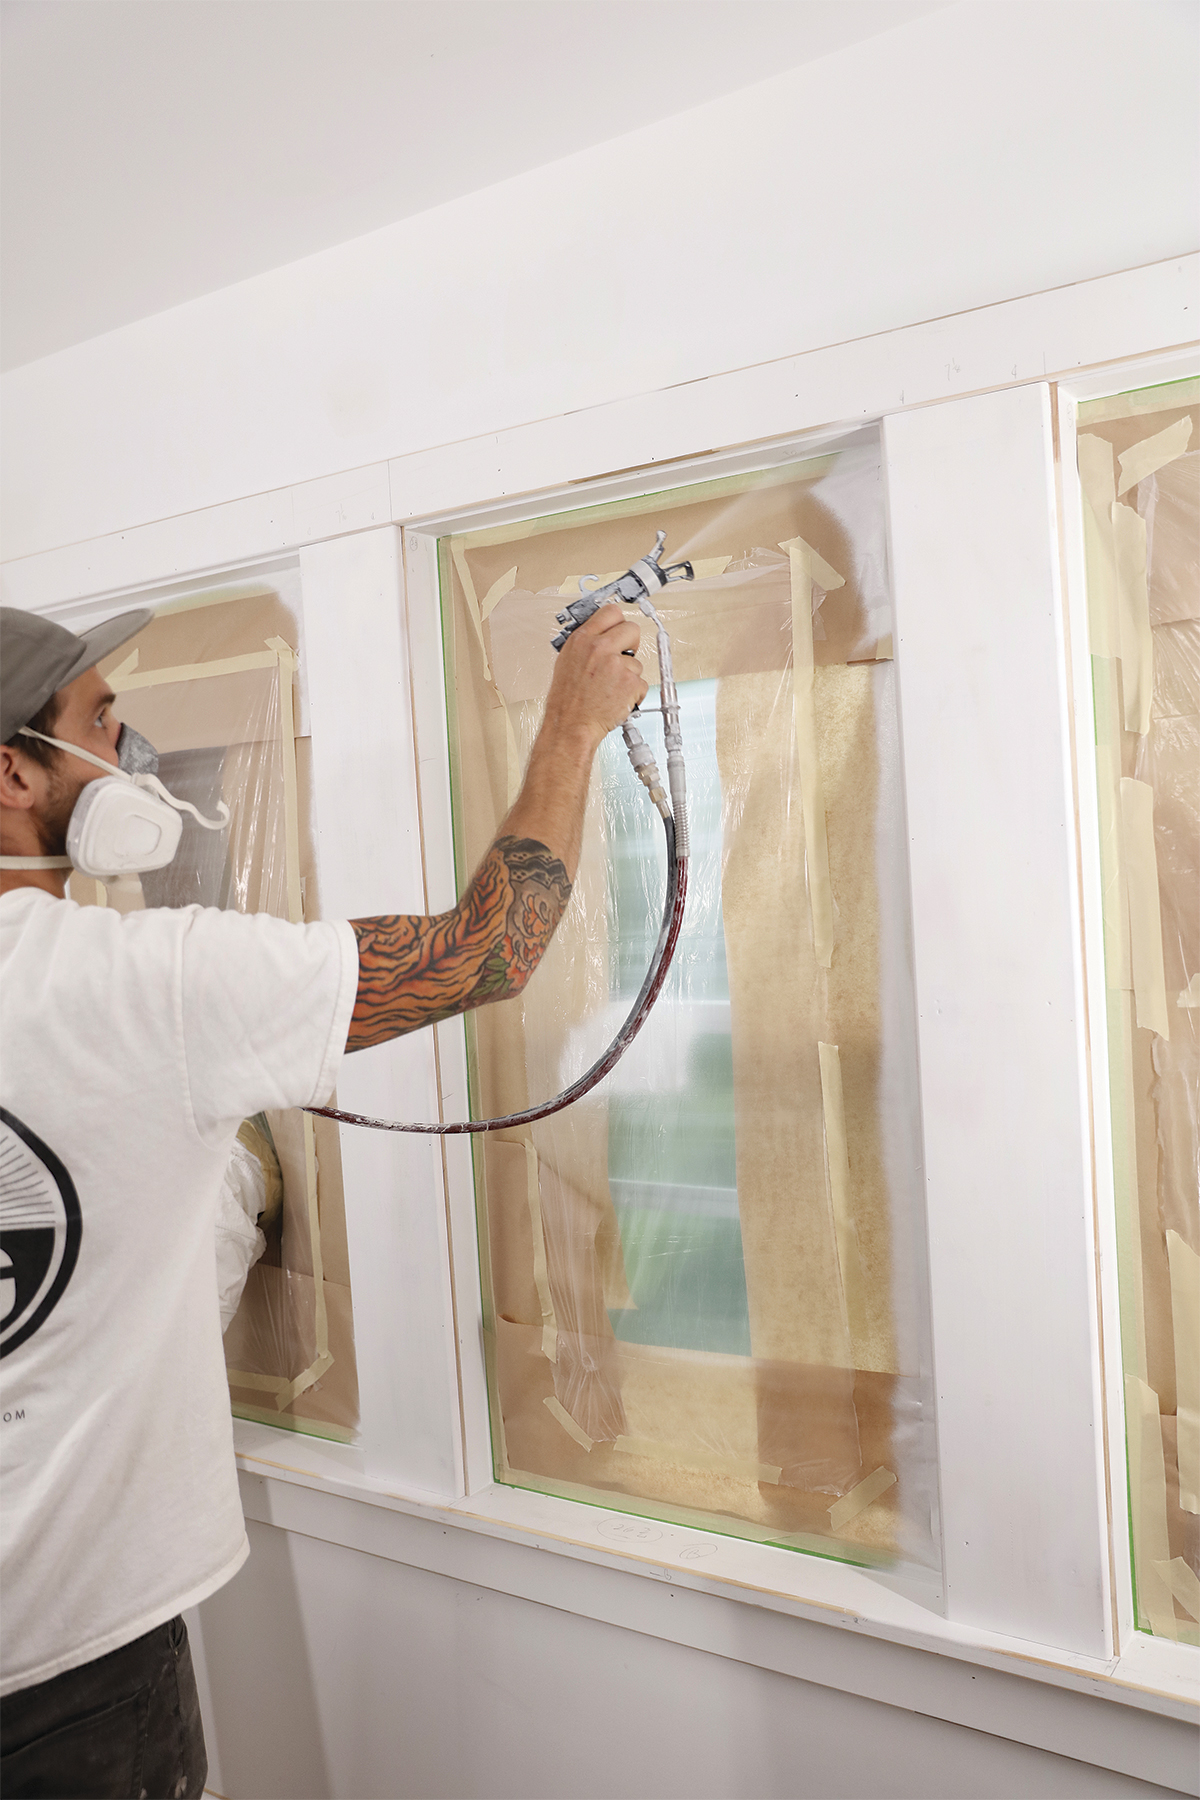
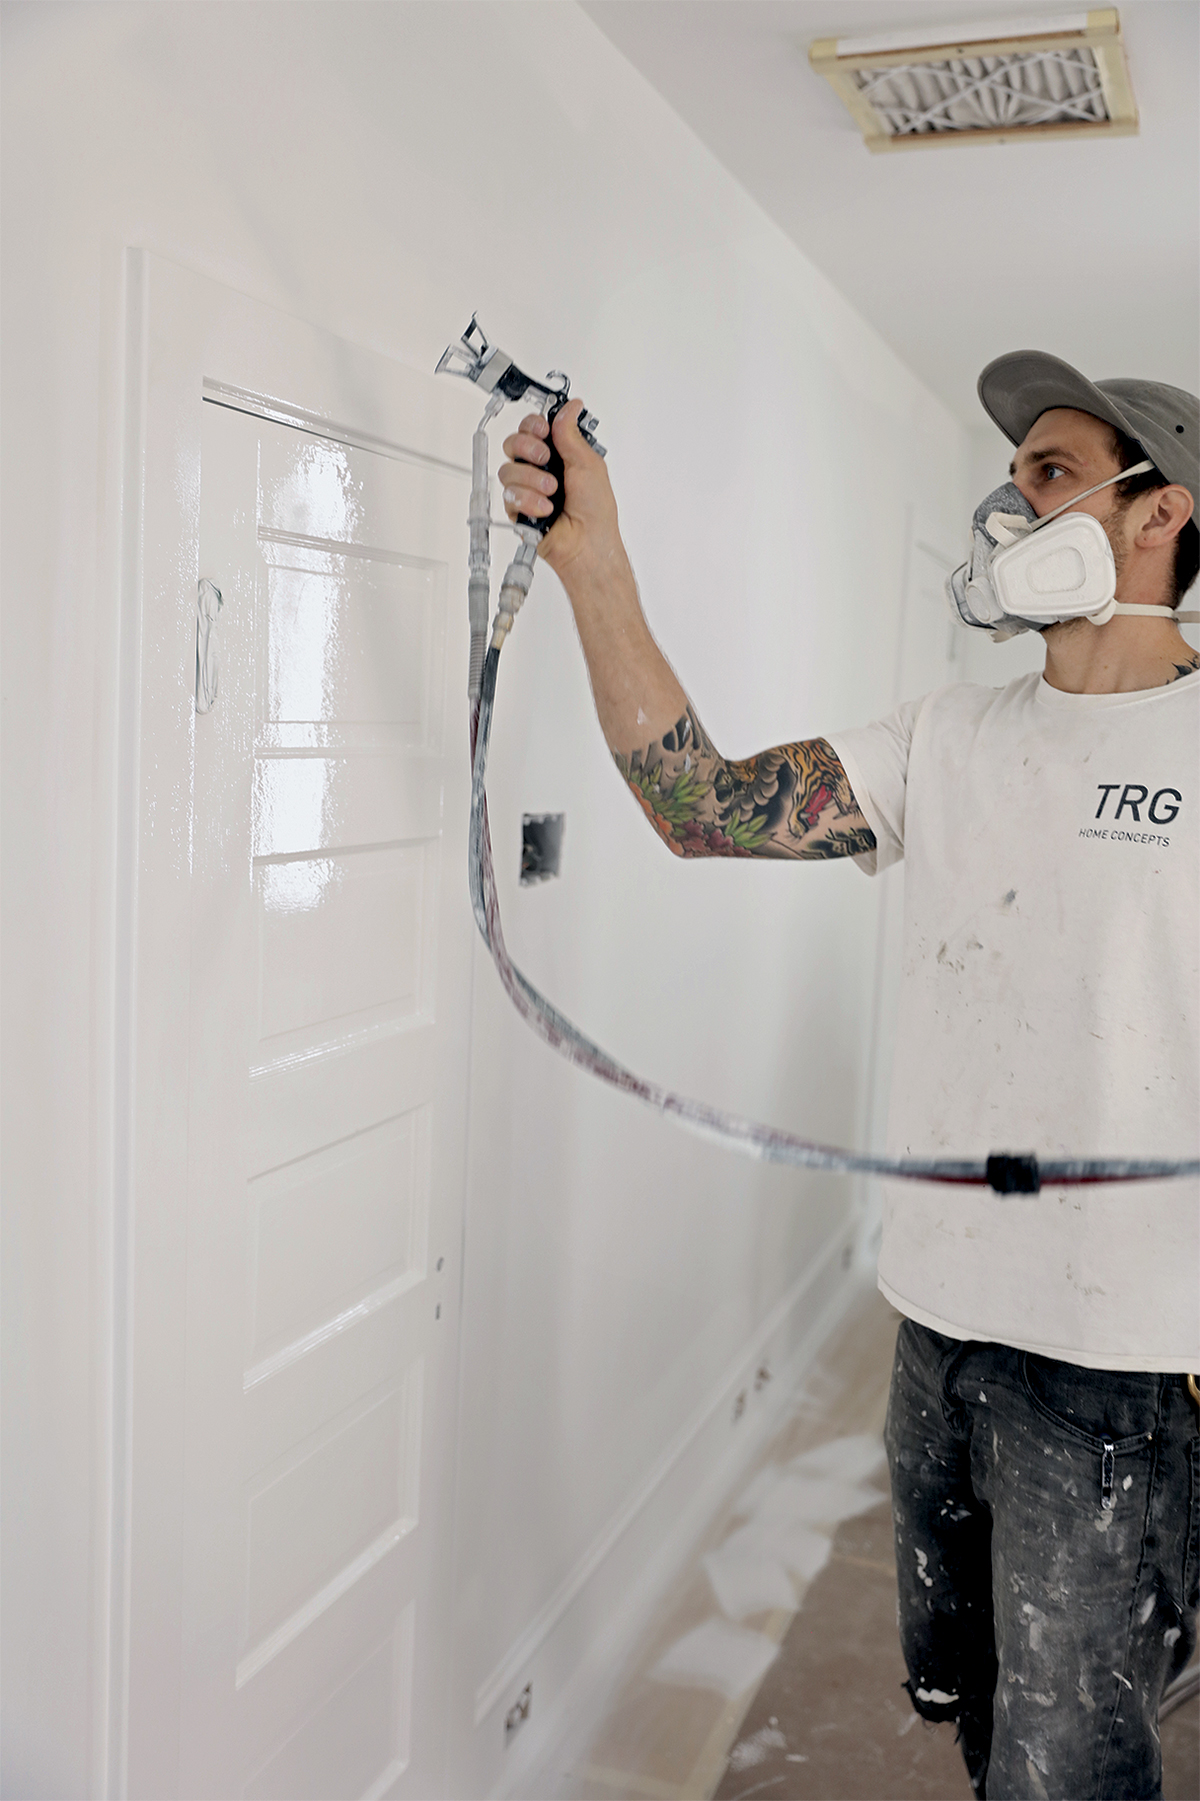
2. PRIME THE TRIM
Before priming, sand the trim to remove any rough areas. Then, whether you use a sprayer or a brush, the goal is the same: an even coat of primer to prepare the surface for paint. For new wood, Sherwin-Williams Premium Wall & Wood Primer builds a body on the trim for spackle, caulk, and paint to adhere to.
prime interior paint
3. FILL, SAND, AND VACUUM
Fill nail holes, dings, and joints in trimwork with Sherwin-Williams Shrink-Free™ Spackling applied with a fingertip or putty knife. Use two coats and slightly overfill holes, sanding them flat afterward. Hit each joint in the trimwork with the sandpaper as well to make sure the surfaces are flush. After sanding, vacuum all surfaces. Caulk all changes in plane on the wall—such as baseboards and casing to wall, casing to window, etc.—using a flexible caulk with excellent adhesion, like SherMax™ Urethanized Elastomeric Sealant, so gaps don’t open up over time.
fill before painting
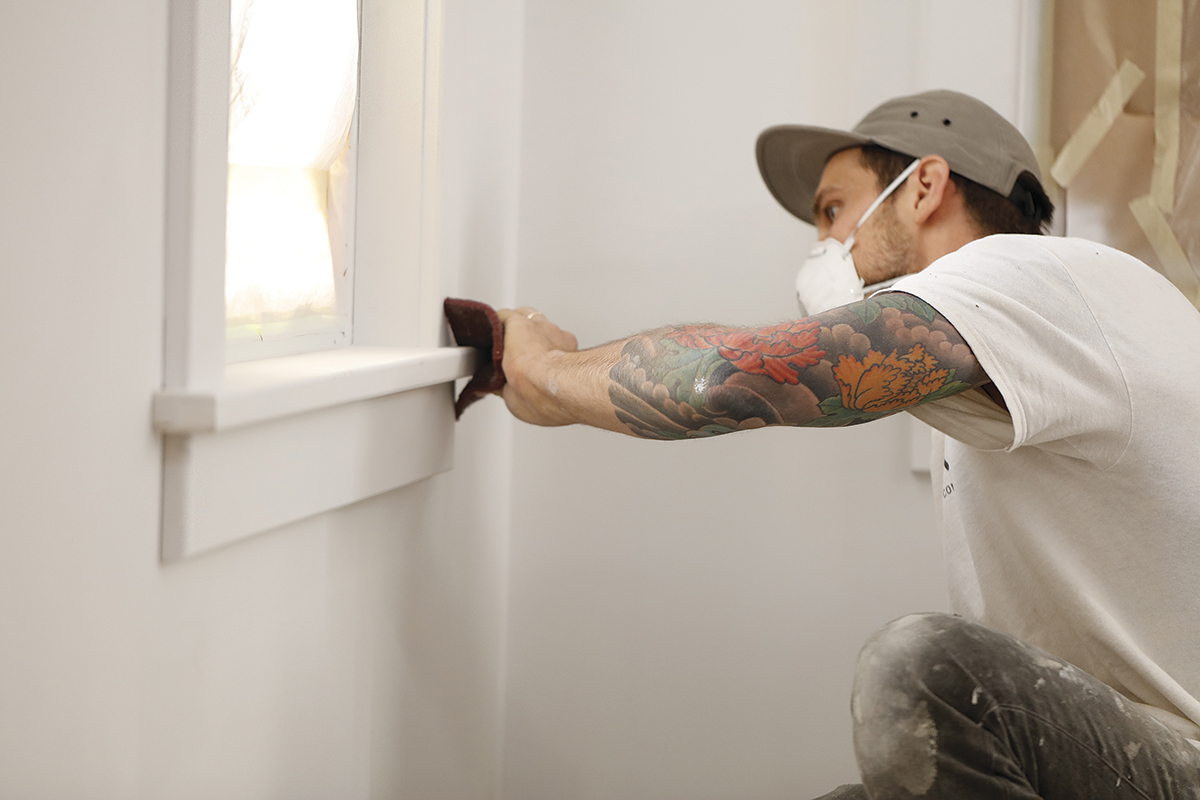
4. REPEAT
Spray the woodwork with a second coat of primer and lightly sand with fine-grit sanding sponges to achieve as smooth and even a base as possible. Vacuum thoroughly before moving on to the painting stage.
repeat paint prep steps until good
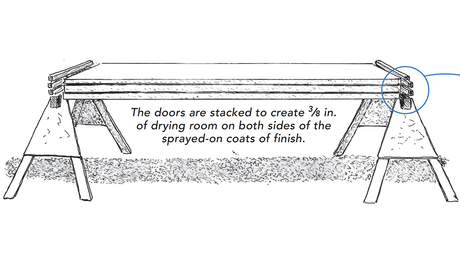
5. PAINT, SAND, PAINT
Painting the trim mirrors the priming process: two coats of the finish paint—Emerald Urethane Trim Enamel—with fine-grit sanding and a vacuuming between the coats. Work systematically and carefully to achieve complete, even coverage.
spray paint on trim

Painting Walls

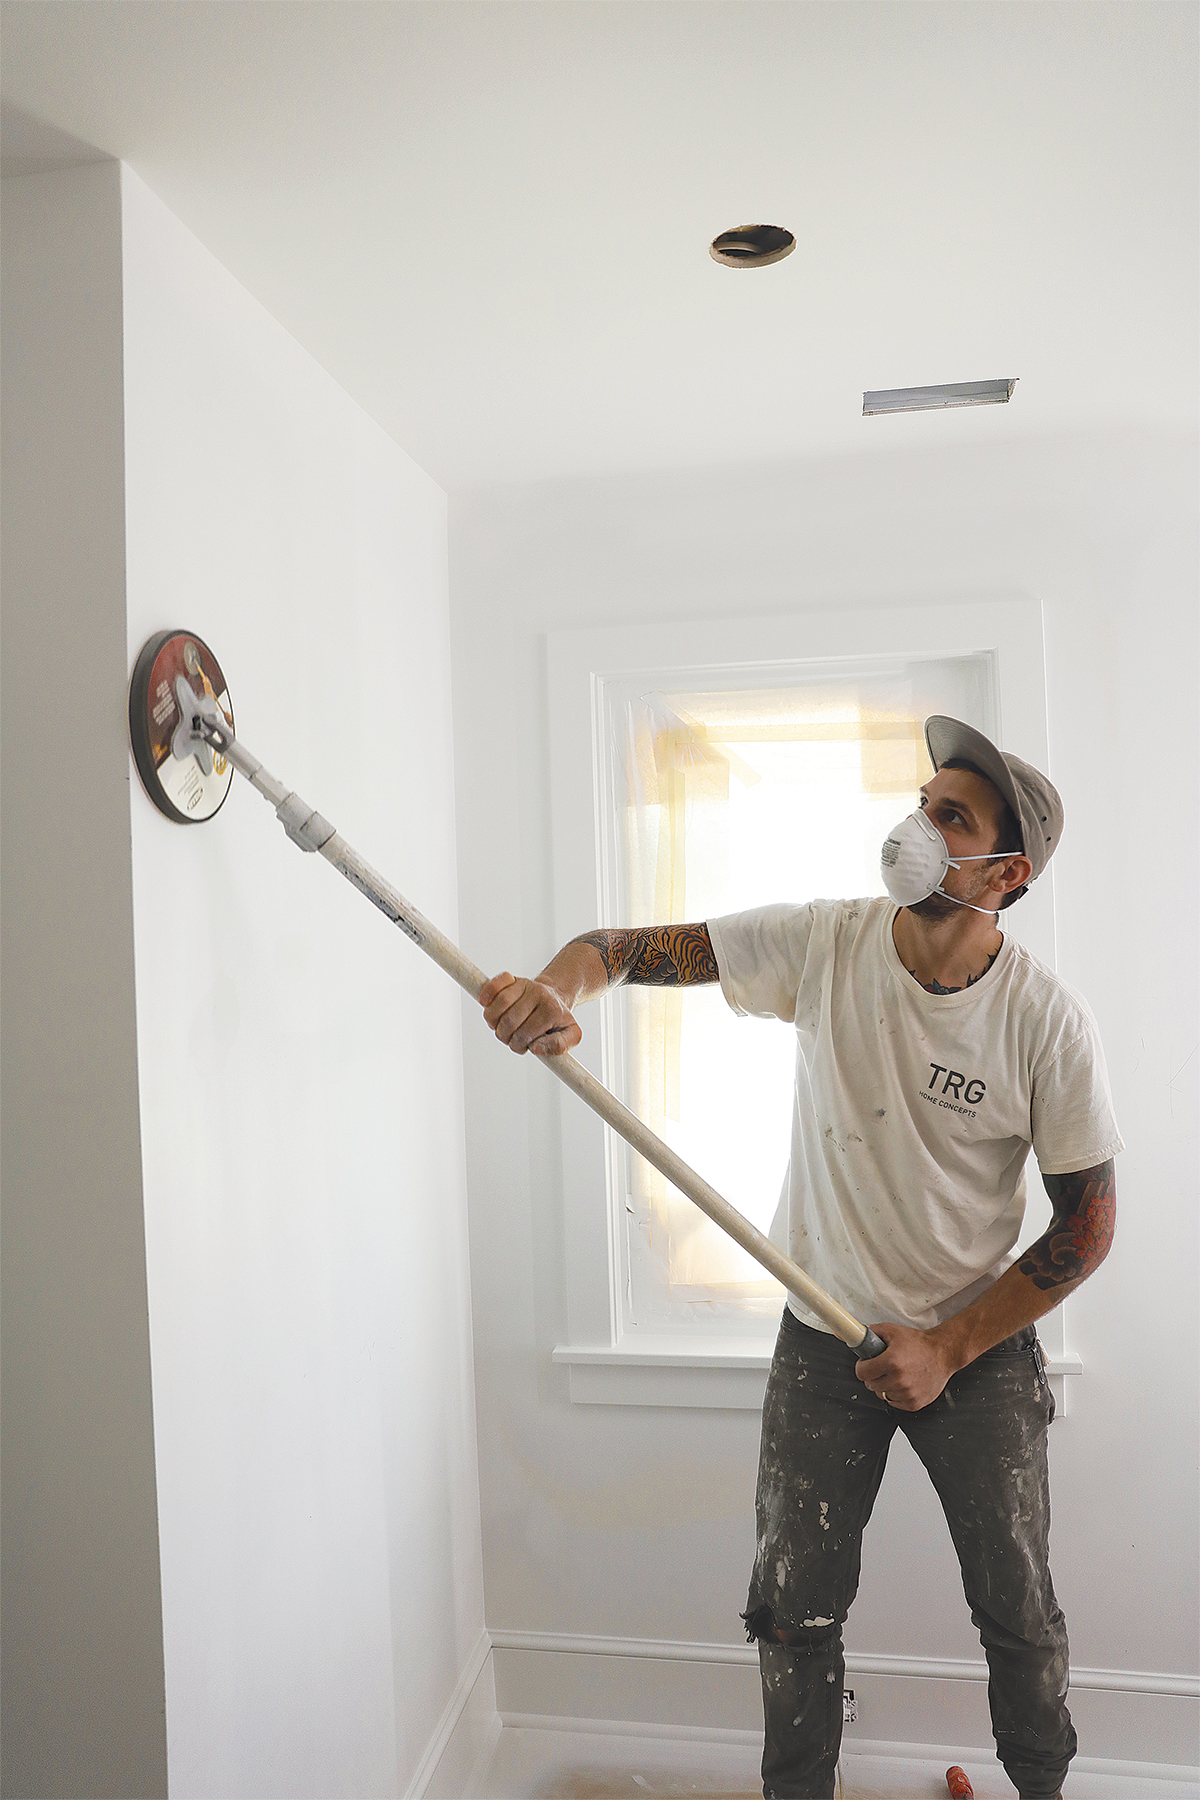
1. PRIME AND SAND
If this is a new project, roll the walls with a coat of primer before installing trim in the room to eliminate cutting in around doors, windows, and baseboard. Check for and repair any dings in the wall from the trim install. After the trim is painted, knock down the first primer coat on the walls with 220-grit paper on a sanding disk.
prime before painting walls
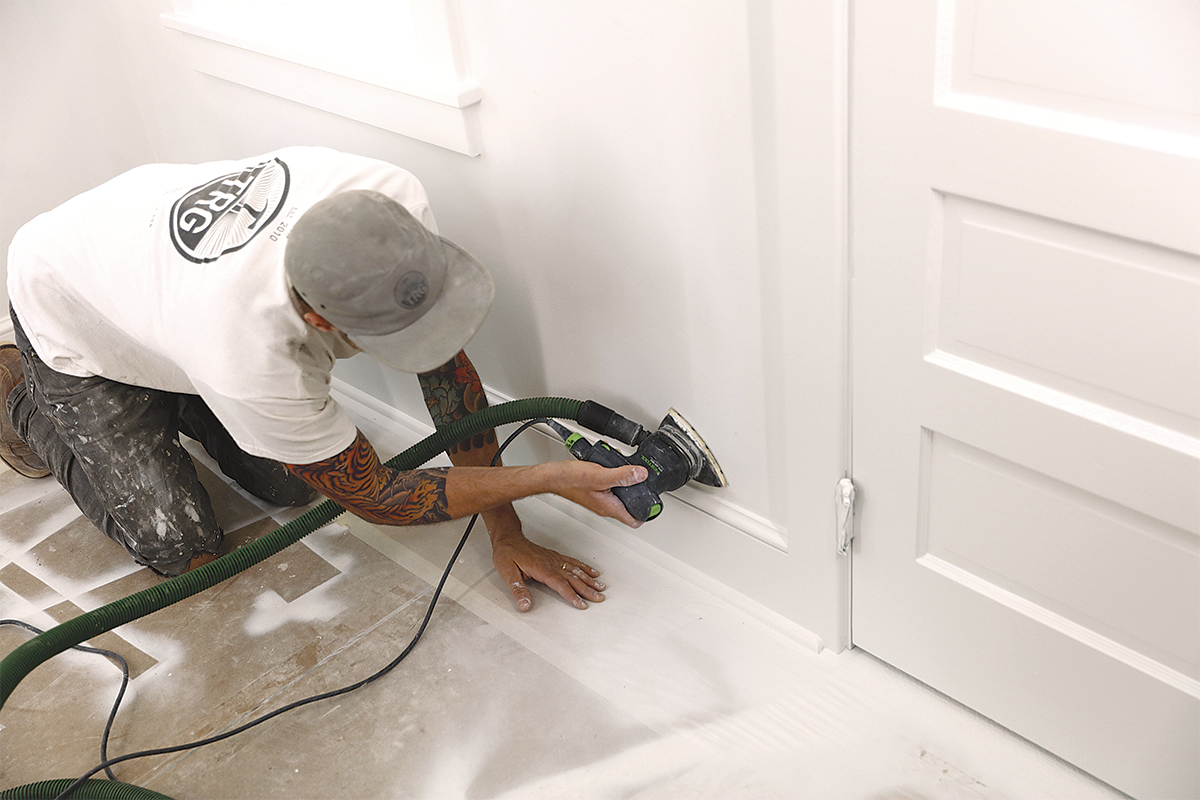
2. CLEAN UP THE OVERSPRAY
When spraying paint, there’s a fair amount of overspray, and with two coats of primer and two coats of paint there will be buildup on the walls adjacent to the woodwork. Before the second coat of primer goes on the wall, use a small finish sander to take down the overspray and get in tight to the trim.
clean up paint overspray on walls
3. CUT IN AND ROLL
Use a brush to cut in the primer along the edges of the walls, and then roll the walls.
how to roll paint on walls
4. SAND AND REPEAT, TWO MORE TIMES
First comes a light sand with the sanding disk to knock down the walls after the second coat of primer and a thorough cleaning with the vacuum, and then it’s time to paint. Apply two coats of Emerald Designer Edition™ on the walls, cutting in with the brush and rolling the field each time and sanding and vacuuming between the first and second coats.
repeat painting steps until perfect

WARNING: If you are working in a home built before 1978, please follow lead-safe remodeling guidelines during any painting projects or other remodeling jobs.

Sign up for eletters today and get the latest how-to from Fine Homebuilding, plus special offers.

Signing you up...

This site is protected by reCAPTCHA and the Google Privacy Policy and Terms of Service apply.
See all newsletters
See all newsletters
×

Get home building tips, offers, and expert advice in your inbox

Signing you up...

This site is protected by reCAPTCHA and the Google Privacy Policy and Terms of Service apply.
See all newsletters
See all newsletters

New Feature

Fine Homebuilding Forums

Ask questions, offer advice, and share your work

View Comments

  1. user-183982 | Dec 28, 2020 01:17pm | #1

    Stripping wood trim and doors often involves old, lead-based paint as WARNING above. The Speedheater™Infrared Paint Removers do this dangerous job faster, cleaner, and safer than liquids and sanding.

Log in or create an account to post a comment.

Sign up Log in

Become a member and get full access to FineHomebuilding.com

Up Next

Video Shorts

Featured Story

Monitor Both Outdoor and Indoor Air Quality

The sensors and mapping tool from PurpleAir can help residents strategically use existing air filters.

Featured Video

Video: Build a Fireplace, Brick by Brick

Watch mason Mike Mehaffey construct a traditional-style fireplace that burns well and meets current building codes.

Related Stories

  • Staining Pressure-Treated Porch Posts
  • Rust-Free Paint Lids
  • Podcast 538: PRO TALK With Painting Contractor Luke DiBlasi
  • Adding Color to Freestanding Bathtubs and Sinks

Discussion Forum

Recent Posts and Replies

  • |
  • |
  • |
  • |
  • |
  • |
View More Create Post

Highlights

Fine Homebuilding All Access
Fine Homebuilding Podcast
Tool Tech
Plus, get an extra 20% off with code GIFT20

"I have learned so much thanks to the searchable articles on the FHB website. I can confidently say that I expect to be a life-long subscriber." - M.K.

Get home building tips, offers, and expert advice in your inbox

Signing you up...

This site is protected by reCAPTCHA and the Google Privacy Policy and Terms of Service apply.
See all newsletters
See all newsletters

Video

View All Videos
  • Podcast 538: PRO TALK With Painting Contractor Luke DiBlasi
  • Podcast 484: PRO TALK With Color Consultant Paula Gaull
  • Removing Lead Paint: DIY or Hire a Contractor?
  • Prep for the Perfect Paint Job
View All

Paints and Finishes

View All Paints and Finishes Articles
  • Adding Color to Freestanding Bathtubs and Sinks
  • Dowels for Painting and Stacking
  • 7 Steps to a Perfect Exterior Paint Job
  • 4 Tips for Maintaining Your Paintbrushes and Rollers
View All Paints and Finishes Articles

BOOKS, DVDs, & MERCH

Shop the Store
  • 2023 Tool Guide
    Buy Now
  • 2022 Fine Homebuilding Archive
    Buy Now
  • Pretty Good House
    Buy Now
  • Code Check Complete 3rd Edition
    Buy Now
  • Shop the Store

Fine Homebuilding Magazine

  • Issue 318 - October 2023
    • Make Mudsills Square and Level
    • Turn Up the Heat With Induction Cooktops
    • The Fine Homebuilding Interview: Lloyd Alter
  • Issue 317 - Aug/Sept 2023
    • Finishing Drywall With Seamless Results
    • A Flat Roof in a Cold Climate
    • Compact Cordless Shop Vacs
  • Issue 316 - July 2023
    • Timber-Framed Solar Canopies
    • Build a Transom Above a Stock Door
    • Understanding Toilet Design and Efficiency
  • Issue 315 - June 2023
    • How to Craft a Copper Roof
    • 5 Lessons from Building in a Cold Climate
    • The Advantages of Cellular PVC Siding
  • Issue 314 - April/May 2023
    • 7 Options for Countertops
    • Tool Test: Wood-Boring Bits
    • Critical Details for Ductless Heat Pumps

Fine Homebuilding

Follow

  • YouTube
  • instagram
  • facebook
  • pinterest
  • Tiktok
  • twitter

Newsletter

Get home building tips, offers, and expert advice in your inbox

Signing you up...

This site is protected by reCAPTCHA and the Google Privacy Policy and Terms of Service apply.
See all newsletters
See all newsletters

Membership & Magazine

  • Online Archive
  • Start Free Trial
  • Magazine Subscription
  • Magazine Renewal
  • Gift a Subscription
  • Customer Support
  • Privacy Preferences

Taunton Network

  • Green Building Advisor
  • Fine Woodworking
  • Fine Gardening
  • Threads
  • About
  • Contact
  • Advertise
  • Careers
  • Copyright
  • Terms of Use
  • Site Map
  • Do not sell or share my information
  • Privacy Policy
  • Accessibility
  • California Privacy Rights

© 2023 The Taunton Press, Inc. All rights reserved.

X
X
This is a dialog window which overlays the main content of the page. The modal window is a 'site map' of the most critical areas of the site. Pressing the Escape (ESC) button will close the modal and bring you back to where you were on the page.

Main Menu

  • How-To
  • Design
  • Tools & Materials
  • Video
  • Blogs
  • Forum
  • Reader Projects
  • Magazine
  • Members
  • FHB House

Podcasts

  • FHB Podcast
  • ProTalk

Webinars

  • Upcoming and On-Demand

Podcasts

  • FHB Podcast
  • ProTalk

Webinars

  • Upcoming and On-Demand

Popular Topics

  • Kitchens
  • Business
  • Bedrooms
  • Roofs
  • Architecture and Design
  • Green Building
  • Decks
  • Framing
  • Safety
  • Remodeling
  • Bathrooms
  • Windows
  • Tilework
  • Ceilings
  • HVAC

Magazine

  • Current Issue
  • Past Issues
  • Magazine Index
  • Subscribe
  • Online Archive
  • Author Guidelines

All Access

  • Member Home
  • Start Free Trial
  • Gift Membership

Shop the Store

  • Books
  • DVDs
  • Taunton Workshops

More

  • FHB Ambassadors
  • Reader Projects
  • Podcast
  • FHB House
  • Customer Support

Account

  • Log In
  • Join

Newsletter

Get home building tips, offers, and expert advice in your inbox

Signing you up...

This site is protected by reCAPTCHA and the Google Privacy Policy and Terms of Service apply.
See all newsletters
See all newsletters

Follow

  • YouTube
  • instagram
  • facebook
  • pinterest
  • Tiktok
  • twitter

Join All Access

Become a member and get instant access to thousands of videos, how-tos, tool reviews, and design features.

Start Your Free Trial

Subscribe

FHB Magazine

Start your subscription today and save up to 70%

Subscribe

We hope you’ve enjoyed your free articles. To keep reading, become a member today.

Get complete site access to expert advice, how-to videos, Code Check, and more, plus the print magazine.

Start your FREE trial

Already a member? Log in