Q:
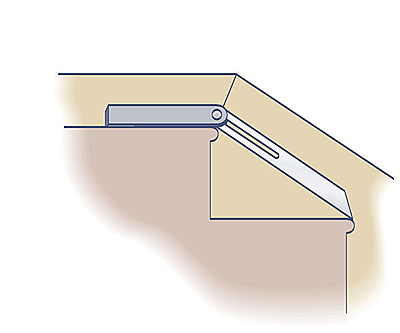
I’m having a devil of a time trying to figure out the funky miter angle where the top of a stair skirtboard meets a horizontal baseboard. The skirt is at about a 19° angle, but I’m having trouble doing the math to come up with the proper angle. There has to be an easier way. Any ideas?
Peggy RaFuse, Goldsboro, NC
A:
Former managing editor Roe A. Osborn replies: I was always awful degrees for something like a skirtboard, odds were that it would be meeting an element that was out of plumb or level, throwing off my calculations.
So I finally figured out that avoiding numbers altogether is really the best way to go. I worked on lots of old houses where square and level were nonexistent, but even for new construction, I always made a story board for any odd angles that I ran into. Bisecting the angles on the story board is easy.
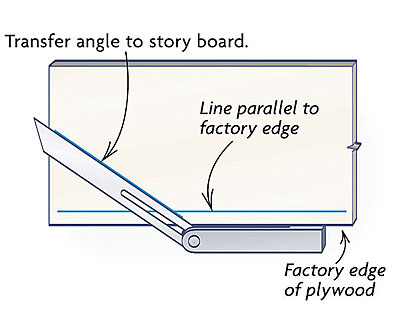
For the board, I usually use a piece of scrap plywood about 6 in. wide and a couple of feet long with one factory edge. First, I line up the tongue of a framing square even with the factory edge of the board and then draw a straight line. Next I use a large bevel square to get the angle I need to miter, in this case the angle between the skirtboard and the floor. You might need to register the bevel square against a long straightedge to minimize any possible discrepancies in the skirtboard or in the floor near the intersection.
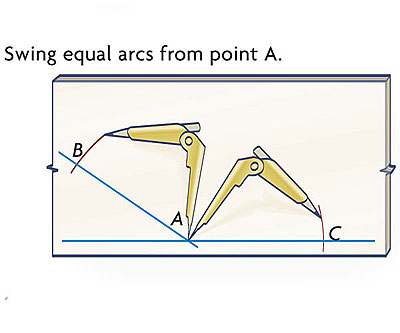
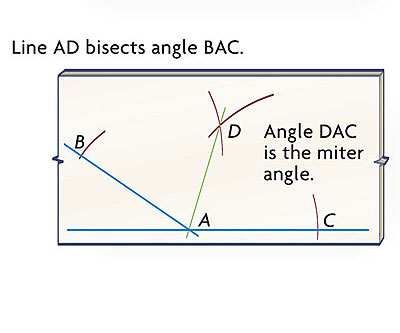
I then transfer the angle to the story board, drawing the angle line through the line that I had made earlier.Next I open a compass or scribes about 3 in. or 4 in. (the dimension for this step isn’t critical), and I place the point at the intersection of the straight line and the angle line (point A); then I swing arcs onto both lines.With the scribes open another 1/2 in. or so, I swing intersecting arcs from the two points (B and C) that I just made on the lines. A line that I draw through the intersecting point (D) and point A bisects the original angle (BAC).
Then I set my bevel square to the new line and transfer the angle to the miter saw. I make a test miter cut to verify that the angle is correct. Then I note the angle (in degrees) from the miter saw and label the board with the location of the angle and the number of degrees. I use this method to find the miter angle for any spot that is not a perfect 90° angle. I keep these boards handy to figure and record each angle. Then when I need to re-create an angle, I just refer to the board.