A cutting guide, often called a shooting board, makes it easy to get straight, clean, accurate cuts from your circular saw. Not only is it great for cutting bulky panel products such as plywood, medium-density fiberboard (MDF), and oriented strand board (OSB), but you also can use it for finish-carpentry tasks like trimming doors and fitting countertops. It’s such a useful jig that I have three of them in different lengths.
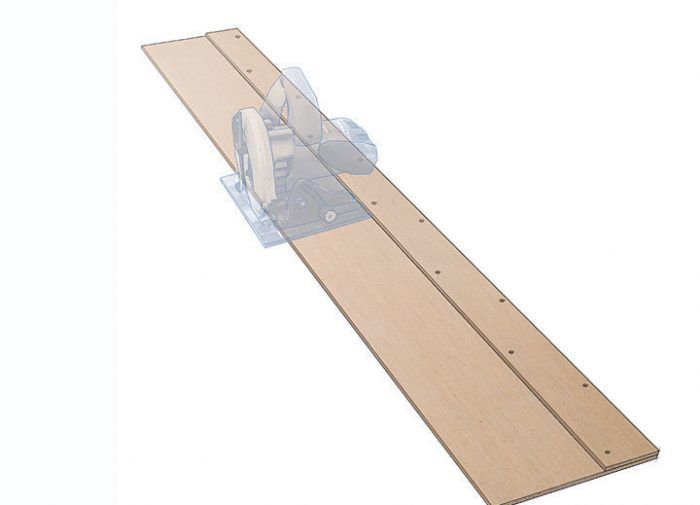
The jig is made up of two parts: a straightedge and a base sheet. The straightedge guides the saw, and the base sheet protects the material from the saw’s shoe and helps you to position the guide. Unlike a spirit level, a straightedge, or other improvised cutting guide, a shooting board is positioned right at the cutline, so you don’t have to compensate for the width of the saw’s shoe. This speeds measuring and marking, and practically eliminates layout errors.
Some carpenters use 1/2-in. or 3/4-in. plywood or even 1x solid stock, but these thicker materials get in the way of the saw’s motor, reducing the depth of cut. As a result, I like to use lauan plywood. It’s inexpensive, and at 1/4 in. thick, it has a minimal effect on the saw’s depth of cut. The photos at right show how to make a cutting guide with a sidewinder saw, but the process is the same for worm-drive saws.
Step by step
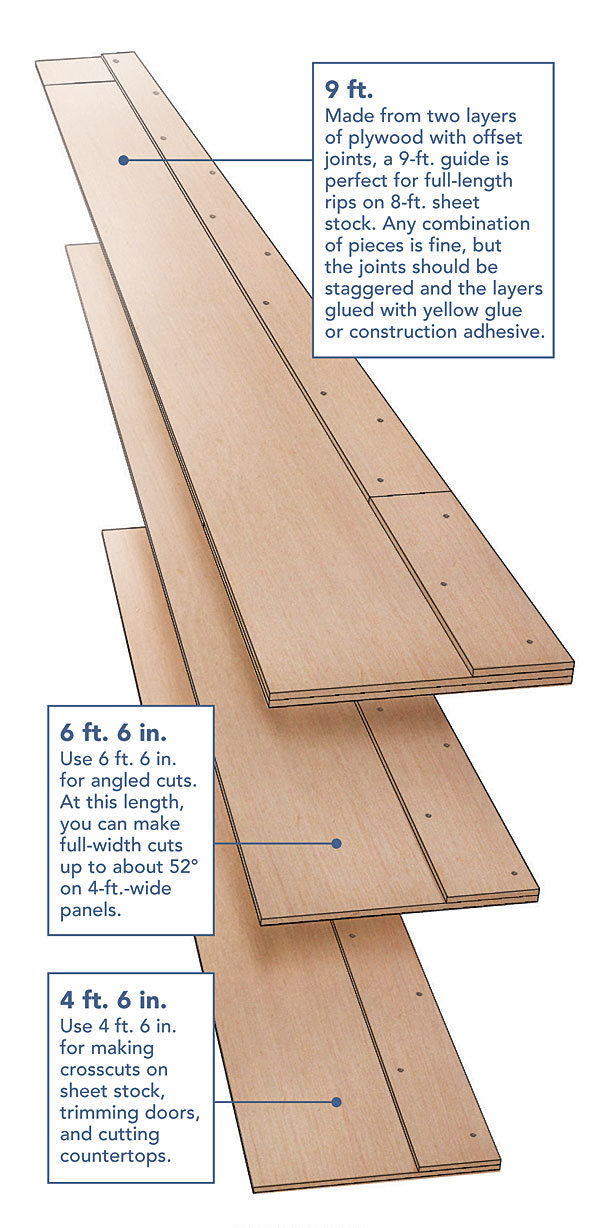
Different lengths for different jobs
Using the saw guide
Photos: John Ross, Drawings: Dan Thornton
-
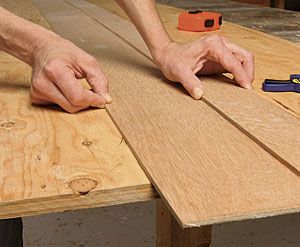
Step 1 Start with a factory edge. The panel’s factory edge will act as the straightedge that guides the saw’s base. Clamping a pair of fingers on the saw’s shoe is a fast and easy way to make a 3-in. strip.
-
Step 2 Cut the base sheet. Make the base sheet a little wider than the saw’s shoe, plus 3 in. (the width of the guide strip from step 1).
-
Step 3 Glue and screw the guide to the base. Place the 3-in. guide strip on top of the base sheet with the guide strip’s factory edge toward the center of the guide. Screw the strip to the base sheet with 1/2-in. sheet-metal screws. You can use glue for a better bond between the pieces.
-
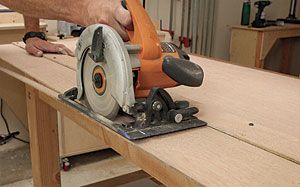
Step 4 Cut the base-sheet edge. Run the saw along the guide strip to cut off the excess base sheet. This step mates the saw to the guide and ensures that the blade is tight to the guide’s base, which will reduce splintering when cutting doors, veneer plywood, and other finish material.
-
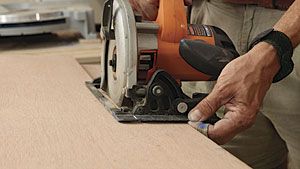
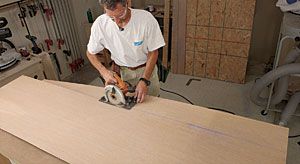
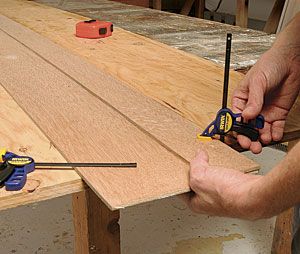
Measure and mark. Make a pencil mark at both ends of the cut. Align the edge of the saw guide to the marks. It’s important to place the guide on the piece of stock you want to save; otherwise, the cut will be short by the thickness of the blade.
-
Clamp the guide. The author likes small (3-in. maximum capacity), quick-adjusting bar clamps to hold the guide.
-
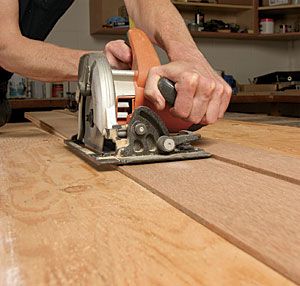
Let it rip. With the saw shoe held tight to the guide, make the cut. If a splinter-free cut is important, score the stock with a utility knife before sawing.