Using a water level
For simple projects, all you really need is plastic tubing and a bucket of clean water
Walk into any good hardware store, and you’ll find more fancy leveling devices than you can count. But which ones do you really need? If you’re a homeowner or a small-scale remodeler, the answer probably is none of them. If your long-distance leveling needs are modest—say you have to lay out kitchen cabinets, line up a bank of windows, or level a ceiling—all you really need is a length of plastic tubing and a bucket of clean water.
Although this simple device lacks the sex appeal of a builder’s level or a high-tech laser, it’s just as accurate and even more versatile. Unlike its pricey competitors, a water level does not depend on line of sight, so you can level around corners without resetting the tool.
To some people, a water level seems like a mysterious device, but the only magic involved is gravity. Every body of water seeks its own level; it doesn’t matter if that water is in the Atlantic Ocean or in 50 ft. of plastic tubing.
Setup takes minutes

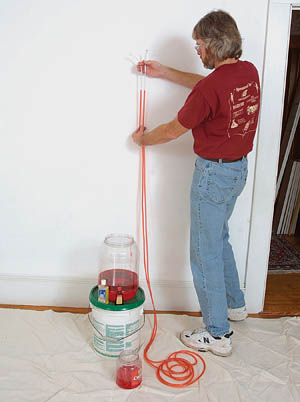
Step 1: Additives improve performance. Fill the hose by siphoning water from an elevated bucket, and let the water flow long enough to force out the air bubbles. Although pure water is fine, a few squirts of Jet-Dry dishwasher rinse agent improve flow. A dollop of food coloring makes the fluid more visible, but it will stain if spilled.
Step 2: If both ends line up, you’re good to go. Test the accuracy of the level by holding both ends together. If the water levels don’t line up (and you’re not standing on the hose), you’ve got air bubbles trapped in the line. If you can’t get the bubbles out by tapping the line with a finger, the best thing to do is empty the hose and resiphon.
Tips for building a one-person water level
The downside to a hosetype water level is that it requires two people to operate. If you work alone, you can build a one-person water level by drilling a hole in a plastic bucket, inserting a few inches of hose, and sealing the edges with silicone; or you can purchase an effective ready-made version for about $30 from Aqua-Level Mfg. Co. This type of level operates on the principle that the water in the hose will seek the same level as the surface of the water in the reservoir.
A benchmark for each corner
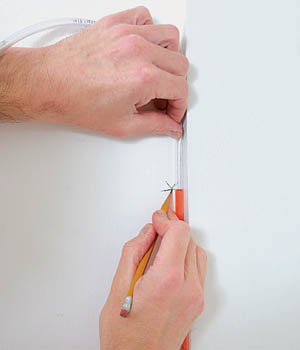
Step 3: V marks the spot. Draw a prominent Vshape over a straight line to indicate the precise elevation. (Note: Because the surface of the water in the tube is slightly concave, both workers should agree beforehand on whether to mark the high point or the low point.)
Step 4: One person calls the shots, and the other works the room. After establishing a benchmark in a convenient corner, one worker remains at that location with one end of the hose (inset photo) while his partner heads for the nearest corner with the opposite end and a pencil. The first worker slowly moves the tube up or down until the surface of the water aligns with the benchmark. After pausing for a few seconds to verify that the water has stopped moving, he gives his colleague the OK to mark the wall.
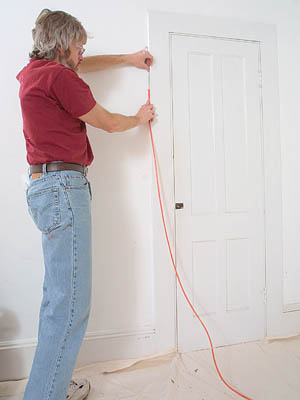

Step 5: Create a level playing field and worry about the height later. In many situations, it’s easier to pick an arbitrary height—preferably at eye level—and use the water level to place a reference point in each corner. Once these benchmarks are in place, a tape measure or a story pole can be used to lay out the correct height quickly.
Photos by: Andy Engel
Fine Homebuilding Recommended Products
Fine Homebuilding receives a commission for items purchased through links on this site, including Amazon Associates and other affiliate advertising programs.
Metabo HPT Impact Driver (WH18DBDL2)
Spyder Stinger Spade Bit
DEWALT Impact Driver (DCF885)