How to Form a Custom Concrete Pier for a Porch
Forming concrete piers for a porch or deck typically amounts to digging holes, dropping in Sonotubes, and placing the concrete.
But for aesthetic reasons, Jake wants the new piers for his porch to be 12 in. by 16 in. with 19 in. above grade, and that means Sonotubes won’t work.
The old block footings, too shallow to begin with, have been dug out, so Jake can’t use new, clean-sided holes as part of the forms. He could use block, but Jake is no mason and doesn’t want to start learning now.
“So my question is this,” he says in a Breaktime post, “How should a form be framed for a 5-ft. pier?”
He’s mulling the use of 3/4-in. plywood and framing lumber, but looks for guidance on the specifics of making the form.
A heavy-duty proposal
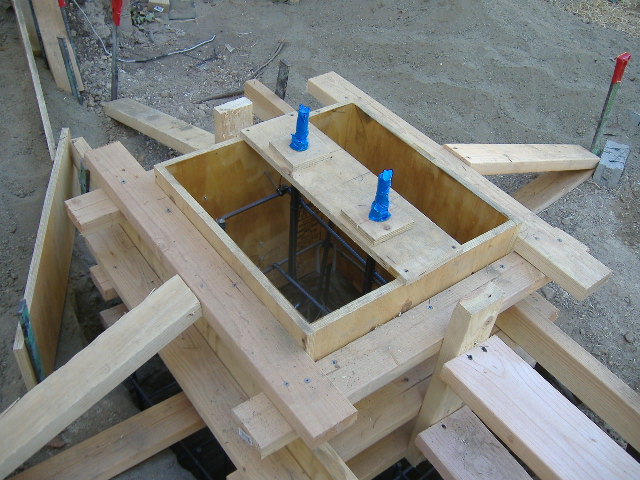
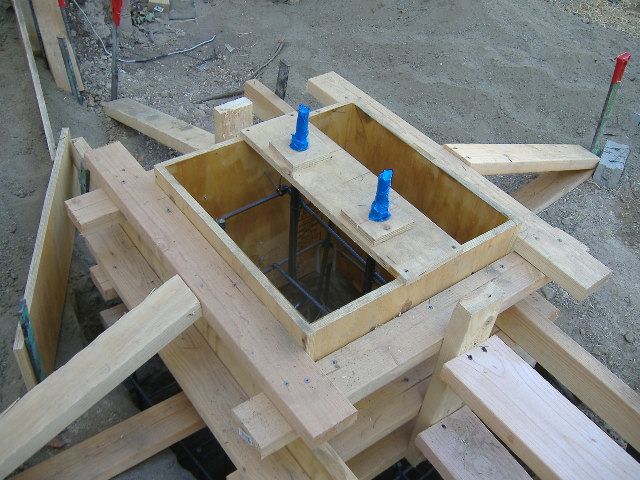
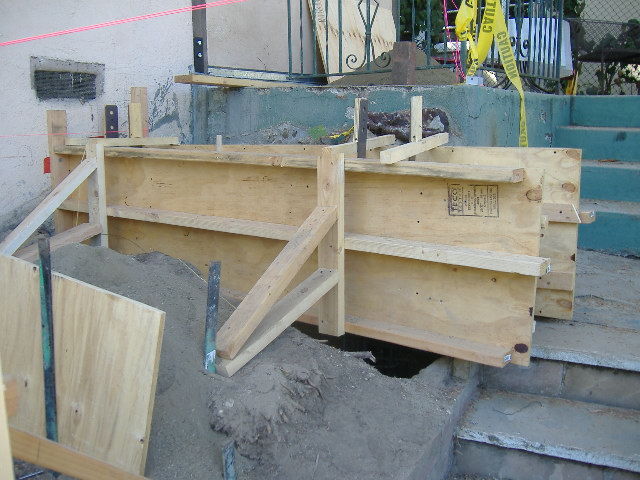
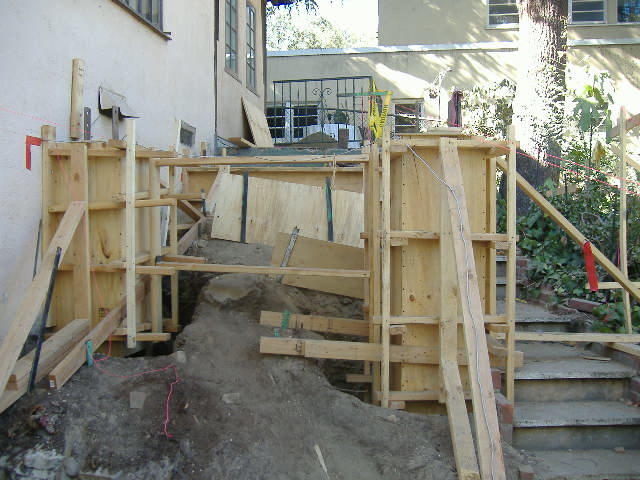
Yersmay1 has been down this road before and suggests plywood forms wrapped with bands of 2x4s set on edge, and then braced on the sides with additional framing material. The 2×4 reinforcements that encircle the forms, called walers, are pinned at the corners.
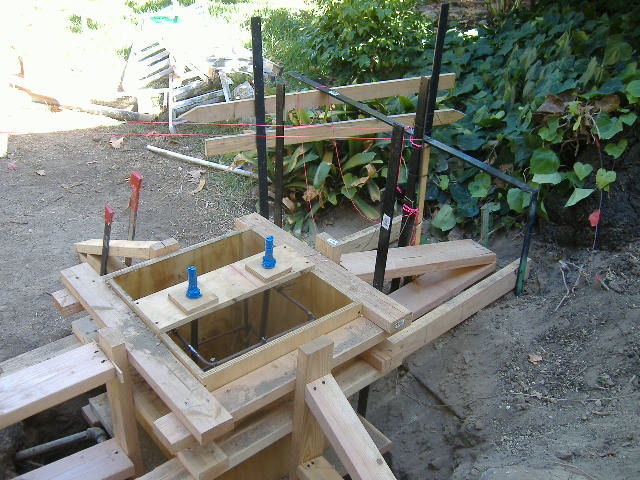
“Pay particular attention to having a kicker at the bottom of your pier,” he adds, “because that is where you’ll be more likely to have a blow out. All sides of the form need to have kickers. The kickers need to be staked off into the ground solidly or somehow wedged against something that makes things completely stable.”
Other tips: consolidate the concrete as it’s placed, oil the forms to make them easier to remove, and make sure the very bottom edge of the form isn’t trapped in concrete.
But, he adds, the holes will have to be large enough to provide access for taking the forms apart. “This sounds like an awful lot of labor,” Yersmay1 writes. Have you calculated labor costs and how they would contrast to simply filling your existing holes with concrete and then forming up once you’re above grade?”
 |
 |
 |
What about a footing?
Do the piers need separate footings? DaveRicheson thinks so, especially if load-bearing piers are set in disturbed soil. If the old block piers were set on footings, they could be used for the new forms. An alternative, he writes, would be to “dramatically” increase the size of the hole and pour a monolithic footing/pier to just below grade, then set forms for the 19-in. portion of the pier that will be above grade.
DanH doesn’t think a footing is necessary. Unless the porch will have a concrete deck, or there will be living space above the porch, the 12 in. by 16 in. pier that Jake is proposing should be “more than adequate for a footing,” he says.
“Be sure to plan how to get the form apart,” DanH adds. “You can build the form outside the hole and drop it in, but you won’t be able to reverse that to pull it apart. Or plan so that you only need to remove the top part of the form.”
What about using concrete blocks as a form?
Jigs-n-fixtures has another idea: Use CMU blocks as the form, holding them together with construction adhesive instead of grout. To allow concrete to flow between cells in the block, knock out half the interior sides, then drop in a length of #4 rebar and fill with concrete.
“Back fill and you are done,” Jigs says.
Jake probably wouldn’t even need glue between the blocks, says gfretwell. “Once you get the concrete in there they are not going anywhere and you will not have much squeeze-out from stacked block,” gfretwell writes. “I set a stack of round column block under water and filled them with no problem. Even in the water, washout was minimal.”
Maybe, says, Jigs, but don’t forget that water counteracts much of the pressure generated by the concrete. “Water weighs 122-lbs per cubic foot, and concrete weighs around 135 to 140-lbs per cubic foot,” says Jigs. “The water around the form counteracts almost 90% of the pressure generated by the concrete.
“Nothing is worse than having the form blow out about the time you get all the concrete in.”
The idea makes sense to Jake. “The more I churn this all over in my mind with the help of you guys the more I don’t see a concrete pier working out as much as I would like it to,” he writes. “The logistics appear too problematical for this situation and greatly outweigh the benefits…
“All that said, I am leaning towards the filled CMU method with Jigs suggestion about using adhesive to hold the column in place. If needed, I can incorporate a cap using a form to tweak my elevation. As for the exterior of the CMU, perhaps a smooth sand stucco coat.”