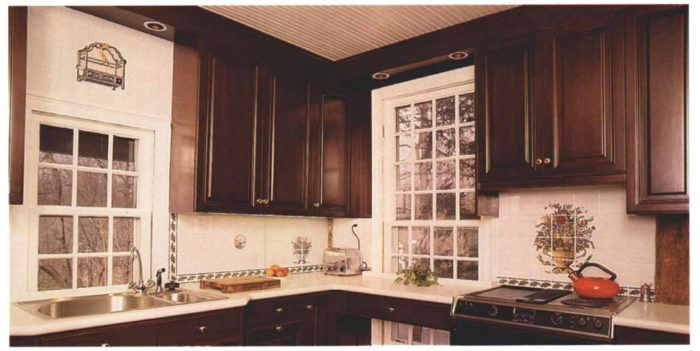
Synopsis: An experienced tile contractor explains the installation of a tiled backsplash in a kitchen. It includes a tile mural over the stove. He covers layout, installation, and material choices.
Years ago, ceramic tile served as a basic material for wall and floor covering. Decorative tiles—handmade, hand-painted European tiles, for instance—were rare. Today our basic needs are met with vinyl flooring, fiberglass tub surrounds and other synthetic materials that are less expensive and easier to install than tile. But there’s been a strong revival of interest in ceramics, and I think this is because tile offers decorative possibilities that other materials just can’t match.
One of the biggest trends seems to be toward the use of tile in the kitchen (chiefly for floors and backsplashes). It has become common to have a plastic laminate or synthetic solid countertop set off by a fully tiled backsplash. In a recent project I did for Lane DeCamp and Alice Korach, I installed a Dutch tile backsplash in the remodeled kitchen of their 200-year-old Connecticut home. It was a job that combined basic setting techniques with advanced layout techniques.
Dutch tiles
Lane and Alice chose Royal Makkum Dutch tile (imported to the U.S. by Country Floors). This tile is packed by hand into wooden frames before firing, which creates a unique tile whose unevenness enhances its old-world look. Local artists paint many of the tiles with scenes of the countryside, children playing, flowers, ships, and windmills.
The body of this tile is relatively soft and easy to cut. Still, I used a wet saw: the tile has a tendency to break unevenly if cut on a snap cutter. Because it’s expensive, we ordered very close to what we actually needed, rather than the normal 5% to 7% extra.
Surface preparation and layout
This job was part of a remodel, so we glued and screwed new drywall over plaster walls that had been cut up to update the electrical wiring. We taped the joints and applied one coat of joint compound. The wall was intact above the window over the kitchen sink, so we simply scraped off the loose paint to establish a solid bonding surface.
Before we could start installing the tile, we had to consider the layout of the three walls that were to be tiled. On a complicated job like this, careful layout would be the key to success. We were using plain, off-white 5-in. field tile surrounded by 2-1/2-in. by 5-in. border tiles painted with acanthus leaves. There were also seven individual decorative tiles—painted with scenes—to be spaced evenly about the kitchen, as well as two 4-tile murals of flower vases. Over the stove, there was to be an even larger mural—12 tiles—of flowers in a vase. Finally, there was a tile plaque of a birdcage, roughly 8 in. by 10 in., to be scribed into the field tiles above the window at the sink.
The layout of the first wall was determined by the placement of the 2-1/2-in.-square corner piece. This tile makes the transition between the horizontal row of border tiles running along the countertop and border tiles running vertically up to the wall cabinets. When it came time to tile this wall, I’d already used up the corner tiles I had, so I mitered two border pieces to serve as a placeholder.
For more photos, drawings, and details, click the View PDF button below:
Fine Homebuilding Recommended Products
Fine Homebuilding receives a commission for items purchased through links on this site, including Amazon Associates and other affiliate advertising programs.

100-ft. Tape Measure

Plate Level

Smart String Line


