Hinge Jigs
Not every door is prehung, so we evaluated nine single-hinge and full-length-hinge router templates to choose the best.
Synopsis: Although many new doors are available prehung, not all of them are. When you need to hang a door that hasn’t been mortised, it’s time to grab a hinge jig. With a router and a hinge jig, making mortises is fast and accurate. In this tool review, finish carpenter Kit Camp tested a variety of devices, including both single-hinge and full-length-hinge jigs. Among four single-hinge jigs, Camp rated a Templaco tool as best overall. Among six pricier, full-length-hinge jigs, Camp placed a Trend model at the head of the pack. This article also includes a sidebar in which Camp lists his best tips for door-hanging.
Though I don’t do it full-time, hanging doors has always been a mainstay of my business, and doing a fine job on a customer’s doors has often led to other work. Although most new homes today are built with prehung doors, hanging them from scratch is still a skill in high demand for both new custom homes and remodels of historic homes.
Mortising doors and door jambs for hinges was traditionally done by hand with a chisel. Today’s router jigs, though, are faster and more accurate. For this review, I looked at a wide variety of both single-hinge and full-length-hinge jigs made from metal, plastic, and plywood, from several manufacturers and covering a wide price range.
Testing procedures
I started by unpacking each jig and reading the directions, which were of a much higher quality than I have come to expect of tool manuals. After assembling each jig, I routed a test mortise to see how it worked and to make sure it would work for the hinges I was using.
For the first round of tests, I used each jig to make mortises for 3-1⁄2-in., 4-in., and 4-1⁄2-in. hinges from a few different manufacturers. Virtually all the hinges I use in my work are either square-cornered or have a small 1⁄4-in. radius at the corner. Many of these jigs also make mortises for hinges with a 5⁄8-in. radius corner, but I have seen these hinges only on inexpensive, prehung doors.
After making sure the jigs worked as they were supposed to, I used each to mortise a pair of standard 80-in. doors and jambs, which I then pieced together. Once joined, I looked at how well the hinges aligned, and whether the backset and the head gap of each pair matched.
To see how well the jigs handled doors with fewer than three hinges or that were shorter than 80 in., I mortised a blank made from a carefully dimensioned 2×4 to fit into one of the jambs in my 1920s house, which features 78-in. doors hung from two 3-1 ⁄2-in. hinges. This test allowed me to see just how adjustable the templates really were when they were being used for a nonstandard layout.
My preconceived notions were wrong
I’ve never owned a full-length, adjustable metal hinge jig but had always coveted them as a tool “real” door hangers used. So when I put them head-to-head against plastic and plywood jigs, I was both surprised and disappointed to find that I just didn’t like the metal jigs very much. To me, they were overly complicated, prone to malfunctioning, and not as impressively constructed as I expected.
If I had to choose a metal jig, it would be either the Bosch or the Milwaukee (which are essentially identical) because of their ability to be fine-tuned to create uncommon mortise sizes. But unless I really needed the adjustability of this style of jig—consistently hanging new doors in old, nonstandard jambs, for example—I would stick with a fixed, full-length template.
Of the single-hinge jigs, I prefer the HingeMate hands down. It is beautifully made, highly
adjustable, and produces flawless results. I would love to have one in my shop. For those on a budget and for carpenters needing the ability to rout jambs in place, the Templaco is hard to beat. It’s inexpensive, simple, durable, and reliable. Each hinge size is sold separately; just buy the sizes you need, as you need them.
The Trend was my favorite of the full-length jigs. It has all the advantages of a fixed template—simplicity, durability, and a minimum of loose parts—but it is also adjustable for different-size hinges. For those willing to make the investment, this jig will handle most door jobs with ease. For those on a more limited budget, I would again choose the Templaco. Like the single-hinge model, the full-length Templaco jigs are designed for only one size of hinge, but they are inexpensive and foolproof, and have served me admirably while hanging hundreds of doors.
Single-Hinge Templates
These jigs generally require you to measure and mark out the mortises on the door and the jamb, and then position the jig over each mortise to be routed (typically three mortises on a standard 80-in. door). The disadvantage is obvious: The jig must be moved a number of times to complete the mortising, with each of these movements taking time and introducing room for errors. With precision being paramount to good door-hanging, these single-hinge jigs would seem at an obvious disadvantage to the multihinge models. Their simplicity and low cost, however, make these templates appealing to carpenters who hang doors only rarely or to homeowners working on their own projects. With careful attention to layout, the end results are just as good.
|
$30 This small plastic template adjusts easily to fit a variety of hinge sizes and door thicknesses. It comes with a high-speed steel (HSS) router bit and bearing combo, but I found the HSS bit was good for only a few mortises before it dulled. I would recommend replacing it with a carbide bit. This jig also mortises the rare 5⁄8-in. radius hinges; no special bit is necessary. Unfortunately, the jig is prone to flexing along the backset side, often producing a curved cut on the long side of the hinge leaf. My jig was also not totally flat, allowing the router to rock and produce a less-than-flat mortise. Bottom line: This jig’s strengths are its low price and wide availability. Unfortunately, the low-quality bit and tendency to create oversize, misshapen mortises makes it a tough sell for me. |
$40 This impeccably machined template is incredibly adjustable, guaranteeing a perfectly fitting mortise for just about any hinge. Besides the included 1⁄2-in. carbide bit with a shaft-mounted 3⁄4-in. bearing, there are no loose parts to worry about. Positioning the single jig for multiple mortises is simple and accurate when following the included directions. There is a 1⁄4-in. offset between the jamb and the door layout, a number that’s easy to add and remember. If you’re looking for an adjustable single-pocket jig, this is as close to perfect as I have found. Bottom line: This is the single-hinge jig to beat. It’s highly adjustable, and is simple to set up and operate. Its only flaw is that it can’t be used to mortise existing jambs, which is a major drawback for remodeling. |
 |
 |
|
Stuckel (no longer available) This all-steel, two-part jig has an appealing 1950s erector-set vibe. It consists of steel frames into which the necessary flat steel templates can easily be fastened. The jig came with templates for 31⁄2-in. and 4-in. hinges, as well as for a number of common strike plates. The templates are milled with a centerline, making it quick and easy to lay out multiple mortises. The jig uses a standard 1⁄2-in.-bit and 5⁄8-in.-guide-bushing combo, which was not included. The windows in the template are small, and the jig also sits up high off the work, requiring a long bit and an inch of cutter to be exposed. Finally, there are a lot of loose parts in the case, which makes me worry about misplacing crucial components. Bottom line: This jig is durable, and its two-piece design makes it a good starting point for a large collection of hinge templates. But it has too many loose parts and is awkward to use. Its small window dictates the use of a plunge router to eliminate potential tearout. |
$33 Templaco jigs are pretty much standard issue for finish carpenters in my area, and the reasons are obvious. They are dirt simple, durable, and produce excellent results. There are no loose parts, and the jigs are easily repairable if nicked. A button on the jig produces a perfect head gap without having to measure an offset. I marked a centerline on mine with a fine-point marker, making layout of multiple mortises a simple task. The jigs use a standard 1⁄2-in.-bit and 5⁄8-in.-guide-bushing combo. Templaco jigs are not adjustable. Each size of hinge requires its own template. To me, the simplicity of this outweighs the disadvantage of having to own multiple jigs. These templates can rattle around in your truck for months or years and still produce perfect mortises with no fussing. Bottom line: This jig is foolproof to operate, would be hard to damage (unless you’re trying), and has no parts to lose in a pile of sawdust. Its only drawback is that each jig is made for a specific hinge size, but this negative is almost a nonissue at this price point. |
 |
 |
Full-Length Jigs
These more complicated and more costly jigs are aimed at professional door hangers and finish carpenters who might be hanging a house full of doors all at once. Once set up correctly and positioned accurately, these jigs allow you to rout three (or sometimes four) hinges into the edge of a door or into a jamb very quickly, with less chance for error. Repeatability is their primary asset.
The Bosch 83038 and the Milwaukee 49-54-0101 templates are identical except for the knurling on some knobs, so I will consider them together. The templates are easy to set up for pretty much any standard layout without using a measuring tape, and they accommodate a wide range of door thicknesses and hinge sizes. All the necessary sizing information is scribed into the parts for common door sizes and hinge spacings. There are fixed positions for each common hinge size as well as an adjustment for fine-tuning these sizes. Once the templates are set up, no measuring is necessary. The mortises produced should be consistent, whether you are doing one door or many.
Despite their beefy appearance, though, both jigs gave me problems. The rotating hook that positions the Bosch guide on the door or jamb was riveted crookedly, preventing it from rotating correctly. I tried to bend it into alignment, but couldn’t. Luckily, the jig comes with two hooks for different hinge spacings, so I was able to substitute.
On the Milwaukee, two screws that hold one of the hinge-adjustment pieces were stripped right out of the box. I retapped the holes for a 10/32 machine screw, but I don’t have much confidence in the flimsy metal used for this part of the jig. Worst of all, one of the pins used to set the size of the hinge vibrated loose while I was routing, ruining my bit, chewing up the pin, and wrecking the mortise. A flaw like that could easily ruin an expensive door.
The enclosed rails were too long to match the template to the short jambs in my house. I matched the mortise positions by eye and got excellent results, but substitute rails could easily be made from hardwood scrap. Bosch sells simple aluminum blocks as an accessory that screw into the old mortises and allow you to line up everything without guesswork. Again, something similar could be made from wood. I know many full-time finish carpenters who use the Milwaukee or Bosch jig for all their door-hanging.
Bottom line: The big advantage of these jigs is their versatility. Having one in your truck or van means you could tackle any job that might spring up. To me, though, there are too many things that could go wrong with these jigs at any given time. If any of the dozen screws or knobs were to vibrate loose, it would be a total failure. I expect better from jigs this expensive.
|
|
|

|
$80 Setting up this jig was simple, as was breaking it down. The plastic templates are dead flat and tightly machined, but when assembled to the thin aluminum extrusions, the full-length jig is quite floppy and fragile. This jig gets a little tricky when it comes to layout, too. First, because the jig must be flipped end for end when moving from door to jamb, it is especially crucial to center the middle template exactly between the others. Also, care must be taken to set the head spacer exactly the same on both ends of the jig; I found that this adjustment could easily be bumped out of position. This jig is better suited for use on jambs with the doorstop already installed, because there is no positive stop to align the jig, only a visual one. Bottom line: This lightweight, adjustable jig will do a lot of work for an absolutely minimal investment, but it’s not for the heavy-handed. It would be an excellent choice for those working on their own home, and an attractive option for owners of the Templaco system who need a tool for nonstandard layouts. |
 |
|
There is no arguing that these jigs are the fastest and the easiest to use. They require no measuring, almost no adjustment, and produce a perfect head gap. They are inexpensive, have no loose parts, and are available for any possible combination of door sizes and hinge types. Since Templaco jigs are not adjustable, they must be purchased for the specific door size and hinge type you need, but Templaco’s Web site makes it easy to order a custom template to your specifications. This fixed layout also means they can never be banged out of alignment. They are made from void-free, high-quality plywood with a slippery laminate on the top surface. A jig that gets nicked from a moment’s inattention can be fixed easily with Bondo. These jigs fasten to the door or jamb with template nails that are captured in a metal sleeve, so they can’t be lost. A simple plastic disk on the bottom of the jig adjusts the backset for different door thicknesses. It’s hard to find anything to criticize about these simple tools. Short of running them over, not much can be done to make them inaccurate. I’ve been using these templates for years and have found them nearly foolproof. Bottom line: The quality of these jigs greatly exceeds their cost. They are simple, durable, and accurate. The only disadvantage is having to own and transport multiple jigs, with the possibility of having to buy more in the future if a job requires it. |
 |
|
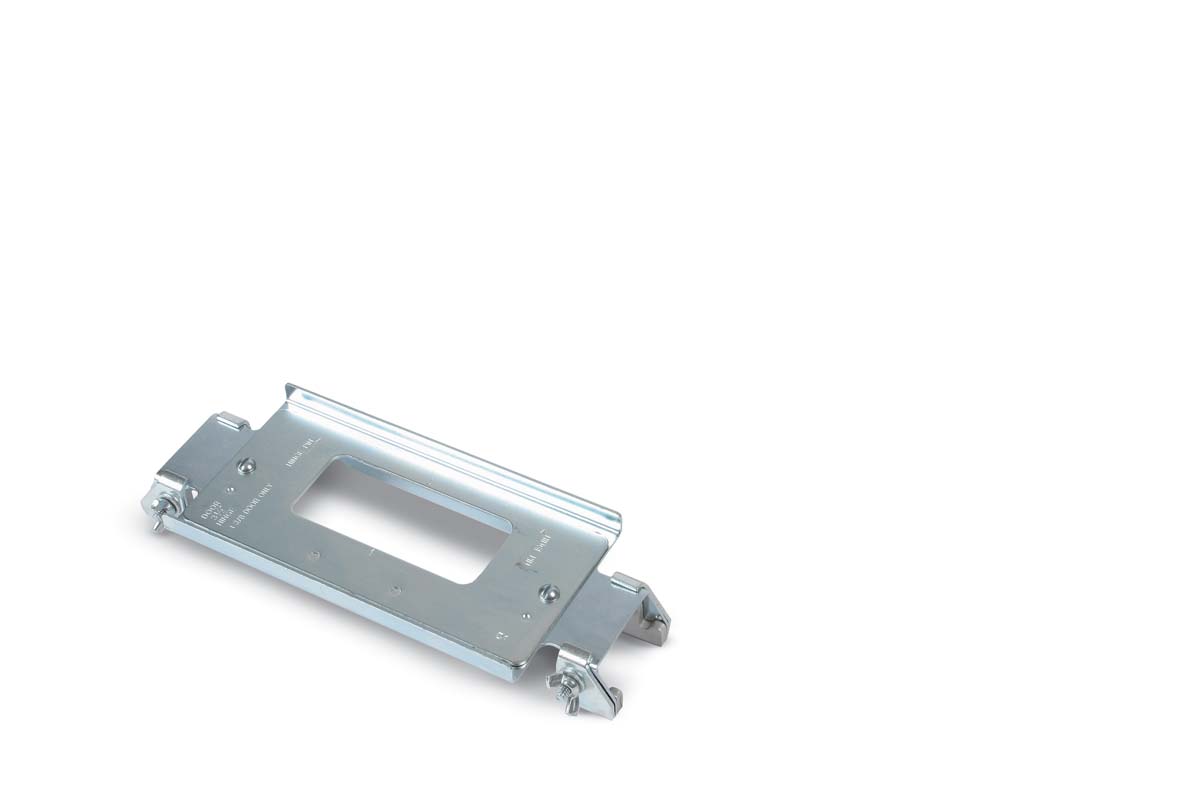
$285 This jig is nearly a complete door-hanging kit packaged into a single elephantine box. It includes a carbide bit, a guide bushing, a template that works for three- or four-hinge doors, and a corner chisel to handle square hinges. It’s also easily adaptable to funky remodel layouts. Unfortunately, it won’t allow you to fine-tune the size of the mortise. The directions are profusely illustrated, which is helpful, but even though the kit includes the appropriate 5⁄8-in. inside-diameter bushing, the parts list shows a 5⁄8-in. outside-diameter bushing, which will chew into the metal template and ruin your work. I like that the jig lets me choose a 1⁄16-in. or 1⁄8-in. head gap, but it was too easy to knock the head spacer out of whack when moving the jig. Also, the spring-loaded backset buttons used for the jamb setup were confusing; it took me three tries to get everything right. I like the large knurled knobs for adjusting the jig, but the plastic star-shaped knobs are painful to handle and hard to get tight enough. I would definitely put lock washers on all the plastic star knobs holding the hinge-size adjustments in place. Bottom line: This jig is fairly simple to operate, but like the Bosch and Milwaukee models, there are many things that could go wrong on a setup like this, any of which could wreck your router bit, your jamb, your door, or your day. |
 |
|
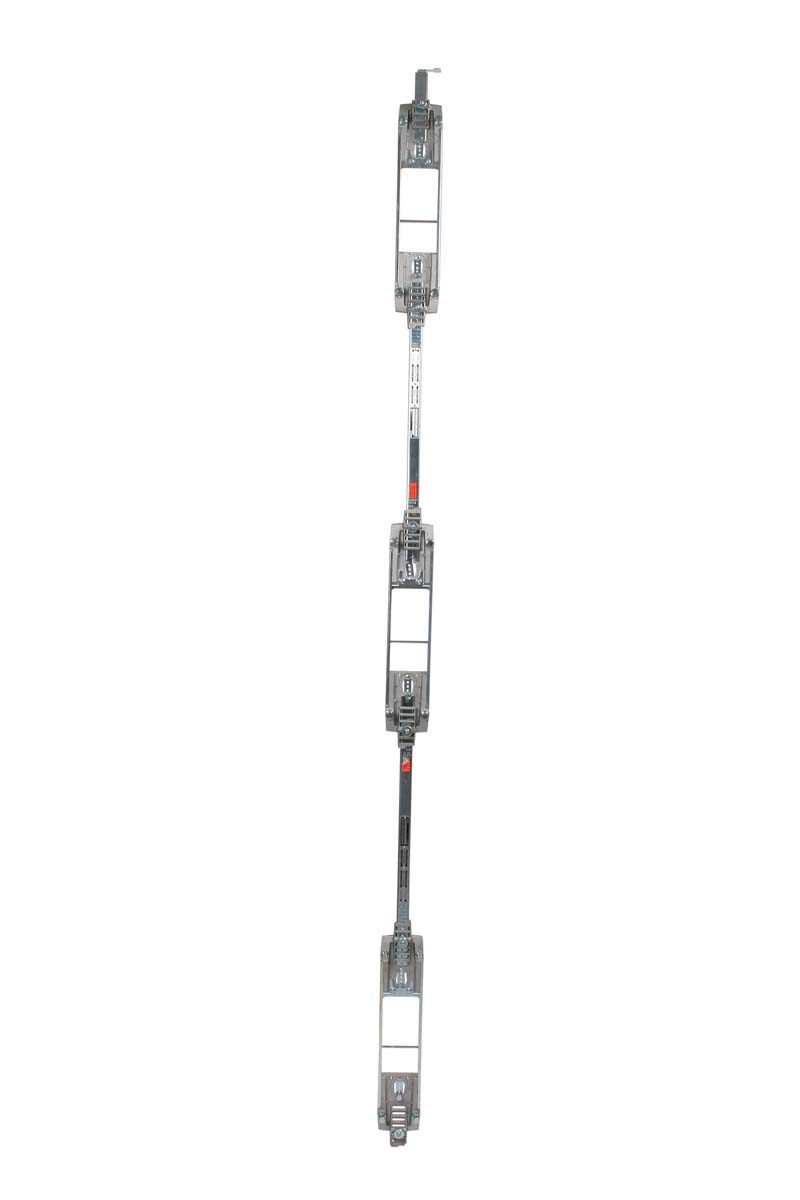
$370 This jig is impeccably constructed, easily adjusted, and intuitive to operate. I fell in love almost immediately. It also breaks down into two sections to make storage and transportation easier. The model I tested, designed for standard 80-in. doors, is made from a beefy aluminum box-beam extrusion. I have no worries about bending it out of alignment; in fact, it seems strong enough to pry a stuck vehicle from a ditch. In use, this jig is sort of a compromise between the adjustable metal jigs and the fixed-plywood Templaco. The hinge spacing is preset, but the size of the mortise can be adjusted for different hinges. The setup features an easy-to-use flip stop that both positions the jig on the door and provides a head gap when routing the jamb. The jig comes packaged with a high-quality carbide bit and a brass guide bushing. Both are in metric sizes, so replacements may not be easy to find locally. The only small gripe I have is about the loose awls that hold the jig in place during use. I understand the need: Because this jig is rolled over when switching from door to jamb, regular template nails won’t work; but the awls are a bit awkward and leave larger holes than a template nail. I also worry about losing the 4-mm spacer block used to set the hinge size, but a short cord and mini-carabiner should eliminate that problem. Bottom line: This jig weds the simplicity and durability of the fixed jigs with the option to accommodate different hinges. Because most doors are a standard height, this setup will handle most situations you are likely to encounter. It’s an excellent, innovative tool. |
 |
Tips That Go Beyond the Jig
Years of door-hanging have left me with a long list of hard-earned lessons. Here are a few tips to make your jobs go more smoothly.
• Prevent chip-out on the edge of the door or jamb by making a shallow cut along the outside edge before moving the router farther into the wood.
• When transferring hinge locations from jamb to door, or vice versa, use a story stick marked with the hinge locations. Don’t forget to figure in the head gap; a nickel makes a good spacer.
• Router bits are round, so they make round-cornered mortises. If you’re
using square hinges, the mortise must be finished by hand. Spring-loaded corner chisels are seldom sharp enough to do clean work—especially in softwoods—and are hard to hone. A sharp 1-in.-wide chisel is best.
• Precise mortise depths are especially easy to achieve using a plunge router. Just place a hinge leaf between the router’s depth rod and depth stop; then clamp the depth stop in place.
• Hinges are not always exactly their stated size. If the mortises are coming out oversize, add a couple of layers of blue painter’s tape to the inside edges of the template, or wrap tape around the guide bushing for nonadjustable metal templates.
• A self-centering drill bit to pilot hinge screws will save time and aggravation.
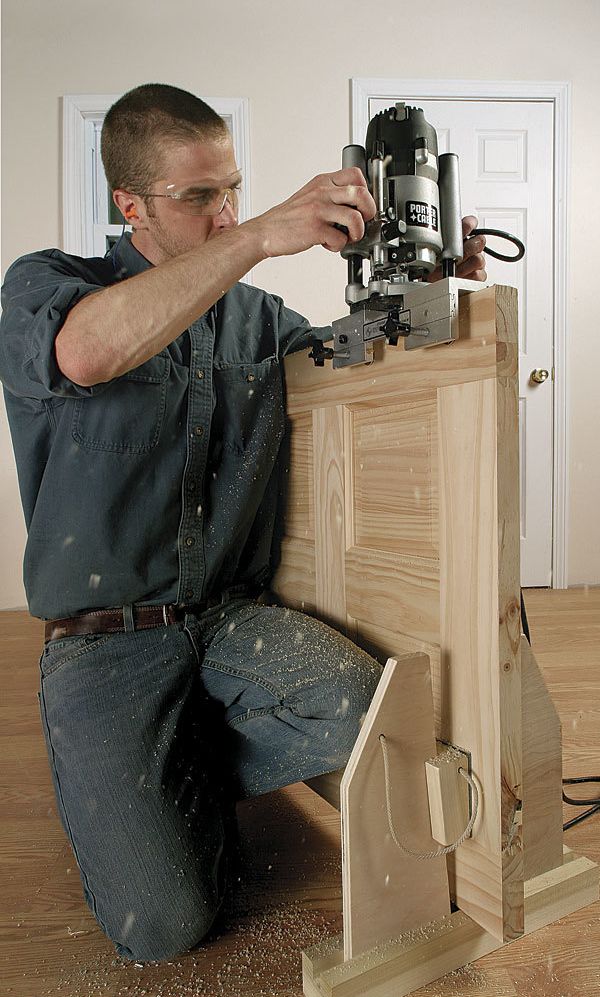
• I don’t have room to store a full-size door bench, so I spent an hour making a simple wedged door buck from birch. Trend and Templaco sell similar bucks, too.
• To avoid mortising the wrong side of the door slab, I use a trick I picked up from Fine Homebuilding author Gary M. Katz. I make a large X on the face of the door nearest the top hinge barrel. Use masking tape for stained doors.
For more photos and details, click the View PDF button below
Fine Homebuilding Recommended Products
Fine Homebuilding receives a commission for items purchased through links on this site, including Amazon Associates and other affiliate advertising programs.

Affordable IR Camera

Reliable Crimp Connectors

Handy Heat Gun


View Comments
I could not locate this back issue, so access FH web site archives was a boon. Kit Camp is shown using a door buck. Are the plans for this jig also available online? Thanks.
You can reach me at the following e-mail address:
[email protected]