My ancient wall mounted fan finally couldn’t take it anymore.
As luck would have it, the local supply house had one in stock. However, the new one does not fit with the old fan cover.
So, here’s the question and there’s a picture attached…..
How big of a job will it be to deal with the vinyl siding to remove the old cover?
Additionally, what’s the difficutly level of getting the sliding back together?
The new fan cover is a little bigger, so I assume I’ll to cut the sliding as well.
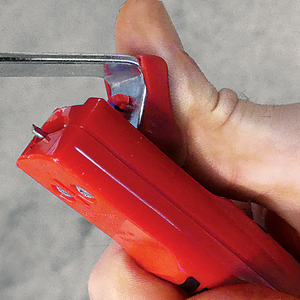
I do have a “zip tool” to loosen/remove the siding.
I would appreicate any thoughts or feedback.
Thanks!
Patrick


Replies
simple, simple & simple.
Pull the highest piece of vinyl first, let the piece above that hang loose & then remove the pieces as you need.
A miter saw will get you the best cuts but you can get by with a jig saw if necessary or even a hack saw blade using a speed square as a guide.
To reinstall start at the bottom, snapping the lower edge and then nailing (not tight) in the nailing flange. Set the nails to the center of the slot.
Use your zip tool to help you pull the hanging piece down enough to catch the lip of the last piece.
It really is easy.
Should not be terrible.
Option #1:
It would appear that the soffit F-channel is nailed through the top course of vinyl. This is a minor PITA as it precludes removing the top course without also removing soffit and F-channel.
I would go to the first siding joint above the fan and open that joint with the zip tool. This will expose (somewhat) the nails which hold that course in place. You need to expose the entire top of that piece.
Trace the very top of the siding onto the Tyvek / tarpaper for future reference. Pencil for tarpaper, Sharpie for Tyvek. Can add a reference mark if you want for horizontal reference. Mark the pieces as you remove them for correct order at re-installation - there will be some trimming involved since the new fan is bigger.
Suggest pencil for marking - Sharpie may transfer if the pieces are stacked and get wet. Sharpie on nailing flange is OK if you cover mark with clear tape.
Remove the nails and un-latch that piece - this is the hardest one.
After removing the first piece you can continue zipping, marking, removing until you get below the fan.
Remove and discard the j-channel around the fan - it is cut too short now and will only get worse. Looks to be white - easy / cheap to get.
Replace fan.
Install new j-channel around fan perimeter - cut to correct length and lap better than what is shown - can be a "butt" look or false miter - your choice - but the corners should not be open.
Replace siding - align to your pencil / Sharpie marks. The old nail holes are good for a nail used an alignment pin - need to use longer nails if the old nail holes are re-used.
If using the old nail hole / longer nail technique - you need to know what is inside the wall - don't want to pierce any wiring or pipes with the longer nails!
Once all siding is nailed - you will need to insert the zip tool and re-latch the top joint - first one you opened.
Option #2:
Have seen some guys cut siding in place to oversized opening - then slip new j-channel under old siding - then fill the oversized hole with wood and wrap in aluminum, flush with j-channel - cut new fan opening - install fan - caulk new j-channel to fan block aluminum. This fan is too big to cover in one width of aluminum - would have to be seamed / lapped. This seems to work OK for something the size of a bath or kitchen vent fan - may not be the best for a larger opening like this one. I would consider this a fast and dirty cure for an opening this large - others may disagree.
Good luck!
Jim
Never underestimate the value of a sharp pencil or good light.
Everybody types faster or ...............
maybe just less than me!
Jim
Never underestimate the value of a sharp pencil or good light.
No complaints from me on that very complete answer!
I'll post a picture when the fan's in. That is, if it doesn't snow on Saturday...