Make Your Own Rigid Foam Roof-Vent Baffles
A simple cutting tool made with scraps of wood and a utility-knife blade allows you to make baffles to put between your rafters for a better insulation job.
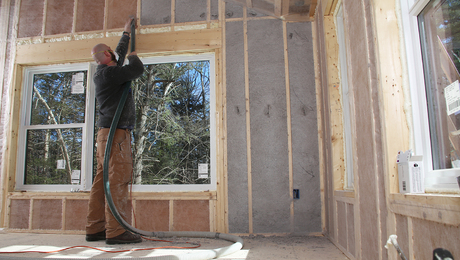
If you’re insulating a cathedral ceiling and need to maintain an air-sealed vent space from the soffit all the way to the ridge, you could use plastic baffles stapled into place between the rafters and try to air seal them, but there’s a better way.
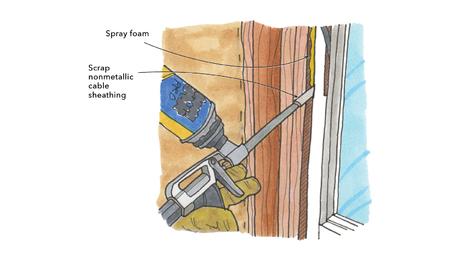
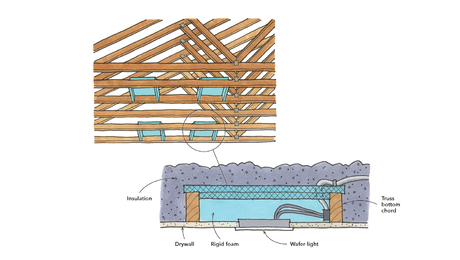
When Bob Kelly of Kensington, NH had to insulate a cathedral ceiling, he came up with a clever way of using rigid foam as his vent baffle, so that he could maximize the air value of his ceiling and easily air seal at the same time. The secret is a homemade cutting jig that holds a utility knife blade. The rigid foam is cut to be 2 inches wider than the space between rafters, then 1 inch of foam is scored and folded over on either side of the foam, creating standoffs that hold the foam away from the roof sheathing, providing a space for air to flow. When set into place and sealed with spray foam, the vent baffles are insulated and air-sealed.


View Comments
So in this application, the rafter bay is air sealed, right? Nothing coming in at the soffit, and nothing going out at the ridge? Or am I reading this wrong?
If it is air sealed, what is the function of the air space?
Thanks for the clarification.
9 years too late but here we go. The idea here is that your soffit is actually open. You would likely put some type of blocking or sheating up betweeen the rafters. Instead of going to the top you leave an inch or so gap there. Or whatever height of air gap you're leaving. Then you slide this baffle into place on the inside and air seal the blocking to the baggle. From there you air seal the baffles all the way up to the roof ridge.
what method was used to secure the now cut for the correct depth rigid foam to the under side of the roof decking or the sides of the rafters? Thanks
I believe the point here is that they have sealed to the edges of the rafters which creates a seal between the roof area and the insulation below. There is no seat at the top and bottom so it will still allow airflow from the soffit to the top vent, just like the leaky plastic troughs.
Keeping air from migrating up through the rafter bays will significantly improve the general sealing of the house. Keep in mind that the relative air pressure (due to the temperature differential) at the top of the house is quite a bit higher than ambient outside the house, doing this greatly reduces the migration of air through the structure.
I'm a big fan of these quick tips. However I'm sad to see finehomebuilding sponsor Home Depot so prominently. I loath the big box stores because everything they sell is of questionable quality. Wood, tile, paint - it's all just horrible.
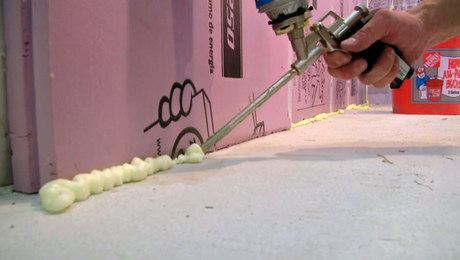
stukinftw - the rigid foam baffles can be fastened with angled nails or screws driven tight against the face of the foam and up into rafters on either side. You don't need much to hold them into place, just enough to temporarily hold them until a bead of spray foam sealant applied along each edge sets up and does the permanent holding.
bonnercd - kmead is correct in his/her explanation. The soffits and ridge vent are still open to airflow, and these vent baffles are simply providing a fully separated path so the ventilation air can run from eave to ridge without washing through the insulation in the rafter bays.
Most research shows that a minimum of 1 to 2 inch air gap is required for adequate air flow. So, perhaps it would be better to cut the board 4 inches longer, then score on both sides to create a z fold. This would give an air gap of 1 to 1.5 inches.
So let's say you have rafters that are 16" on center. The bays are 14.5" wide. You add a couple of inches to the foam board you're working with per this video's instructions. That's 16.5". You can only get two lengths that wide out of a 48" wide board and are left with another piece that's about 15" wide. I guess you could adapt and use inch-high sticks for this last bay, but it does seem a bit annoying.
If the rafters are 16" on center why not cut the insulation 16" wide and make 3/4" wide slices down the sides, this way you could get three pieces out of each sheet of insulation. Also if you use a thicker insulation this gives you an air gap of whatever thickness the insulation board is since it is folded over on itself. I believe this was shown years ago in a tip at the back of the magazine and it has always stuck in my mind. I always thought I would use 2" thick insulation to give a 2" air gap and secure it with a bead of spray foam on the inside surface. You also need to box off the soffit and ridge vents so the air can flow in the soffit through your baffle and out the ridge vent.