
The best tools are multi-taskers
April Uno from Saskatoon, Sask., Canada, has handed in her nail set and modified her hammer for countersinking nails on the fly. Here’s what she’s done:
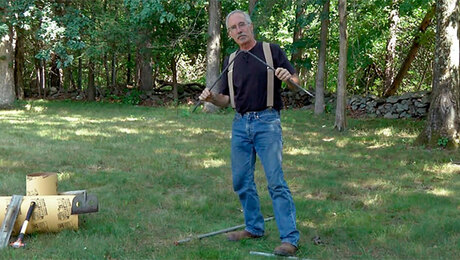
April used a 4-in. angle grinder with a diamond blade to first cut one claw off at an angle, about 1 in. back from the end of the other claw. She then ground and filed the longer claw until it was a long, slender spike, similar to a thin nail set or awl. All she does next is swing away at any proud nails in the trimwork she’s installing.
If you try this yourself, you may initially end up with a few unwanted holes in your baseboards and casings, but with a little practice, you’ll be hitting the nails on the head every time.


View Comments
That April Uno, she's pretty clever--I wonder what tip she'll come up with next year.
"April Uno" --LOL!
This tip appears to work better in theory than in practice.
Brilliant! Nice one, April.
This is a joke, right?
Yes. Please don't try this at home.
First I tried it with my curved claw hammer. It didn't work too well. Then I modified my straight clawed Stilleto. Way easier to use. Thanks for the tip!
ROFL...great one Chuck. I was already to fire off an email blast asking you what part of "Fine Homebuilding" did you not get; then I saw the credits of the video. You got me good.
In reality this tool modification would work well, and without damage, if you carried a small, second hammer -- wherein you placed the newly pointed claw of the first hammer on the protruding nail, then tapped the head of that hammer with your second hammer. But, this would be a form of "Tool Hound Mission Creap" where you replaced a nail set with a hammer. . . . .
I thought better of April's idea and improved on it. Don't use a claw hammer, use a ball peen hammer instead. It's so much easier and faster to sharpen the 'ball' end, considering that it's already in the general form and this way you don't lose the ability to pull nails with your main hammer. And no curve in the 'nail set' means less target practice to get to 'Sharpshooter' level. Smart, eh?
Wow. What a great tip. I didn't have one of them there claw hammers handy, but I did have one of those shorty handled sledge hammers. Man... after five days, I finally got done filing one of those sides down and let me tell you, it works GGGRRRREEEEAAAATTTT !!!!!. Talk bout time well spent creating this crafty little time saver.
Only thing is, I just started having another dern problem, fer sum reason I'm getting a bunch of nails popping through the other side of the wall.
I'm so excited, I can't wait til next month to see Cinco de Mayo's tip.
Awesome tip! You know while you have the file out if you rub all the points on the teeth of a saw blade it gives you real fine sawdust. It takes a little longer to cut the wood but hey some things are worth it. I just found out it takes me longer to type on the keyboard when I'm laughing so hard. Thanks again.
Excellent way to put a hole in your head, too.
Uh oh! Now I bet you'll see one of these in a large orange or blue "building supply" store soon...