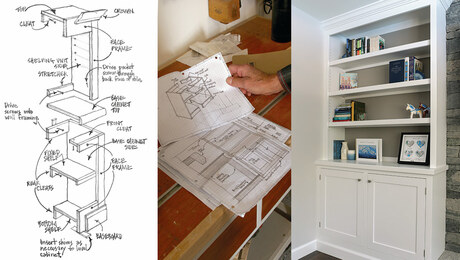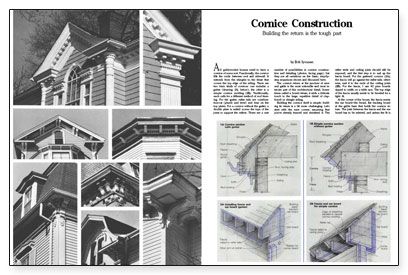
Synopsis: This is a guide to cornice construction on gable roofs. It outlines several possible approaches but the author explains that all of them are based on the same step-by-step sequence of construction. Illustrations outline the possibilities.
A11 gable-roofed houses need to have a cornice of some sort. Functionally, the cornice fills the voids between roof and sidewall. It extends from the shingles to the frieze that covers the top edge of the siding. There are two basic kinds of cornices: one includes a gutter; the other is a simple cornice molding. Traditionally, each calls for a different method of roof framing. For the gutter, rafter tails are combination-cut (plumb and level) and bear on the top plates. For a cornice without the gutter, a double plate is nailed across the tops of the joists to support the rafters. There are a vast number of possibilities in cornice construction and detailing, but they are all variations on the basic, step-by-step sequences shown and discussed here.
The cornice return at the juncture of eave and gable is the most noticeable and most intricate part of this architectural detail. Sometimes called a boxed return, it adds a delicate touch to the large, repetitive detail of clapboard or shingle siding.
Building the cornice itself is simple; building its return is a bit more challenging. Let’s start with the eave corner, assuming that you’ve already framed and sheathed it. The rafter ends and ceiling joists should still be exposed, and the first step is to nail up the fascia board. For the guttered cornice, the fascia will go against the rafter tails; otherwise, nail it to the ends of the ceiling joists. For the fascia, I use #2 pine boards ripped to width on a tablesaw. The top edge of the fascia usually needs to be beveled for a tight fit.
At the corner of the house, the fascia meets the ear board—the broad, flat backing board at the gable base that holds the cornice return. The joint between the fascia and the ear board has to be mitered, and unless the fit is tight, it’s a good idea to use a weatherproof adhesive caulk. Phenoseal and other marine adhesives work well in this type of joint. I also staple a piece of building paper behind the ear board.
If you want the ear board to be flush with the corner board, which is installed before the siding is nailed up, the ear board needs to be rabbeted at its bottom edge so that the siding and a tongue at the top of the corner board can be tucked up underneath it. The ear board should also cover the gable edge of the roof sheathing if you’re not planning to use rake molding.
Now install the soffit, frieze, and bed molding, in that order. I cut the soffit and frieze boards from pine or fir, and fur out the frieze so that the siding will fit underneath it. Cut the frieze to extend over the corner board. You can use something fancier than bed molding to cover the joint between soffit and frieze, or simply leave this juncture plain.
For more photos, drawings, and details, click the View PDF button below:
Fine Homebuilding Recommended Products
Fine Homebuilding receives a commission for items purchased through links on this site, including Amazon Associates and other affiliate advertising programs.
Fall Protection
Roof Jacks
Flashing Boot
