Installing a Built-Up Girder
From where and how you build it, to setting the columns underneath, the process goes smoother if you have a system.
Synopsis: A girder built up from conventional dimensional lumber is constructed in place. This article explains the process. It includes an annotated list of alternative materials, including engineered lumber, flitch beams, and wide-flange steel beams.
One time I pulled onto the job site after two days of rain, and I’m sitting in the truck, staring at the second-floor deck, trying to figure out why it looked like a swimming pool. It suddenly dawned on me: Did I set the Lally columns? Uh oh. As I trudged toward the basement, I realized the last time I saw the girder was when we were laying down the subflooring on the first-floor deck. In the basement I saw my temporary supports—A-braces, which I’ll discuss in a little bit, bowed out like bananas, and the weight of two floors was sitting on the sway-backed girder. Two of us wasted half a sunny day in the basement resetting the girder, and seeing those banana-shaped braces made a lasting impression on a cocky kid framer like myself.
It’s been eight years since that happened, and I still use A-braces to hold girders temporarily, but now I cross-brace A-braces to keep them from bowing. I also visit basements a lot more than I used to just to check on the girder. I guess you could say I’ve got a lot more respect for a part of framing I’ve always hated. I’ve even developed a few little tricks that speed up the process of building and setting a girder.
Foundation work
Most basement girders that I install are set in pockets at the top of foundation walls. The pockets are formed when the foundation is poured and are placed wherever the plans call for them. Pockets are oversized. If a girder is to be three 2x10s, for example, the pocket is probably about 1 ft. high, 6 in. wide, and 4 in. deep. It’s oversized because there should be an airspace all around the girder. If the girder is in direct contact with the masonry, moisture will rot the girder.
The locations of the pockets jive with the locations of piers (or footings) under the slab. The piers support Lally columns, which are steel tubes filled with concrete. The piers are often no more than 8 ft. apart, but the spacing depends on the size of the built-up girder and on the load it supports.
Building the girder
I use #2 Douglas fir for built-up girders. Some architects specify LVL (laminated veneer lumber) girders to lengthen the span between posts. Unless you’re finishing your basement, or you have abnormally high loads, I’d choose Douglas fir. LVLs are expensive, and long spans still require intermediate supports.
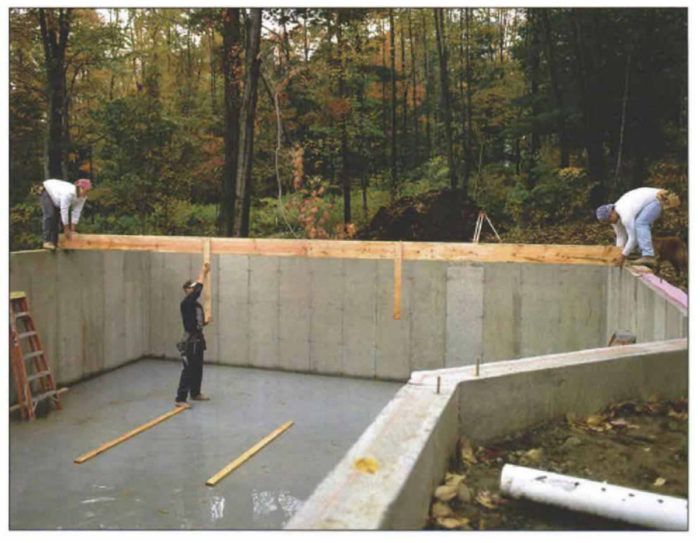
It’s always nice to build a girder as close as possible to its final resting place. When a girder runs the entire length of the foundation, I like to build it up on top of the foundation wall if it’s accessible from ground level. Then all I do is slide the girder along the wall and drop it into its pockets. If the foundation is too high to use as a workstation, I build the girder on a flat surface, such as the basement slab, stick one end in a pocket, and then the other.
For more photos and details, click the View PDF button below:
Fine Homebuilding Recommended Products
Fine Homebuilding receives a commission for items purchased through links on this site, including Amazon Associates and other affiliate advertising programs.
Portable Wall Jack
Short Blade Chisel
100-ft. Tape Measure


