A Wood Floor That Can Survive Anywhere
In a basement or on a slab, create a stable platform to support quality engineered-wood flooring.
Synopsis: Creating extra living space in your house doesn’t necessarily mean building an addition. Many basements are viable options for conversion to livable space. To make a subterranean room feel even more homey, you can install a wood floor — which isn’t such a crazy idea if you use the method Charles Peterson outlines in this article. Peterson, a wood-flooring expert, recommends a system built in layers: first, the concrete slab; second, a layer of 15-mil polyethylene vapor retarder; third, two layers of 1/2-in. or 5/8-in. exposure-1 plywood; and finally, the finish flooring. This article includes a sidebar about choosing the best engineered flooring for a basement or slab project.
If you need more living space but don’t want to move, you’ve got a couple of options. Either you can build an addition, or you can put the space you already have to better use. The latter option often means finishing the basement. It’s a good option, too, because it can cost a fraction of what an addition might cost. Also, the basement is isolated from the main traffic paths of the house, so it’s an ideal setting for entertaining guests or relaxing with the family.
To me, nothing makes a basement feel more finished than a wood floor. It adds a sense of warmth and refinement that drastically changes the utilitarian feel of a space at or below grade. However, basements — and any concrete slab, for that matter — are notoriously moist, and moisture is responsible for more than 90% of all wood-floor failures. Installing a wood floor in a basement or on a slab so that it looks good and will last means controlling moisture, assembling an appropriate subfloor, and choosing the best engineered-wood flooring you can afford.
A floating subfloor is the best option
Wood flooring can be glued directly to a concrete slab or attached to a fabricated subfloor. Glue-down applications are intensive, and the best-performing adhesives are expensive. That’s why installing wood flooring over a subfloor is typically a better option.
There are many ways to build a subfloor. Plywood can be screwed to 2×4 sleepers that have been fastened to the slab on 16-in. centers. Plywood can be scored, glued, and nailed to the concrete, or it can be installed so that it floats over the slab without attachment.
The most cost-effective method, and the one that I and most professional flooring contractors prefer, is the floating subfloor approach. A floating subfloor is less labor intensive, doesn’t rely on expensive adhesives, and can be integrated with a vapor retarder more seamlessly than other subfloor assemblies.
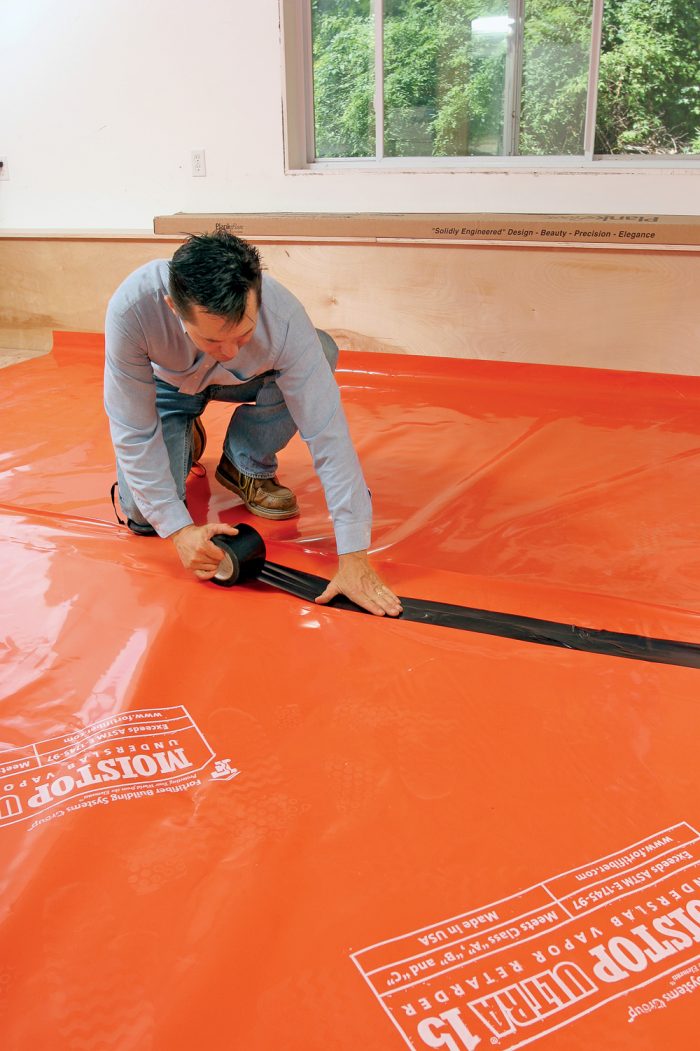
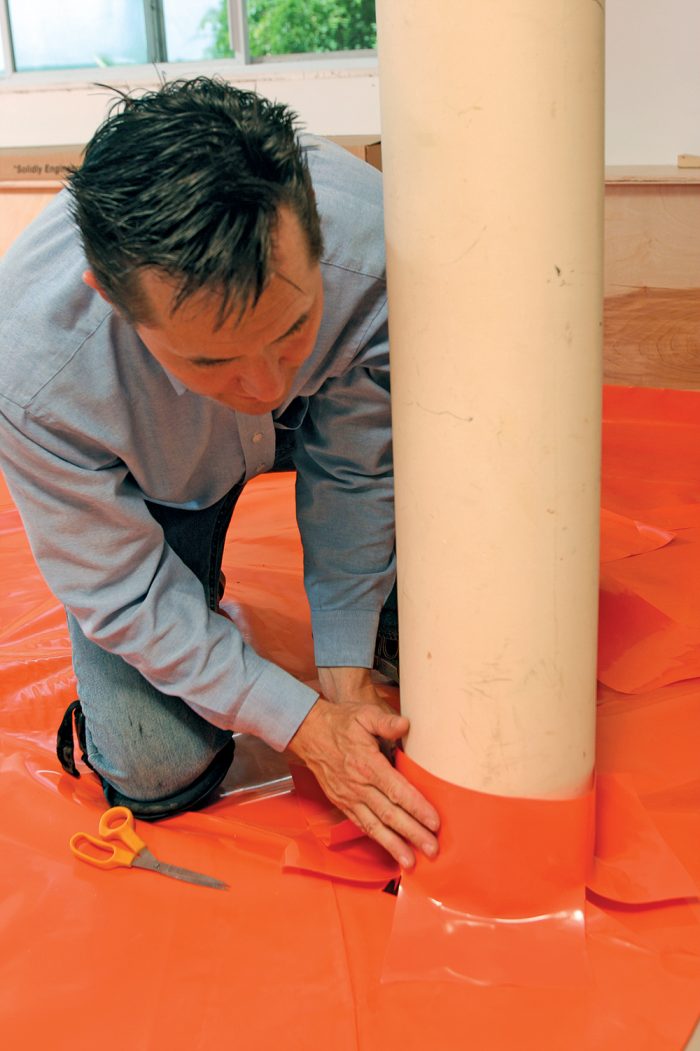
Always install a class-I vapor retarder
Wood-floor manufacturers recommend that concrete slabs be tested for moisture content before their products are installed. If the moisture content of the slab is too high, the manufacturer specifies the use of a vapor retarder. This suggests that a vapor retarder doesn’t have to be used if the slab has a low moisture content at the time of testing. The problem is that testing represents just a snapshot of the concrete’s moisture level and does not factor in potential moisture levels. A class-I vapor retarder (commonly referred to as a vapor barrier) should always be installed despite a manufacturer’s recommendations about its use.
When you’re installing a wood floor over a concrete slab, the vapor retarder should be placed under the plywood subfloor. This installation contains the moisture in the slab, increases the subfloor’s stability, and helps to keep the finished floor from swelling, buckling, or cracking. Because a floating subfloor isn’t fastened to the slab, no fasteners are poking holes through the vapor retarder. The moisture in the air is another important consideration. Most wood-flooring manufacturers recommend that their products be installed in an environment that is a constant 60°F to 80°F with a relative-humidity level between 30% and 50%.
Use the highest-quality materials available
When it comes to selecting vapor retarders, plywood, fasteners, and flooring for a basement, don’t skimp on quality. The basement will expose the flaws in inferior products quickly.
I’ve used close to every vapor retarder on the market. When it comes to a floating floor, I always recommend at least 10-mil polyethylene sheeting. A 6-mil product is standard, but it isn’t as durable. I use Fortifiber’s Moistop Ultra 10 and Ultra 15 (www.fortifiber.com).
For the subfloor, I use two layers of 1⁄2-in. or 5⁄8-in. exposure-1 plywood when possible. Exposure-1 plywood is exterior grade—perfect for a concrete application. Pressure-treated plywood can be used as well, but it must be kiln-dried. Pressure-treated plywood straight off the yard can have a moisture content as high as 18%, which is high enough to destroy any wood flooring installed over it.
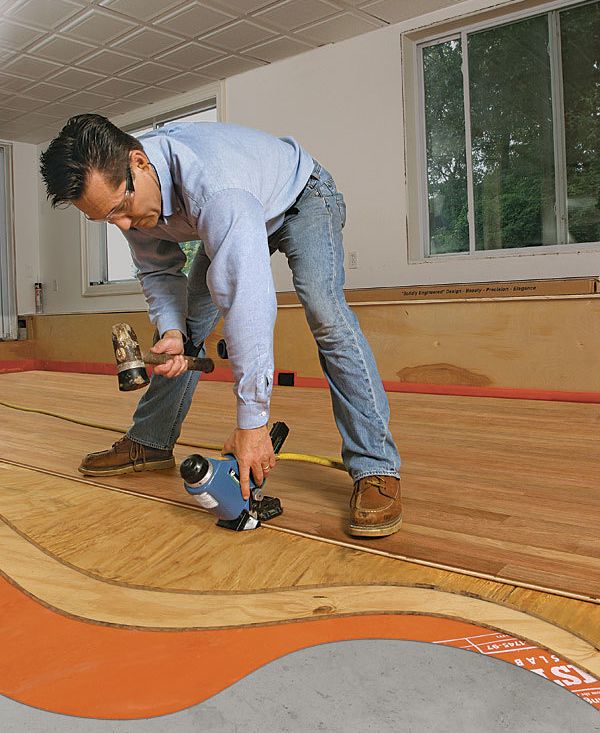
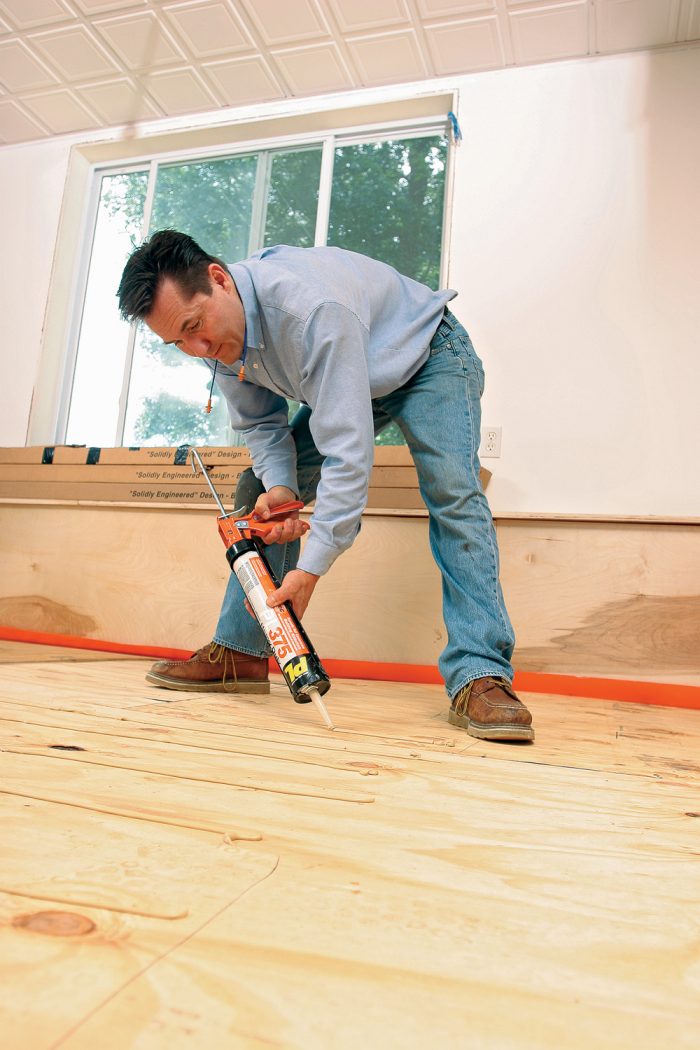
I assemble a floating subfloor with 18-ga. staples and construction adhesive. You can screw the sheets together, too, but stapling is faster. Be sure the fasteners are long enough to secure the sheets together, but short enough so that they don’t penetrate through the bottom layer of plywood. Heavy-duty construction adhesive—PL 375, in this case—strengthens the bond between plywood sheets.
When I’m installing a wood floor in a basement, I always opt for engineered flooring because it’s more stable than solid-wood flooring. However, not all engineered-flooring products are created equal, so choose carefully. Some manufacturers say that you can use their solid-wood flooring over concrete. I encourage you not to heed this claim. When a problem with a solid-wood floor does arise, the manufacturers will blame it on moisture issues, not their product, and you’ll be solely responsible for the repair or replacement of the floor.
Control moisture with poly sheeting
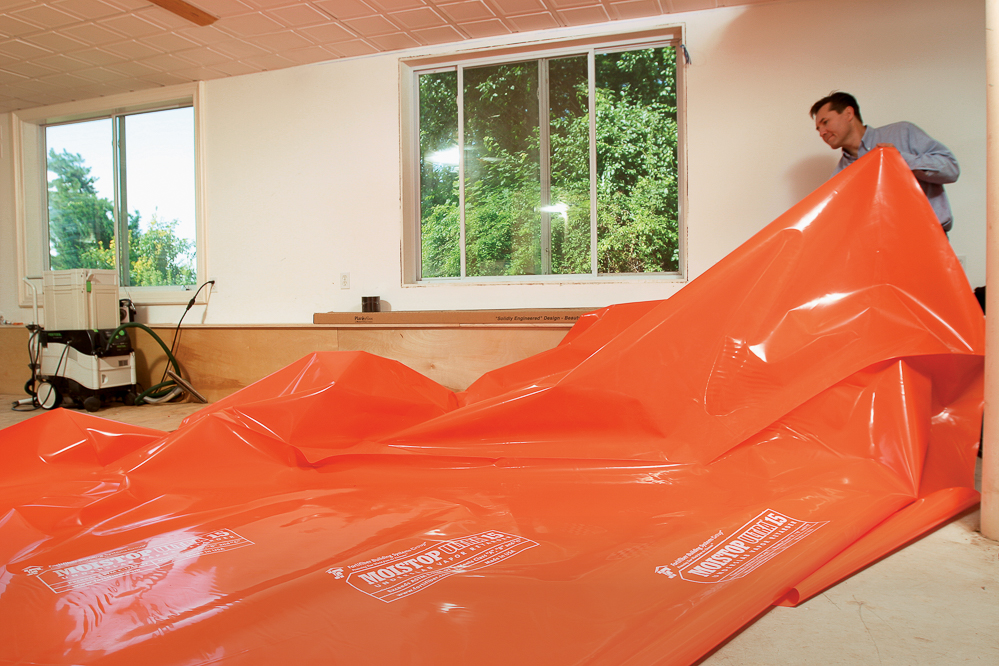
A properly constructed concrete slab—one poured over a capillary break of 6 in. to 8 in. of gravel and a vapor retarder—should stay relatively dry. However, to be sure that your floor isn’t damaged by excessive moisture, you have to install a vapor retarder under the subfloor, and you have to install it properly. Use 10-mil to 15-mil polyethylene, which has a perm rating of 0.1 perm or less.
Build the subfloor with two layers of plywood
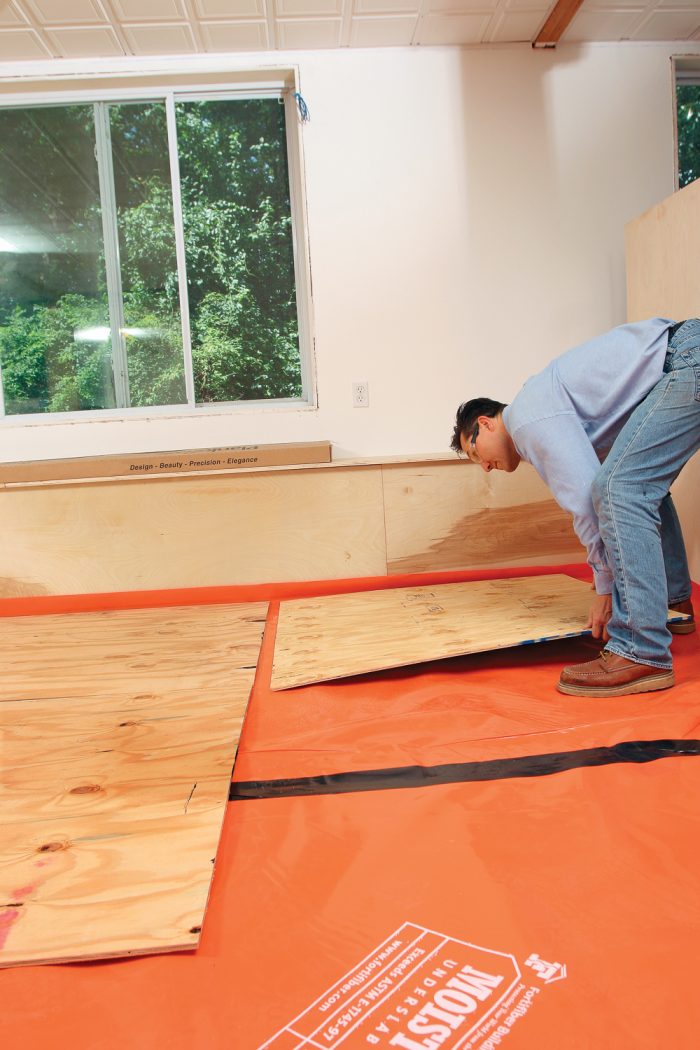
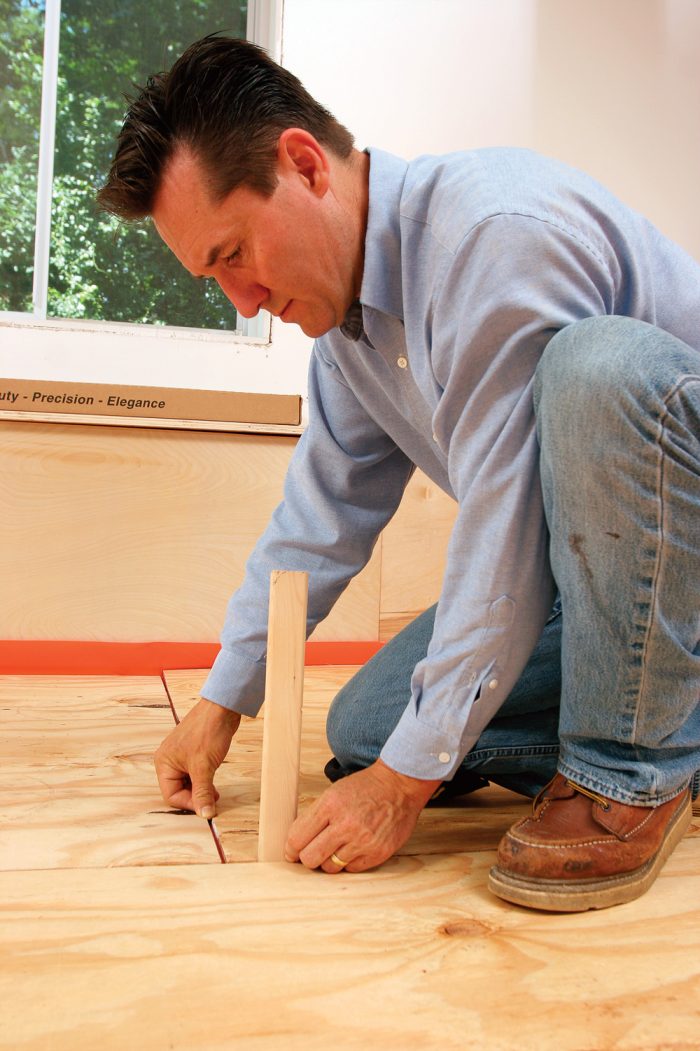
A floating subfloor is the best way to install a wood floor over concrete. Two sheets of 1⁄2-in. or 5⁄8-in. exposure-1 plywood can be fastened without risk of penetrating the vapor retarder. With any plywood assembly, proper spacing and orientation are crucial. Safety notice: Proceed with caution and proper ventilation when working with flammable adhesives and pneumatic nailers. Combustion is not likely, but possible.
How to choose the best engineered flooring
Engineered-wood flooring is the best option if you want to install a wood floor in the basement or on a slab. However, engineered-flooring products are assembled in different ways, which affects the floor’s functional and aesthetic role. To get the best floor possible, assess each component and the way it was manufactured.
The thicker the wear layer, the longer the floor lasts
The top veneer on engineered flooring, considered the wear layer, can vary in thickness from 1⁄32 in. to 3⁄16 in. Floors with a 1⁄32-in.-thick wear layer cannot be sanded if they have to be refinished. A professional wood-flooring contractor might be able to sand a 3⁄32-in. wear layer once or twice, but that’s it. To get the longest life out of a floor, I recommend flooring with a 3⁄16-in.-thick wear layer.
Sawn veneers look the best and last the longest
Manufacturers use one of three different milling methods to produce top veneers. These thin pieces of wood are either rotary-peeled, sliced, or sawn.
Rotary-peeled veneers show a dramatic, wild graining that looks more like plywood and less like solid wood. Rotary-peeling yields the most material from the log, so it’s relatively inexpensive. The veneers, however, have the weakest grain structure and tend to face-check. Floorboards made with rotary-peeled veneers have an extremely thin wear layer.
A sliced veneer is stronger than a rotary-peeled veneer but still tends to develop small cracks and checks in its surface. However, it has more natural-looking grain patterns and looks much more like solid wood. Sliced veneers are generally less than 3⁄16 in. thick, so they don’t create the longest-lasting floor.
The logs used to make sawn veneers are traditionally milled. The boards then are graded, sorted, and dried. They are later resawn to the thickness needed for the veneers. Sawn veneers are the most expensive to produce but have the strongest grain structure and are typically thicker than peeled or sliced veneers.
Backing substrates and milling tolerances are equally important
My favorite engineered-flooring product is made by Owens. The company uses nine-ply, quality birch plywood to create the backing substrate. Other manufacturers, particularly those that source or create their products in Asia, make substrates by sandwiching small fillets of wood between two wood veneers. Manufacturers use this construction because it’s difficult to source quality plywood in Asia. Also, fillets are made of waste wood, so it’s less expensive. This construction is considered old technology and is less stable than plywood.
Many manufacturers of engineered flooring have a maximum board length of only 4 ft. Owens and a few other manufacturers sell flooring that’s as long as 71⁄2 ft. I prefer longer boards so that my floors don’t end up looking like butcher blocks.
The best engineered flooring has tighter milling tolerances, too. The American National Standards Institute (ANSI) specifies over-wood tolerances between 0.012 in. and 0.025 in. for engineered flooring, depending on its grade. (“Over wood” is the difference in height between pieces of flooring when they’re installed.) Always try to find out what the manufacturer’s tolerances are because the national standard is not mandatory.
Photos by Rob Yagid
Related stories:
- A Closer Look at Solid-Wood Flooring
- How to Acclimate a Wood Floor Correctly
- Refinishing Floors Safely
From Fine Homebuilding #206
For more photos and details, click the View PDF button below: