FHB Logo Facebook LinkedIn Email Pinterest Twitter Instagram Plus Icon Close Icon Navigation Search Icon Navigation Search Icon Arrow Down Icon Video Guide Icon Article Guide Icon Modal Close Icon Guide Search Icon Skip to content
Subscribe

In every issue you'll find...

  • Expert insights on techniques and principles
  • Unbiased tool reviews
  • Step-by-step details to master the job
  • Field-tested advice and know-how
Subscribe Now!
Subscribe
  • How-To
  • Design
  • Tools & Materials
  • Videos
  • Blogs
  • Forum
  • Magazine
  • Members
  • FHB House
  • Podcast
  • Join
  • Log In
Subscribe
How-To

Making a Beaded Circular Casing

By Chris Green Issue 216

My foray into the world of circular trim began with the round window over my front door. The window looked nicer than the hole it replaced, but it had no trim. At first glance, matching the other windows seemed like it would be easy; the trim is just 1×4 flat stock with a simple bead on the inside edge. But I knew the process wouldn’t be as simple as it seemed. I considered buying the casing from a local mill shop. I checked around and got quotes ranging from $150 to $600 for custom circular casings, none of which matched the existing trim profile on my house. So I decided to make it myself. I engineered the horizontal router setup first, checked it on scrap material, then started on the actual trim. As the rest of the house’s trim was cellular PVC, I cut the stock from a full 4×8 sheet of 3/4-in. material I purchased for about $165.

There are several benefits to making your own circular moldings. You’re not limited to standard sizes, you avoid premium one-off production fees, and the molding is delivered on your schedule. Making your own moldings also broadens your skills and gives you a couple of useful router setups when you are finished.

Two cuts define the blank

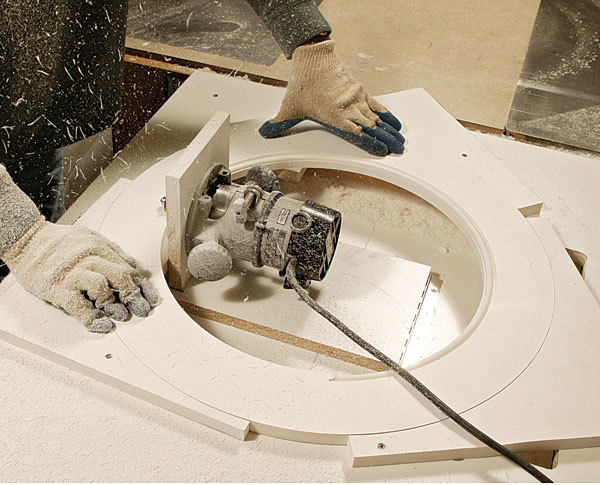
After establishing a centerpoint in the stock, drill a 3/8-in.-dia. hole and tap in a 11/2-in.-long steel pivot pin of the same diameter, which will protrude above the surface about 1/2 in. The stationary end of the adjustable circle-cutting jig fits tightly onto the pin. Attach a router with a 3/4-in. mortising bit to the mobile end, dial in the correct outside diameter, and begin a series of increasingly deeper passes. It’s a good idea to stop occasionally to vacuum the debris so that you can see what you’re doing. After checking your measurements for the inner circle, adjust the base and cut the inner circle.

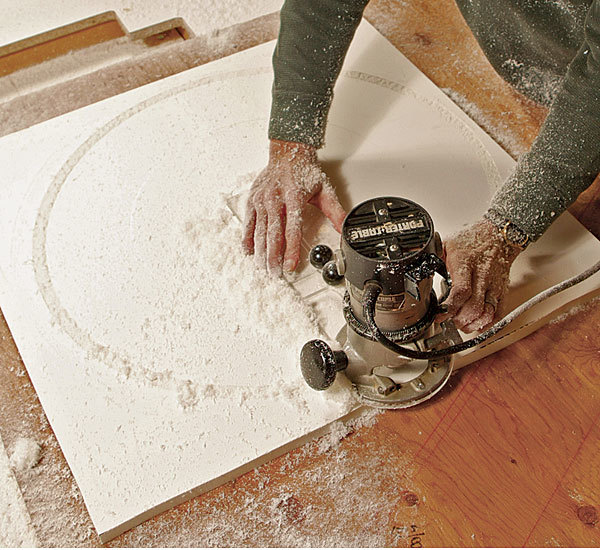
Cut the outside diameter 
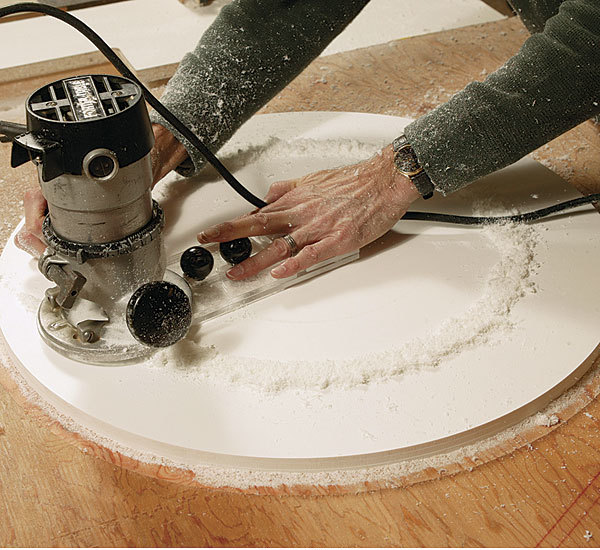
Cut the inside diameter

Trick of the trade

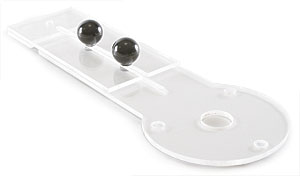
Adjustable circle-cutting jig
You can buy a circle-cutting jig for a router for about $45. Typically, it’s an elongated teardrop shape with lots of indexed holes at one end that determine the radius of the cut. The author wanted a fully adjustable jig, so he made one from two pieces of clear polycarbonate that slide past each other. Two knobs and bolts lock the two pieces together. The cost for materials was about $50. The knobs were bought online (www.leevalley.com).

Cut the bead sideways

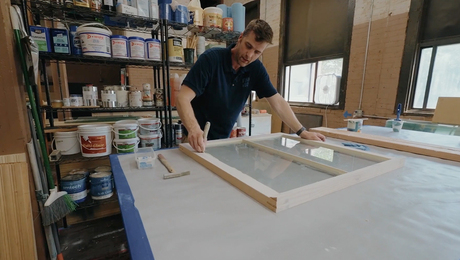
To cut the bead on the inside edge of the circle, a horizontal router setup is the best way to go. The stock lies flat on the table, which makes it safer to cut and limits wandering and vibration.

Due to the relatively tight radius of this particular window trim, I realized that commercially available router bases would be too wide to let the stock get close enough to the bit. I decided to make a horizontal jig with a base a bit wider than the router baseplate.
I mounted the jig into a recess in my tablesaw outfeed table and mounted the router so that its arbor height would match the height of the stock when laid on the table. Because the cutter needs to be spinning when it enters the stock, I hinged the opposite end of the L-shaped base to my worktable so that I could lower the spinning bit into the stock.

To secure the stock, I cut the matching outside radius in three pieces of scrap and screwed them to the table, allowing just enough clearance for the blank to rotate past the cutter without any slop.

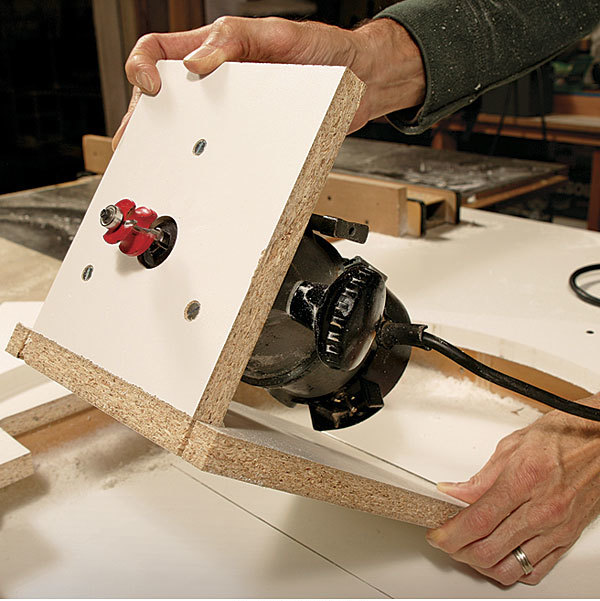
Mount the router in hinged horizontal jig Lower spinning router onto workpiece

It’s like a record on a turntable

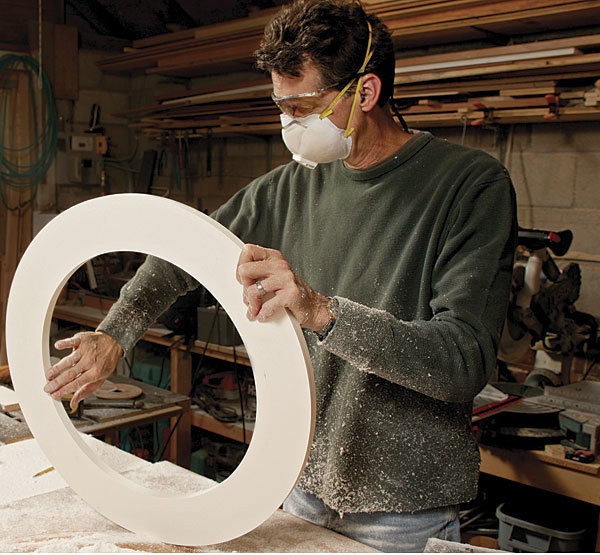
Because the bit must ease into the work, turn on the router and lower it slowly into the material. When the guide bearing is resting on the stock, the router base should be flat against the table. Begin rotating the stock clockwise into the rotation of the cutter. As with machining any other material, keep the feed rate and pressure as constant as possible. Use gloves with grippy fingertips to increase the traction on the stock, which can be slippery. The author’s beaded circular molding was blemishfree on his first attempt.

Sign up for eletters today and get the latest how-to from Fine Homebuilding, plus special offers.

Signing you up...

This site is protected by reCAPTCHA and the Google Privacy Policy and Terms of Service apply.
See all newsletters
See all newsletters
×

Get home building tips, offers, and expert advice in your inbox

Signing you up...

This site is protected by reCAPTCHA and the Google Privacy Policy and Terms of Service apply.
See all newsletters
See all newsletters

New Feature

Fine Homebuilding Forums

Ask questions, offer advice, and share your work

Log in or create an account to post a comment.

Sign up Log in

Become a member and get full access to FineHomebuilding.com

Up Next

Video Shorts

Featured Story

Compact Cordless Compressor

Metabo HPT's 2-gal. cordless compressor is a useful back- and time-saver.

Featured Video

Micro-Adjust Deck-Baluster Spacing for an Eye-Deceiving Layout

No math, no measuring—just a simple jig made from an elastic band is all you need to lay out a good-looking deck railing.

Related Stories

  • Podcast 533: Missing-Middle Housing, Collateral Damage From Demo, and Midwest BS Symposium
  • Podcast 533: Member’s only Aftershow — Training for Tradework
  • Insulating a Roof: Getting Higher R-Value
  • Podcast 530: PRO TALK With Architecture Student Phillip Schladweiler

Discussion Forum

Recent Posts and Replies

  • |
  • |
  • |
  • |
  • |
  • |
View More Create Post

Highlights

Fine Homebuilding All Access
Fine Homebuilding Podcast
Tool Tech
Plus, get an extra 20% off with code GIFT20

"I have learned so much thanks to the searchable articles on the FHB website. I can confidently say that I expect to be a life-long subscriber." - M.K.

Get home building tips, offers, and expert advice in your inbox

Signing you up...

This site is protected by reCAPTCHA and the Google Privacy Policy and Terms of Service apply.
See all newsletters
See all newsletters

Video

View All
  • How to Repair Shrinking Crown Molding
  • Installing Exterior PVC Window and Door Trim
  • Exterior PVC Trim: Wire and Pipe Penetrations
  • Installing Exterior PVC Trim Corner Boards
View All

Finish Carpentry

View All Finish Carpentry Articles
  • Built-Ins Made Easy
    Custom Built-in Cabinets Made Easy
  • Tom Bodett
    Tom Bodett, Co-Founder, HatchSpace
  • scribing
    Perfect Scribing for 5 Types of Tasks
  • odd trim angles
    Measure Odd Trim Angles
View All Finish Carpentry Articles

BOOKS, DVDs, & MERCH

Shop the Store
  • Pretty Good House
    Buy Now
  • 2022 Fine Homebuilding Archive
    Buy Now
  • Code Check Building 4th Edition
    Buy Now
  • 2023 Tool Guide
    Buy Now
  • Shop the Store

Fine Homebuilding Magazine

  • Issue 313 - Feb/March 2023
    • Practical System for a Seismic Retrofit
    • Fine Homebuilding Issue #313 Online Highlights
    • Practical System for a Seismic Retrofit
  • Issue 312 - Dec 2022/Jan 2023
    • Tool Test: Cordless Tablesaws
    • Gray-Water System for a Sustainable Home
    • Insulate a Cape Roof to Avoid Ice Dams
  • Issue 311 - November 2022
    • 7 Steps to a Perfect Exterior Paint Job
    • Options for Smarter Home-Energy Tracking
    • The Fine Homebuilding Interview: James Metoyer
  • Issue 310 - October 2022
    • Choosing a Tile-Leveling System
    • Choosing Between HRVs and ERVs
    • Custom Built-in Cabinets Made Easy
  • Issue 309 - Aug/Sept 2022
    • 10 Steps to Install Crown Molding on Cabinets
    • How to Get Sturdy Walls Without OSB
    • Choosing the Right Construction Tape for the Job

Fine Homebuilding

Follow

  • twitter
  • facebook
  • instagram
  • pinterest

Newsletter

Get home building tips, offers, and expert advice in your inbox

Signing you up...

This site is protected by reCAPTCHA and the Google Privacy Policy and Terms of Service apply.
See all newsletters
See all newsletters

Membership & Magazine

  • Online Archive
  • Start Free Trial
  • Magazine Subscription
  • Magazine Renewal
  • Gift a Subscription
  • Customer Support
  • Privacy Preferences

Taunton Network

  • Green Building Advisor
  • Fine Woodworking
  • Fine Gardening
  • Threads
  • About
  • Contact
  • Advertise
  • Careers
  • Copyright
  • Terms of Use
  • Site Map
  • Do not sell or share my information
  • Privacy Policy
  • Accessibility
  • California Privacy Rights

© 2023 The Taunton Press, Inc. All rights reserved.

X
X
This is a dialog window which overlays the main content of the page. The modal window is a 'site map' of the most critical areas of the site. Pressing the Escape (ESC) button will close the modal and bring you back to where you were on the page.

Main Menu

  • How-To
  • Design
  • Tools & Materials
  • Video
  • Blogs
  • Forum
  • Reader Projects
  • Magazine
  • Members
  • FHB House

Podcasts

  • FHB Podcast
  • ProTalk

Webinars

  • Upcoming and On-Demand

Account

  • Log In
  • Join

Podcasts

  • FHB Podcast
  • ProTalk

Webinars

  • Upcoming and On-Demand

Popular Topics

  • Kitchens
  • Business
  • Bedrooms
  • Roofs
  • Architecture and Design
  • Green Building
  • Decks
  • Framing
  • Safety
  • Remodeling
  • Bathrooms
  • Windows
  • Tilework
  • Ceilings
  • HVAC

Magazine

  • Current Issue
  • Past Issues
  • Magazine Index
  • Subscribe
  • Online Archive
  • Author Guidelines

All Access

  • Member Home
  • Start Free Trial
  • Gift Membership

Shop the Store

  • Books
  • DVDs
  • Taunton Workshops

More

  • FHB Ambassadors
  • Reader Projects
  • Podcast
  • Customer Support

Account

  • Log In
  • Join

Newsletter

Get home building tips, offers, and expert advice in your inbox

Signing you up...

This site is protected by reCAPTCHA and the Google Privacy Policy and Terms of Service apply.
See all newsletters
See all newsletters

Follow

  • twitter
  • facebook
  • instagram
  • pinterest

Join All Access

Become a member and get instant access to thousands of videos, how-tos, tool reviews, and design features.

Start Your Free Trial

Subscribe

FHB Magazine

Start your subscription today and save up to 70%

Subscribe

We hope you’ve enjoyed your free articles. To keep reading, become a member today.

Get complete site access to expert advice, how-to videos, Code Check, and more, plus the print magazine.

Start your FREE trial

Already a member? Log in