Synopsis: While renovating an old house, the author decides to make window sash to match the originals. He has only a small shop and no specialized tools, but he finds a way to produce traditional wood sash with tools he has on hand. A sidebar covers installation.
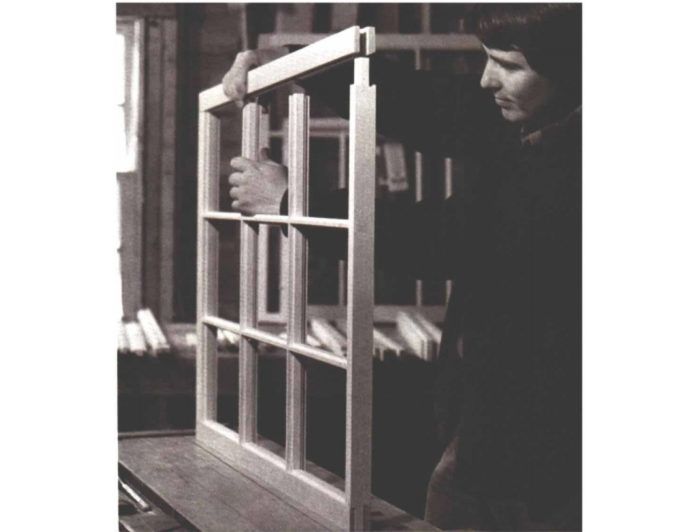
On a historic-restoration project I worked on not long ago, the house’s window sash were in poor shape. The original plan for the sash was to repair the worst of them and then replace them all sometime in the future. But before the window work started, the owner decided to have new sash right off. I didn’t have enough time to place an order with a custom millworks; so I decided to make the sash in my own small shop, even though it lacks specialized sash-making machinery. This meant I’d have to match the joinery and molding profile of the originals, and I’d have to work quickly enough to make money on the job without overcharging my customer.
The old sash were hand-made over 150 years ago. One had been without paint for many years, so its joints came apart easily. All I had to do was see how it was made, and reproduce each part. The challenge was to keep track of all those parts, and to make the joints fit properly so the sash would get as much rigidity from its mechanical integrity as from the glue in the joints.
It takes me about hours for all the setups needed during a run of sash. The production time for the kind of sash described here on a short run of three or four double units is almost six hours per unit. Considering my time and the cost of materials, the final price was about 20% higher than ordering custom-made sash from the local lumberyard. Not too bad for short-order work that met my specific requirements exactly.
Of course, I could lower these time figures by keeping specialized machinery set up for sash work. If I did, my shop rates would be higher. I’d rather keep my capital expenses low and have more hourly income.
I use white pine for all my sash because it strikes a good balance between machinability and durability. Straight-grain, knot-free wood is essential because the thin, narrow muntins need to be as strong and stable as possible. Also, the outer frame can twist if it’s made from wood with unruly grain. I try to use all heartwood, which is stronger and more rot resistant. It’s best to cut all the rails and stiles from parts of the board that have vertical grain. These quartersawn lengths of wood are less liable to warp and twist.
Two kinds of sash
Here I’ll describe how I made double-hung sash for jambs that don’t have parting strips or weather stops. However, many older sash are made for jambs that have parting strips, and so require meeting rails with weather stops. Meeting rails with weather stops are thicker in section and narrower in elevation than ordinary rails, and are mortised to receive tenons on the stiles, rather than the other way around. If you have to make meeting rails like this, the joinery is the same, except that the stiles are tenoned and the rail is sized to overlap (with bevel or rabbet) the other rail. You can avoid this trouble altogether, if you wish, by applying the weather stops (with brads and waterproof glue) after the sash are assembled. The instructions that follow are for simple sash.
Published January 1, 1984
For more photos, illustrations, and details, click the View PDF button below: