Best Way to Address Header Trim with Nail Fin Windows
The AAMA (American Architectural Manufacturers Association) has a good “Standards Practice for Installation of Windows with a Mounting Flange in a Wood-Frame Construction Using Exterior Barrier Methods.” As far as I can tell, most window manufacturers’ installation recommendations are derived from this. As an architect, I often start my window details by reviewing this approach.
On the other hand, many nail fin windows in California (where I practice) are trimmed with 1×4 casing, and this can be hard to coordinate with the AAMA installation methods. The application of head trim is a natural place for water to “catch” and enter the area between the trim and the siding, a good place for rot to start.
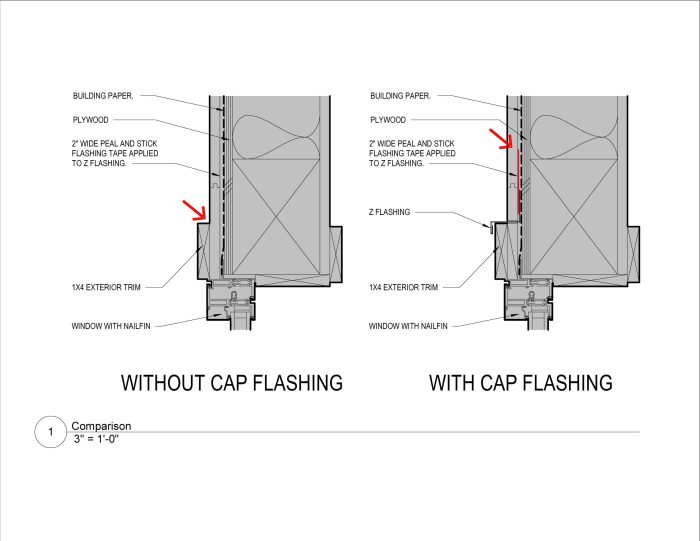
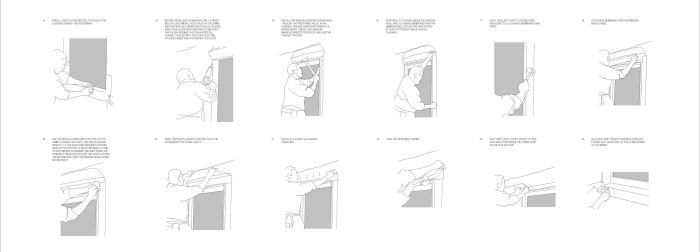
Is it a better pratice to put a piece of Z flashing above the header trim or am I overthinking this? It is hard to do this while adhering to the AAMA’s recommendations. I’ve attached a couple of images below to illustrate my conundrum. The “Flashing Sequence” attachment is an excerpt from my typical waterproofing instructions for windows. The “Window Detail Comparison” shows a lefthand detail I have found to be quite common in the construction industry despite the “reverse singling” of the head trim with the siding (see red arrow).
When a window is installed tight to an eave, it is probably overkill to install head flashing, but this eave may be absent on many more modern projects. The right-hand detail is one way to avoid water infiltration at the head condition, but it requires a build-out for the head trim. Even though the condition is less problematic, it still has a reverse singling of the building paper with a 2″ piece of peel and stick (see red arrow). Nevertheless, the absence of a “shelf” at that location is probably an improvement in rot risk.
I’d love to address this better than I have been without creating some insanely complicated architectural detail that contractors will hate for its fussiness. Any help improving things is appreciated.
Mike


Replies
It seems to me that a eave of 18-24 inches minimizes the possibility of water seepage; unless you're in an area subject to high winds. And even in that case, caulk will probably suffice.
I agree. I do sometimes have an absence of eaves. I guess that would be the only time to engage in this head-flashing madness. Thanks for clarifying. Still need to have a solution, at this "eaveless" but if the detail is titled as such a bit of fussiness is probably warranted.
It’s a common challenge when coordinating window details with AAMA standards, especially in areas prone to water infiltration like California. Z flashing above the header trim can help prevent water damage without complicating installation. Ensuring proper flashing and trim sequencing is key to minimizing rot risk without overcomplicating the detail.
Thanks for the feedback. If I understand you correctly, you're saying that the simple introduction of Z flashing above the header trim doesn't need to be overcomplicated by trying to get the building paper to overlap. If that's what your saying, it makes sense to me. Let me know if I got it wrong.