*
I have hardwoodflooring in my house that is over 60 years old. Due to expansion and contraction, there is a considerable amount of gaps between sections of the flooring. The boards are in great shape but the gaps are a good place for dirt to get trapped and I want to seal them up. The largest gap may be 1/8″. Is there a product or material I could use to fill the gaps? I did hear once about mixing sawdust with some type of “liquid” to fill in the gaps but I do not recall the liquid. Any suggestions?
Discussion Forum
Discussion Forum
Up Next
Video Shorts
Featured Story
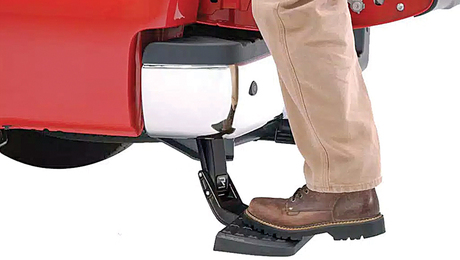
The RealTruck AMP Research Bedsteps give you easy access to your truck-bed storage.

Highlights


"I have learned so much thanks to the searchable articles on the FHB website. I can confidently say that I expect to be a life-long subscriber." - M.K.


Replies
*
I like to use Wood Patch on hardwood floors. It takes a lot longer than sawdust, but I like the results better. You might check to see if your cracks are consistant summer and winter. Our floor shows it's worst cracks in winter, (we heat with wood) and then looks pretty good as it swells in the summer. But we have Maple and that is not as stable as Oak either. - jb
*Paste Wood Filler. This product is designed to fill the voids in wood flooring. Check with your local paint supplier or lumber yard. They should be able to tell you how to use it. Start with a small area until you get the hang of it. This product is designed to be used after the floor has been sanded. It is applied as the first step in the finishing process. It is a labor intensive process but properly used gives excellent results.Ron.
*
PK:
Any type of filler will pop out with seasonal movements. You're stuck with it unless you have a climate controlled house or condo that has a tiny heating season..such as two days. But that doesn't seem to be the case.
*Okay, all good advice, so I'll add one more to the group. I had a very problematic 3/4 inch oak slat floor (T&G) in a fancy house recently that had lots of irregular "grooves" due to a sloppy/hasty installation by a "spec" builder. It appears that the oak was simply glued to the concrete slab underneath. Needless to say, all kinds of problems resulted. Facing having to remove either the entire floor ($$$$) or sections for repair, I decided to do a test. After considering all the methods already described by others here, I opted to use a cedar colored caulking that had some minor silicon in it (DAP I think). This was strictly an experiment. The oak planks were beveled so care was taken so the caulk was finished to keep the integrity of the bevel. We applied a coat of varathane.I'll be the first to admit that this was an experiment, but I'm pleased to report that in spite of the problems with concrete moisture content, etc. that still exist inherently in the floor...the oak planks we "filled with cedar colored" caulking are in perfect condition after 5 years. The cracks may open and close over the seasons but the caulk accepts it just fine. Keep in mind that the "Cedar color" the mfg. claims just happens to be a perfect match for the golden honey oak flooring in this instance. It worked great in an area about 10x10 feet and we're enthused and confidant enough to do the rest of the estate sized kitchen soon. Although we've tried the other mehtods described here by others over the years, it invariably ends up drying out and breaking out with normal use. If I were gonna try the sawdust routine, I'd "filter out the larger bits" and opt for the almost dust stuff. The trick is to stain the sawdust first before you mix with a glue because the glue will prevent you from changing the color easily after the fact. You might mix a compatible stain with a bit of the finish coating and sawdust and then apply the goo in the cracks.-Espanto
*Espanto: Your caulk must have worked a lot better than the stuff I tried about 6 years ago in a storefront floor (pine). This caulk shrunk back after a short time, and shreds of it come out of the cracks as they please. I can't recall the exact type of caulk, but know it did have silicone in it. At the time, I thought it would be a great solution to filling the gaps but it ended up worse. I'm sure someone else can comment on this caulk thing. I'm curious to find out more...M
*Mad Dog,Was the flooring dust free in the crevices to allow the caulk to get a good grip? My "gaps" were no more than an eighth of an inch. Also, I was careful to really squeeze and inject the caulk deep enough for it to curl and grip the tongue and groove. Also. the Varathane sealer/finish protects it further. Worked like a charm.Storefront with lots of foot traffic and flexing of boards you say? I bet the floor sees a lot of the outside weather elements too (open doors, rain, snow, etc.) all year long, right? Hmmmm, the boards and your caulk were put to a lot harder test than my oak planks, that's for sure!All in all, the shopkeeper should have been happy to bring you back to "recaulk" periodically (6 years?) under those circumstances.
*No doubt the heavy traffic would be a likely suspect, but the floor extended into office space that was comparatively much lesser used, same result. The floor was pretty much dust free, but some of the gaps were larger than 1/8 inch, and I'm sure very little caulk got into the grooves at all. Did you caulk before you nailed?Even here in Wisconsin, it doesn't snow all year, just September-June.Dogxxx
*Nope. We only used caulk as a remedy after the fact. And only as a semi-desperate measure before incurring much more effort/cost to remedy the problem of the installation.The floor had been in place about three years. We were lucky that the caulk (cedar tan) blended perfectly with the honey oak color of the floor.Question: On the same floor, oak 3/4 inch solid tongue and groove red oak, there are a couple of boards that have curled and "unglued" from the concrete slab they were glued to by the builder. Short of cutting them out and replacing them and trying to get the coloration to match, any ideas on how we might be able to affix them to the slab again?I've considered using concrete gripping screws(pre-drilled) that would require countersinking the hole. I'm concerned that plugging the hole after to conceal the head of the screw may look unsightly since there would be no other "plugs" in the flooring. Unfortunately, it is in a very conspicuous area in the kitchen area.Other suggestions?
*
I have hardwoodflooring in my house that is over 60 years old. Due to expansion and contraction, there is a considerable amount of gaps between sections of the flooring. The boards are in great shape but the gaps are a good place for dirt to get trapped and I want to seal them up. The largest gap may be 1/8". Is there a product or material I could use to fill the gaps? I did hear once about mixing sawdust with some type of "liquid" to fill in the gaps but I do not recall the liquid. Any suggestions?