Hello All, hoping I can get some tips for this project and see if I am on the right track with my thinking.
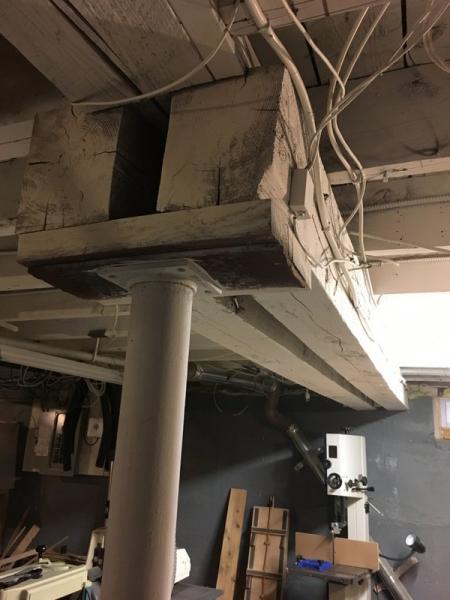
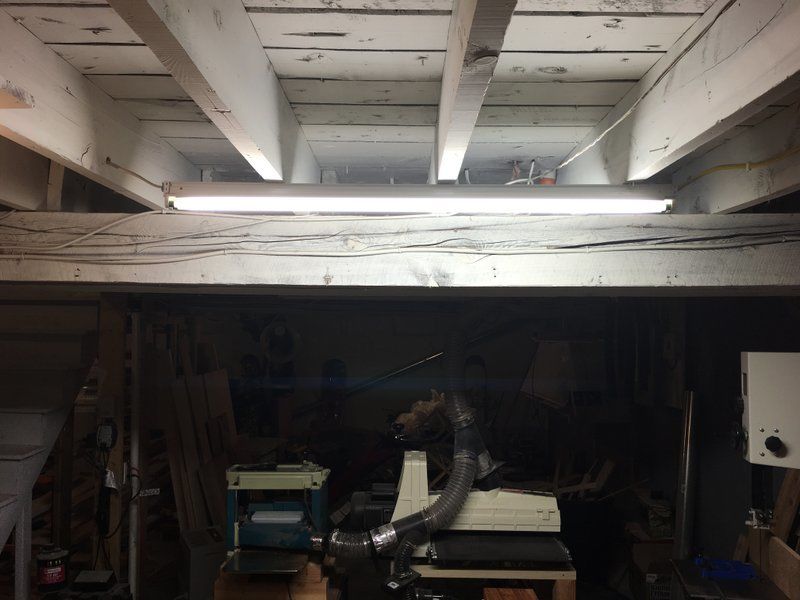
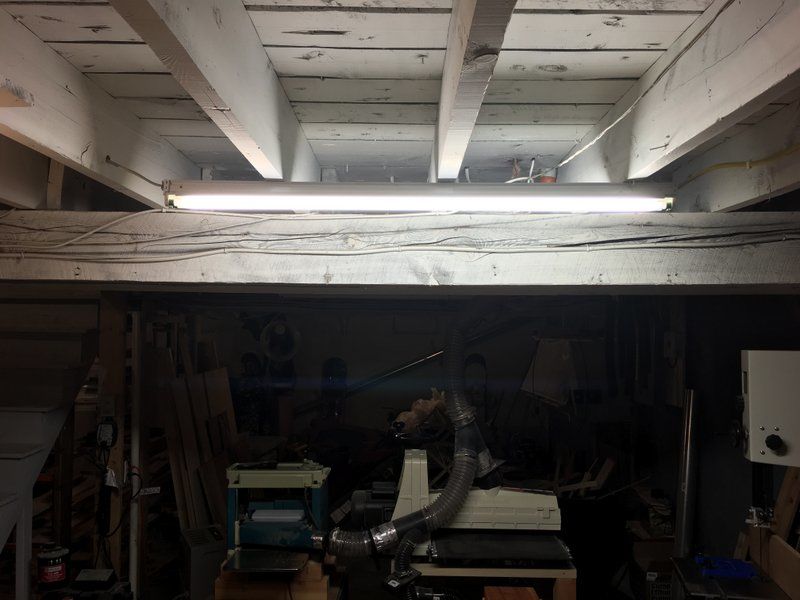
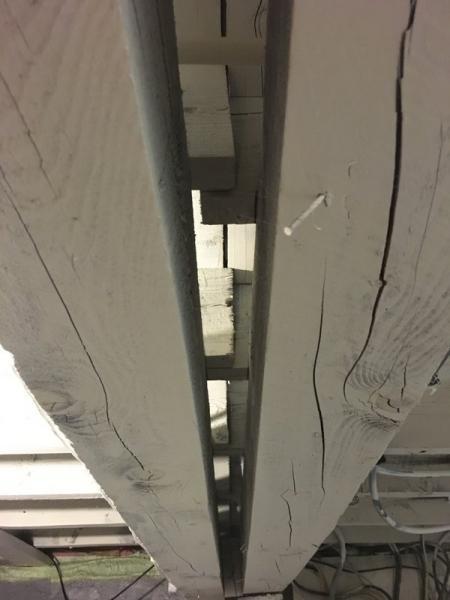
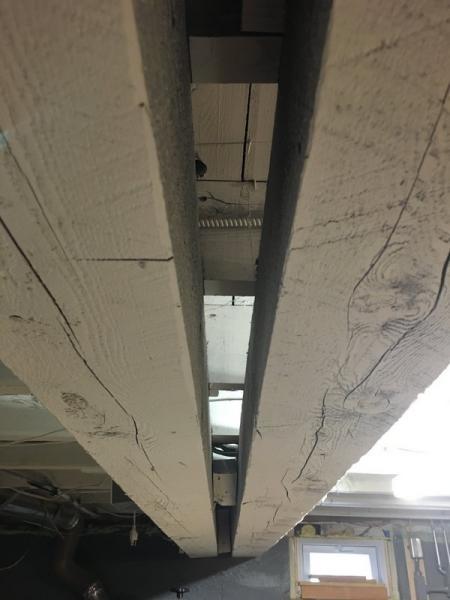
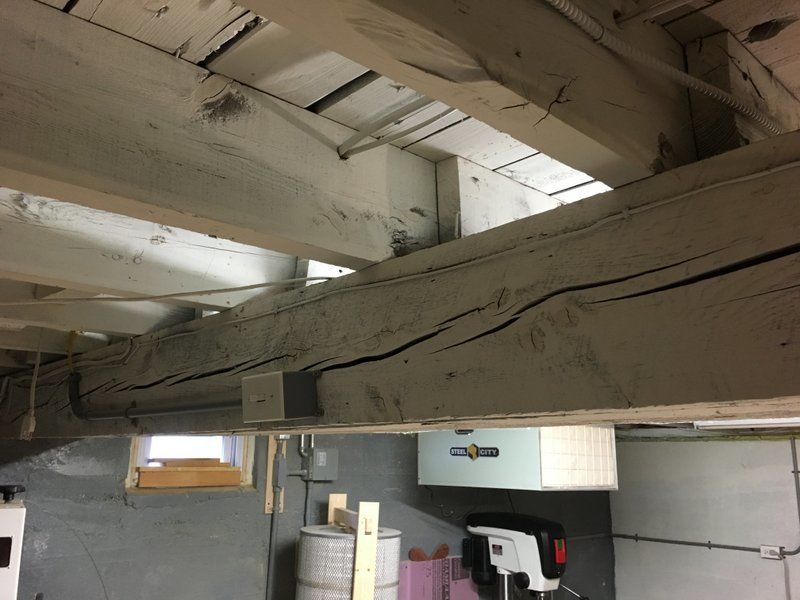
I have two beam spans in the basement that are 12′ and support crossing floor joists, each span is two 6×8 rough sawn beams. They are side by side with a ~2-3/4″ gap between them. Both beam spans are sagging quite a bit, you can see the sag in the basement looking at them, and feel it in the floor above. I eventually want to redo my hardwood floors and want a level (or close to level!) subfloor to work with.
My idea to fix them was to take two 2x10s, plane one side of each smooth and get the total combined thickness of them down to a little less than 2-3/4″ so they can fit bewteen the existing beams (I have a full woodshop in the basement). Glue (some sort of poly based glue was my thinking) and nail or screw? the boards together.
After the glue cures I would lift the beam up between the existing beams, and place a screw jack post in the middle. I would have a plate pressing on the new beam I just made, and shims to exert pressure on the old beams as well. Over a few months I would jack the beams up slowly until level. After this I planned to drill 1/2″ holes through the entire beam span with a ship auger bit [old beam][new beam][old beam]. This would be a 16-17″ long hole, then I would pound 18″ long carriage bolts through. I would stagger the bolts along the span high, mid, low and have them 1 foot apart. Once they were all in I would tighten them all slowly/sequentially to pull the beams together. I would like to get glue up in there but it would probably be too tight.
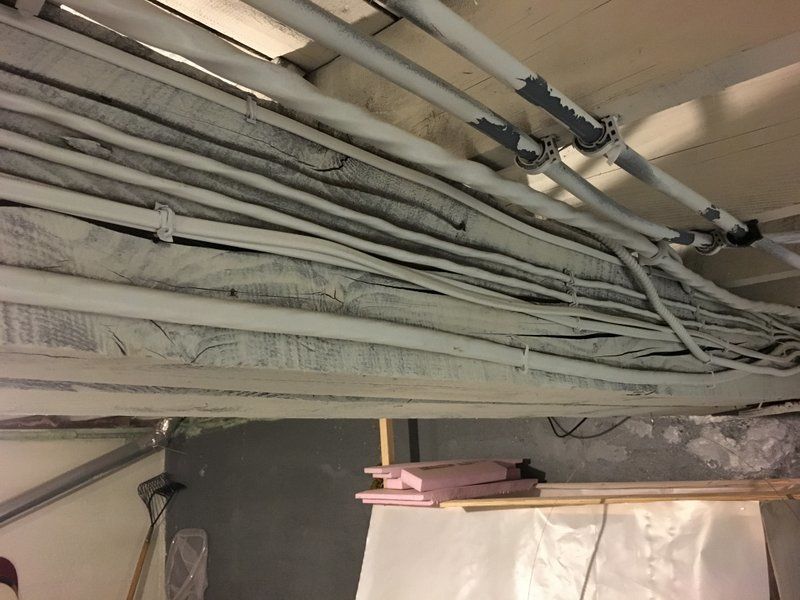
I realize sistering the beams on the outside may be better and allow use of nails and glue instead of bolts.. but there are electrical wires that I’d rather not have to mangle with. I can work around them to drill the bolt holes but I’d rather not have to get them all loose/off the old beams.
Does anybody see issues with this plan? Think it will be strong enough to correct the sag?
From the pics you can see some cracks in the old beams, mostly on the outside surfaces, some go about 2″ into the beams but mostly only 1″ deep.
Thanks in advance!
Dustin


Replies
I doubt very much of that would even get the sag out of the beams much less support the floor. Why not just replace them with some engineered glulams? It would cost more but wouldn't be much harder and would provie the support you need.
So you think I wouldn't be able to get the beams straigtened out? Or the combined strength of the new "beam" would just go right back to sagging?
I'd love to totally replace them, and the cost increase wouldn't be a big factor, I'm just worried about the increased complexity of building two temporary support walls for each span, dealing with the old wiring, removing the old beams, figuring out how to support the ends of new beams.. etc etc. I'm not sure how that's not "much harder", no offense. Maybe you have a different idea of how to accomplish it? Or are you thinking just leave the old beams and putting a glu-lam on each side?
I appreciate your help!
Dustin
No, you'd never get the sag out of those. Pulling them out and installing some glulams wouldn't be that big a deal. I'd bid the labor on that job to be 6 to 8 hours for 2 guys. Actually, if it were my house I'd build the temporary walls then cut the joists so the new beam would slide up flush with them. You'd need to install joist hangers but you were done you'd have a lot more headroom and it would look nicer.
I don't see the point in keeping the beam ends on the laly column side though, do you? Wouldn't it probably be better to have the new beams supported directly by the column, or two new columns? On the sill side leave what 3-4" of old beam and install hangers on them?
How would the sag in the floor be corrected, by pushing up on the new glulams or using screw jacks in the temporary walls? Sorry I'm just not quite visualizing how that would work.
Thanks!
You're right, bearing on columns would be preffered. You'd push the sag out mostly with the temporary walls, Depending on how bad the sag is you may need to spend days or even weeks jacking the sag out. It took many years for the sag to develop and it's not going to come out overnight without springing up somewhere else. Slow and easy will win the day.
We just jacked up an old piling house that sagged 5 inches end to end and 2 inches side to side. The owner was ina hurry even after I explained that hurrying would create a whole new set of problems. Siding fell off, doors wouldn't open, the roof started leaking, and on and on.
Why not just stick a lally column there in-between the planer and the sander?")
Haha, that might work but it would be pretty well lined up with the blade on my table saw! haha.
I would second the motion to use gluelams. They come in several thicknesses, so you should be able to find something that's an appropriate width, and they are much stiffer than ordinary lumber, so you get more bang for your buck.
(I don't see any real need to completely fill the space, just get as much stiffness in there as you can.)
I would however, try to get the new piece to rest on the sill and the lally column, vs just being supported by bolts. This would require temporarily removing the existing lally column, I guess, but that should be doable.
+1 on glulam
I second Dan's motion on the glulam, and on the need to somehow get it on top of the lally column and fully supported at the wall end. Since you don't have the height on the existing ledger, you'll need to add some sort of support for the new column at the wall end.
If you don't fill the full gap between the existing beams you'll need to fully shim all the locations of your through bolts to avoid distorting the existing beams when you tighten down on them.
That picture of the lally column also disturbs me a bit. The whole load on the lally column is being transfered from the beams by what, a 2x6 laid on the flat. It looks like most of the existing beams width are on the cantilevered ends of the 2x. Obviously, it hasn't failed for all these years, but if it were mine, I think I'd get something stronger fabricated to carry that load if you do insert a new beam.
Ed
There is actually a 3/8"
There is actually a 3/8" steel plate in there as well, not just the 2x6.. But still, I agree the way it is engineered is disturbing..!
It would take an act of God to correct the sag in the existing beams. Adding a little lumber between the beams will do nothing but waste a lot of time and effort.
I can only see 2 solutions. One is to put a post mid span. (Or 2 posts, since you have 2 beams) And jack it up very slowly.
The second is to replace the beam.
If you replace it with a wood beam, you'll likely need one that's a lot deeper than the existing beam. If headroom is a problem I'd suggest a steel beam. That will get you by with half to 2/3 of the height.
I suppose it should be pointed out that there's enough width there to fit a custom-fabricated steel truss. I have no idea what the strength of such a truss would be, vs one of the other fixes, though. Nor do I know what it would cost.
Flitch plate.
You've obviously got failure in horizontal shear. I'd think about a steel plate sandwiched in between. Or two with a 2x between them. There's not enough room for a I beam but you may be able to find another profile that would work. Also, when you jack those suckers up, you're going to need considerable cribbing to distribute the load.
You haven't told us what is above all this. Are there load-bearing walls above, or some other concentrated force?
(I notice that the existing beams aren't sagging all that badly, for old, rough wooden beams. Seems like the weight above may not be all that great.)
Yes there are load bearing walls above these spans but it's just a 1.5 story cape. 2 10x12ish rooms on the half story and I'm hoping to add a bathroom some day with a dormer. I am in NH so there are snow load concerns.
On the other side of the house there are the same beams but the span is supported by columns in the middle and there is very little sag at all. On this side, however, there are no columns, and it's where my woodshop is so adding columns wouldn't work for me. Either way if the I couldn't correct the sag and the solution is new beams then they may as well support the entire span right?
2ea 4" wide, 1/8" thick
2ea 4" wide, 1/8" thick steel plates the length of the beams between existing supports.
Drill tight close fitting holes for lag screws, calculate the lateral shear for hole locations and number
Put plates flat on bottom face of beams, jack in the middle until plaster starts to crack above (or bow removed). This i NOT a filtch arrangement.
Install bolts tight, then you can remove the center post.
The plates do not have to be under the lally at the ends of the beam.
Have done this numberous times over the last 65 years, always good results.
search for 'composite beam' to get the lateral shear formula if you do not know the equations.
see page 81 of the link - heck, link wont copy here